The Complete Guide to Veo 3 Character Consistency: Creating Coherent Multi-Shot Videos with Scenebuilder
Honestly, the first time I used Veo 3 to generate a multi-shot video, I almost threw my laptop out the window.
You know that feeling? Spending an entire night designing a 5-shot short film script, generating each shot with anticipation. And the result? The protagonist in the first shot had black short hair and wore a blue suit; in the second shot, they suddenly had brown long hair and a gray hoodie; by the third shot, even their face shape changed completely—like they’d become a different person entirely.
I stared at the screen with only one thought: Am I making a story about septuplets here?
If you’ve encountered this problem too, congratulations—you’re not alone. Character appearance inconsistency is one of the most frustrating pain points in AI video generation. But after extensive testing and research, I’ve found a set of truly effective methods. In this article, I’ll share all my experience with you.
Why Does AI Video Always Have “Character Drift”?
Before diving into solutions, we need to understand: why do characters in AI videos keep changing? Understanding this will help you address the root cause.
AI Actually Has “Amnesia”
This is the core issue. Veo 3, Runway, and all AI video generation models share a fatal flaw: they have no long-term memory.
What does this mean? Simply put, when you have AI generate a man in a black suit in the first shot, the AI doesn’t remember what that character looks like. When you generate the second shot, it’s a completely new task for the AI—like talking to someone with amnesia, where you have to reintroduce yourself every time.
When I first started, I naively thought AI would automatically maintain character consistency. After all, the previous shot was just generated, so the data should still be there, right? Later I realized, I was being too naive. AI models treat each prompt as an independent task with no connection between them.
Text Descriptions Are Inherently Imprecise
The second problem lies in our prompts.
Think about it—“a man in a black suit”—how many visual results can this correspond to? It could be a 30-year-old or a 50-year-old; Asian or European; the suit could be an Italian three-piece or a standard business suit. Faced with such a broad description, the AI will naturally produce different results each time.
It’s like ordering “fried rice” at a restaurant—different chefs will make it differently. To get consistent flavor, you need to provide a precise recipe: how many grams of rice, how many eggs, what brand of soy sauce, how many minutes to fry. AI is the same: the more detailed the description, the more stable the results.
Technology Itself Has Limitations
There’s also a technical reason.
Early AI video generation was actually frame-by-frame generation. The AI generates frame 1, then generates frame 2 based on frame 1, then frame 3 based on frame 2… Each frame may have small deviations. These deviations accumulate, and by the end of the video, the character may be unrecognizable.
It’s like the game of telephone we played as kids—the first person says “the weather is nice today,” and by the last person it becomes “let’s have a late-night snack tonight.”
According to industry research data, before models like Runway Gen-4 and Veo 3.1 specifically optimized for character consistency were released, user satisfaction with AI video character consistency averaged only 3-4 points (out of 10). This shows how widespread this problem is.
Veo 3’s Three Character Consistency Weapons
Fortunately, Google and other AI companies have recognized this problem. Veo 3 has developed several features specifically to address character consistency, with truly remarkable results. According to Google Flow’s official data, using these features can improve character consistency by 60-70%.
Let me explain each one.
Weapon One: Reference Images
This is an exclusive feature of the Veo 3.1 Standard version. Simply put, you can upload 1-3 images and tell the AI: “This is what my character should look like, follow this strictly.”
The AI extracts key character features from your uploaded images—face shape, hairstyle, skin tone, facial proportions, etc.—and tries to reproduce these features when generating videos.
This feature is particularly suitable for two scenarios:
- You’re creating a completely new fictional character and need to define their appearance from scratch
- You want to recreate the appearance of a specific person (like a historical figure or literary character)
However, honestly, this feature has limitations. First, it’s only available in Standard mode; the basic version of Veo 3 doesn’t have it. Second, while the results are good, it’s not 100% perfect replication—you still need to pair it with detailed text descriptions.
I’ve tested it several times using real photos as reference images. The AI-generated characters can indeed capture the main features, but there are still differences in details. For example, eye color might be slightly off, or hair texture might not be quite the same. But overall, it’s much better than relying solely on text descriptions.
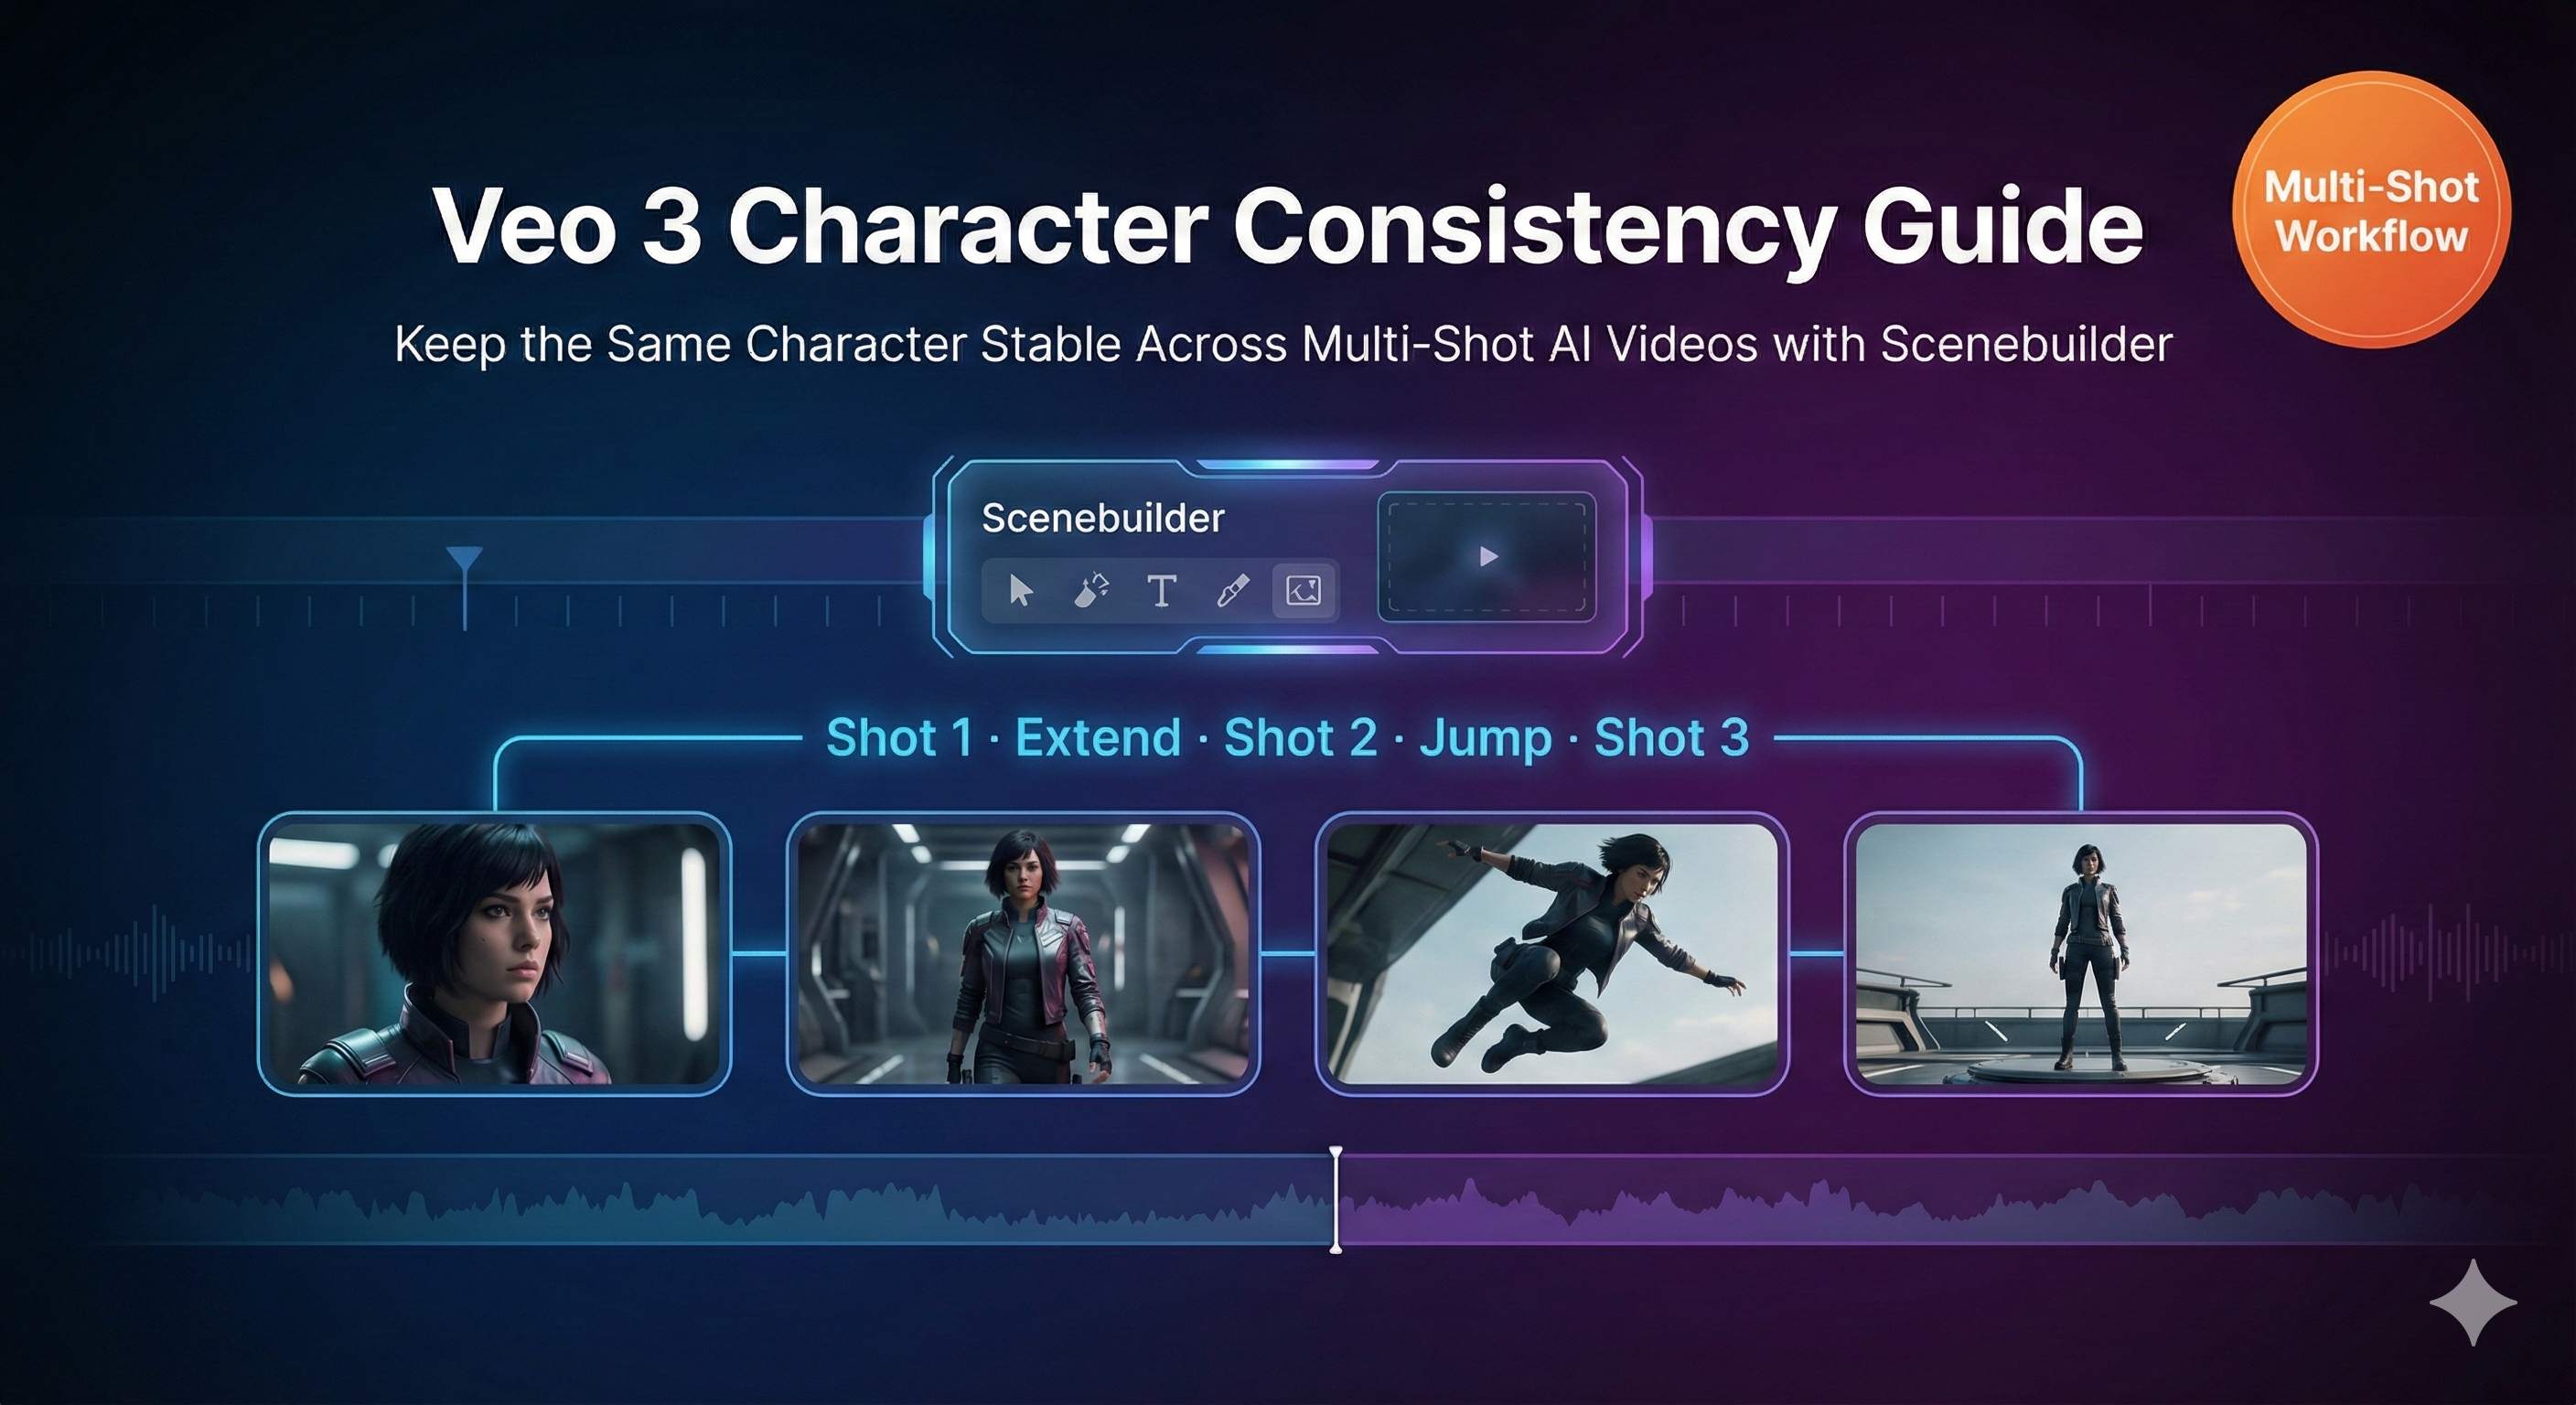
Weapon Two: Scenebuilder
This is the feature I use most and rely on the most. You could say Scenebuilder is the core solution for multi-shot character consistency.
Its working principle is: use the visual information from the previous shot as a reference for the next shot. It’s like giving the AI a “short-term memory”—while it can’t remember all history, it can at least remember what just happened.
Scenebuilder has several key functions:
“Add to Scene”
When you’ve generated a satisfactory shot, click this button and the video will be added to a timeline. This operation essentially tells the AI: “Remember what this character looks like, I’ll need it later.”
“Extend”
This is the main way to generate the next shot. It generates naturally connected subsequent footage based on the visual content of the previous shot. Crucially, it tries to keep the character’s appearance unchanged.
“Jump to”
If you want a hard cut—like switching from an indoor scene to outdoors—you can use this function. It creates a discontinuous edit cut but still tries to maintain character appearance consistency.
The first time I successfully generated 5 coherent shots using Scenebuilder, the sense of achievement was indescribable. The character’s clothing, hairstyle, and facial features remained basically consistent, with only lighting varying slightly due to scene changes, but it was completely acceptable.
Google Flow’s official cases show that using Scenebuilder can improve character consistency by 60-70%. In other words, if you were previously satisfied with only 3 out of 10 generations, you can now achieve 6-7 out of 10. This improvement is a qualitative leap.
Weapon Three: Ingredients to Video
This feature is more suitable for complex scenes, especially situations with multiple characters appearing simultaneously.
The workflow goes like this:
- First use Gemini 2.5 Flash Image or other tools to individually generate reference images for each character and scene element
- Upload these “ingredients” to Veo 3
- Use the Ingredients to Video feature to have the AI compose these elements into one scene
The advantage of this approach is that each character has a clear visual reference, and the AI doesn’t need to imagine from scratch. For example, if you’re making a scene with two people talking, you can first generate character portraits of A and B separately, then use the Ingredients function to compose the dialogue shot.
I don’t use this much myself, because for single-protagonist stories, Scenebuilder is sufficient. But if you’re making videos with multiple character interactions, Ingredients to Video is definitely the best choice.
Hands-On Operation: Creating Coherent Videos with Scenebuilder
Alright, theory is done—let’s get practical. I’ll walk you through the complete process step by step. Even if this is your first time using Veo 3, you can follow along.
Step Zero: Create a “Character Bible”
This step is often overlooked but is actually the most important.
Before you open Veo 3, spend 15-30 minutes writing a detailed character description document, commonly called a “Character Bible”. This document should include:
- Basic Information: Age, gender, ethnicity
- Hair: Length, color, texture, hairstyle (e.g., “shoulder-length wavy black hair, center-parted, with ends slightly flipped out”)
- Face: Eye color, eyebrow shape, nose features, chin contour, any obvious marks (moles, scars)
- Body Type: Build, height impression, posture characteristics
- Clothing: Type, color, material, fit, and accessories for each garment
The more detailed, the better. My recommendation is to write 100-150 words.
Here’s an example:
A 28-year-old Asian woman with straight black hair tied in a low ponytail, dark brown eyes, slightly thick eyebrows, a small nose, and a rounded chin. Wearing a white cotton T-shirt (slightly loose, round neckline), paired with dark blue jeans (fitted style, cuffs rolled up), and white canvas shoes. Slender but not skinny build, confident standing posture, head slightly raised. Silver thin watch on left wrist.
See that? This description is specific enough that the AI has almost no room for interpretation. That’s the effect you want.
Many people might think: isn’t this too much trouble? Honestly, yes, it’s a bit troublesome. But this 15-minute investment can save you 3 hours of repeated generation time. No matter how you calculate it, it’s worth it.
Step One: Generate the Baseline Shot
Open Google Flow, select Veo 3, paste your complete character description, then add the action and scene for the first shot.
For example:
[Paste complete character description]. She stands at the coffee shop entrance, pushing open the glass door to enter. Medium shot, slight push-in. Soft natural light, warm afternoon tones.
Click generate.
Here’s the key: you may need to try the first shot several times. Don’t rush, and don’t compromise. Because the first shot is the baseline for the entire series, and all subsequent shots will reference it. If the character appearance in the first shot isn’t accurate, everything that follows will be wrong.
I usually generate 3-5 times and pick the most satisfactory one. Check these points:
- Do facial features match the description?
- Are clothing details correct?
- Does the overall style meet expectations?
- Is the image quality good enough? (Composition, lighting)
Only proceed to the next step when you’re satisfied with all of these.
Step Two: Add to Scene
Below the satisfactory video, you’ll see several buttons. Click “Add to Scene”.
The interface will switch to timeline view, and your just-generated video will appear in the first position on the timeline. Congratulations, your first shot is officially locked in.
This operation seems simple, but it actually does something very important: it tells Veo 3’s system, “This is what my standard character looks like, remember it.”
Step Three: Add a New Shot
On the timeline, you’ll see a ”+” sign. Click it.
The system will pop up options asking what type of shot you want:
- Extend: Continue the action and scene of the previous shot, naturally connecting
- Jump to: Switch to a new scene but maintain character appearance
If your next shot is a continuing action (like she walks in the door and then goes to the counter to order), choose Extend.
If you want to jump directly to another scene (like she’s already sitting down drinking coffee), choose Jump to.
Most of the time, I choose Extend because it has the best continuity.
Step Four: Write the Prompt for the New Shot
This step is the most important and where most people make mistakes.
Many people will take shortcuts here and simplify the prompt. For example, writing: “She walks to the counter to order coffee.”
Wrong! Completely wrong!
When processing a new shot, although the AI will reference the visual information from the previous shot, your text description is still the primary basis. If you don’t provide a complete character description, the AI may deviate from the original appearance.
The correct approach is: copy and paste the complete character description verbatim, then only modify the action and scene parts.
Continuing the example above:
[Paste complete character description, exactly the same as the first shot]. She walks toward the coffee shop’s wooden counter, smiling at the barista. Camera follows, shooting from the side. Maintain soft natural light.
See that? The character description hasn’t changed a single word—only the action and camera settings were modified.
This is the so-called “Verbatim Rule”. Test data shows that the difference in final character consistency between using complete descriptions versus simplified descriptions can reach 40%. This difference is enough to determine whether your video is “barely watchable” or “professionally coherent.”
I know this is tedious. Copy-paste, copy-paste, copy-paste again… But there’s no way around it—this is the current technical limitation of AI. When AI truly has long-term memory someday, we won’t have to be this meticulous. But until that day comes, we have to play by the rules.
Step Five: Generate and Check
Click generate and wait 30 seconds to 2 minutes.
After the video is generated, immediately do a comparison check:
- Is the hairstyle still consistent?
- Is the clothing still the same?
- Are there obvious deviations in facial features?
- Does it still feel like the same person overall?
If consistency reaches 8+ points (out of 10), congratulations—you can accept this shot.
If it’s only 6-7 points with some incorrect details but main features intact, you can consider accepting it or adjusting the prompt to regenerate.
If it’s 5 points or below and the character has obviously changed, don’t hesitate—regenerate immediately. Note: when regenerating, don’t modify the character description, only adjust the scene or camera setting parts.
Step Six: Repeat to Build the Complete Scene
Continue using the same method to add shots 3, 4, and 5.
Every time you add a shot, I recommend playing through the entire sequence to check overall continuity. Because sometimes individual shots look okay, but when played together you’ll notice something’s off.
Also, don’t make it too long in one go. Each Veo 3 video is 5-8 seconds long; making 5-7 shots (total about 30-50 seconds) is about right. If it’s too long, character consistency will gradually decline, and it will consume a lot of time and credits.
Advanced Tips (Optional but Recommended)
If you want to further improve consistency, try these techniques:
1. Use Negative Prompts
After the character description, add a line like “no hat, no glasses, no beard, no accessories” (if your character doesn’t have these features).
This prevents the AI from randomly adding elements you don’t want. I once had all previous shots without glasses, but the 4th shot suddenly gave the character sunglasses, completely changing their vibe. After adding negative prompts, this problem stopped happening.
2. Maintain Consistent Lighting
Sudden lighting changes affect the AI’s character recognition. For example, jumping from a bright indoor scene to a nighttime outdoor scene—the AI might change the character’s appearance due to the excessive lighting difference.
If you must change scenes, try to keep lighting conditions similar or use transition shots as buffers.
3. Avoid Extreme Angles
Extreme angles like bird’s-eye or worm’s-eye views make it difficult for the AI to recognize facial features, causing subsequent shots to lose accuracy.
Use normal angles like eye-level or slight high angles for the first few shots. Once the character appearance is stable, then try special angles.
4. Build a Prompt Template Library
Save your commonly used character descriptions in Notion, Google Docs, or any note-taking software. Copy them directly when needed—don’t retype every time.
I built my own template library with 5-6 different character types (male, female, elderly, children, etc.). For each new project, I just pick one and modify it. This saves a ton of time.
Prompt Management and Optimization Strategies
Having covered Scenebuilder operations, let’s talk about prompts. Many people think prompts are just casual writing, but there’s actually a lot to it.
Basic Prompt Structure
A good Veo 3 prompt should include these four parts:
[Complete Character Description] + [Action/Scene] + [Camera Movement] + [Style/Atmosphere]
Here are some specific examples:
Example 1: Simple Scene
A 35-year-old white male with short brown hair slightly graying, blue eyes, neatly trimmed beard, wearing a dark blue suit with white shirt and dark red tie, average build, formal posture. He walks on a city street, looking around. Medium shot, slight follow. Soft morning light, modern urban atmosphere.Example 2: Indoor Dialogue
A 28-year-old Asian woman with straight black hair tied in a low ponytail, dark brown eyes, wearing a white T-shirt with dark blue jeans, slender build, confident posture. She sits at a coffee shop's wooden table, smiling at the camera, holding a coffee cup with both hands. Front medium close-up, fixed camera position. Warm indoor light, cafe background blurred.Example 3: Action Scene
A 22-year-old Black male with short curly hair, dark brown eyes, wearing a gray hooded sweatshirt and black athletic pants, muscular build, athlete posture. He jogs in the park with light steps. Side tracking shot, camera follows character movement. Morning natural light, park greenery background.See the pattern? The character part is always the most detailed, the action and scene parts are relatively concise, and the camera and atmosphere parts play supporting roles.
The Golden Rule of Character Description
I’ve emphasized this many times, but I’ll say it again because it’s so important:
Every time you generate a new shot, copy and paste the complete character description without changing a single word.
Why so strict? Because AI’s understanding of language is probabilistic, not precise. “White T-shirt” and “a white T-shirt” make no difference to humans, but to AI they might be two slightly different inputs, leading to slightly different outputs.
These tiny differences might not be noticeable in a single shot, but accumulated across 5 or 10 shots, the differences get amplified. Eventually, you’ll find the character has “drifted” again.
So don’t be lazy, don’t rewrite, don’t simplify. Copy-paste, unchanged.
According to user test data, creators who strictly follow the “verbatim rule” achieve an average character consistency of 8.5 points (out of 10); those who casually rewrite prompts average only 5-6 points. This gap is decisive.
Scene Connection Techniques
Generating individual shots isn’t hard; the challenge is making these shots flow naturally.
Technique 1: Maintain Environmental Continuity
If the previous shot is in a coffee shop and the next suddenly jumps to a beach, the visual disconnect will be strong. The AI is also more likely to confuse character appearance.
Try to keep scenes logically related. For example: inside coffee shop → coffee shop entrance → street → park. This gradual scene change is more stable for the AI to handle.
Technique 2: Use Transition Shots
If you must make a large scene change, consider adding a transition shot.
For example, from indoors to outdoors, you could add a shot of “she pushes the door open, sunlight streams in.” This not only looks better visually but also makes the AI’s character consistency more stable.
Technique 3: Clarify Temporal Continuity
Add words like “continues…” or “then…” in your prompts to help the AI understand this is a continuous action.
Wrong example: “She sits at the table drinking coffee.” (Abrupt)
Correct example: “She walks to the table and sits down, picks up the coffee cup and takes a sip.” (Flowing)
My Personal Template Library
Sharing a few templates I commonly use—feel free to adapt them:
Template 1: Modern Urban Male
A 32-year-old Asian male with short black hair neatly combed back, dark brown eyes, light stubble, wearing a gray knit sweater with black casual pants, well-proportioned build, relaxed but commanding posture.Template 2: Professional Woman
A 29-year-old white woman with golden-brown shoulder-length wavy hair, light blue eyes, wearing a beige blouse with dark gray dress pants and black low-heeled shoes, slender build, professional confident posture.Template 3: Street Youth
A 19-year-old Latino male with medium-length wavy black hair, dark brown eyes, wearing a black graphic T-shirt with blue ripped jeans and white sneakers, tall thin build, casual relaxed posture.You just need to save these templates and slightly adjust details when you use them based on your story needs. For example, change the hairstyle or clothing—the basic framework is reusable.
Common Problems and Practical Solutions
After making so many videos, I’ve basically stepped on every mine. Below are problems you might encounter too.
Problem 1: Character Changed Despite Using Scenebuilder
Symptoms: The first two shots are quite consistent, but by the third and fourth shots things go wrong—clothing color changed, hairstyle changed, even facial structure doesn’t look right.
Possible Causes:
- Prompts have minor differences (like you simplified the character description)
- Lighting or scene changes too drastic
- Camera angle too extreme
Solutions:
First, check your prompts. Open all the prompts you’ve used and compare the character description parts word by word. I guarantee you’ll find differences—maybe “dark blue suit” became “blue suit,” or you missed some detail. Unify the descriptions and regenerate.
Second, review the scene settings. If the second shot is bright indoors and the third suddenly jumps to a dark nighttime street, the AI will confuse the character due to the lighting difference. The solution is either keep lighting similar or emphasize “maintain the same character appearance” in the prompt.
Finally, check camera angles. If you used an extreme bird’s-eye or worm’s-eye angle, the AI might not accurately recognize facial features. Use normal angles early on, then play with special angles once the character appearance is stable.
I had a project where the character suddenly changed in the 4th shot. After checking for ages, I discovered that shot used an ultra-wide-angle low angle—the character’s face was distorted by perspective and the AI couldn’t recognize it. Changed to eye-level angle, problem immediately solved.
Problem 2: My Veo 3 Doesn’t Have Reference Images
Symptoms: Tutorials say you can upload reference images, but you can’t find this option in your interface.
Reason: Reference Images is an exclusive feature of Veo 3.1 Standard mode. If you’re using the basic version or an older version, you don’t have this feature.
Solutions:
Upgrade to the AI Ultra subscription plan. Honestly, this plan isn’t cheap—$250 per month. But if you’re serious about AI video creation, this investment is worth it. Standard mode’s generation quality, speed, and features are all much better than the basic version.
If you don’t want to upgrade yet, no problem. Reference Images isn’t essential—Scenebuilder plus detailed text descriptions can already achieve good consistency. I didn’t use Reference Images for more than half my projects and still made coherent videos.
Another alternative is to use other tools (like Midjourney or Stable Diffusion) to first generate a character portrait, then write an extremely detailed text description based on that image to generate videos. While not as good as directly uploading images, it’s still better than pure text.
Problem 3: Generation Is Slow and Costly
Symptoms: Each shot takes 1-2 minutes to generate. A 5-shot project with repeated trial and error—you can only complete one in a whole evening, burning through credits.
Reality check: Yes, this is the current state. AI video generation is just slow and expensive right now. This isn’t your problem—it’s a limitation of the current stage of technology development.
But you can optimize your workflow:
Strategy 1: Prepare Thoroughly Before Starting
Don’t open Veo 3 and just start generating. First spend an hour preparing the script, character descriptions, and prompts for each shot completely, checking everything before you start generating. Blind trial and error wastes the most time and cost.
My current habit is to plan the entire project in Notion first, including complete prompts for 5-7 shots, all in one document. Then copy-paste everything at once to generate, reducing improvised modifications and repeated adjustments.
Strategy 2: Use Low-Cost Tools for Preparation
Before using Veo 3, first use free or cheap tools for character design.
For example, use Whisk (Google’s free tool) to generate character portraits, use Leonardo.ai or Ideogram to generate scene reference images. Visualize and lock in the character appearance, then go to Veo 3 for animation—success rate will be much higher.
Strategy 3: Only Generate Key Shots
Not every shot needs Veo 3. Some unimportant transition shots or wide shots can be generated with cheaper tools (like Pika or Runway’s basic version), or just use real footage.
Only spend your budget on shots that really need character close-ups and important actions.
I had a project with 7 shots: 3 were character close-ups, 2 were medium conversation shots, and 2 were environmental wide shots. I carefully made the first 5 with Veo 3, and for the last 2 I directly used free Pexels video footage. The final edit looked completely seamless, but cost was cut in half.
Problem 4: Multiple Characters Are Even Harder
Challenge: Your story has two protagonists, or even three. Keeping everyone consistent is hell difficulty.
Why is this so hard:
Each character needs a detailed description, making prompts extremely long. Veo 3 has prompt length limits—too long gets truncated. Plus, the more characters, the easier the AI confuses them, mixing up identities.
Solutions:
Prioritize
Be clear about primary and secondary. If you have one protagonist and one supporting character, spend 80% of your effort on the protagonist; you can relax consistency requirements for supporting characters. The audience’s attention is mainly on the protagonist—minor deviations in supporting characters won’t be noticed by most people.
Use Ingredients to Video
This is the best tool for multi-character scenes. First individually generate reference images for each character (using Gemini 2.5 Flash Image or Midjourney), then use the Ingredients function to compose. This way each character has a clear visual anchor point and the AI won’t easily confuse them.
Split Shot Filming
Try to avoid multiple characters appearing in one shot simultaneously. Use montage techniques—when A speaks, shoot A’s close-up; when B responds, cut to B’s close-up. This way each shot only handles one character, instantly halving consistency issues.
I saw a clever case where a creator made a two-person dialogue short film but never had a single shot showing both people together—all individual close-ups cutting back and forth, with voice-over. The audience didn’t notice this was a technical limitation at all; they actually thought the editing rhythm was very professional.
Final Thoughts
After all this, let me share some honest thoughts.
Character consistency is indeed one of the biggest challenges in AI video generation. Even with Scenebuilder and Reference Images, it’s impossible to achieve 100% perfection. You’ll still encounter failed generations, still need to retry repeatedly, and still occasionally feel frustrated.
However, through systematic methods—detailed character bibles, strict prompt management, correct use of Scenebuilder—you can definitely improve consistency from 3 points to 8 points. This gap is enough to transform your work from “looks like AI-generated” to “looks like professional production.”
I went from complete chaos at the beginning to now being able to consistently produce coherent multi-shot videos—it took about two weeks and hundreds of generation tests. If you can learn something from my experience and avoid some detours, this article was worthwhile.
Finally, an action recommendation: start with small projects.
Don’t try to make a 10-minute short film right away. First make a 2-3 shot ultra-short scene, just as practice. Get familiar with the process, build confidence, accumulate templates. Once you can consistently make 3 consistent shots, expand to 5, then 7.
Rome wasn’t built in a day, and skills aren’t mastered in one attempt.
Alright, that’s the tutorial. Open your Google Flow, create your first character bible, and start trying. If you have any questions or success stories, feel free to share in the comments. I’d love to see what you create.
Wishing you smooth generation and consistent characters.
Published on: Dec 7, 2025 · Modified on: Dec 15, 2025
Related Posts

Complete Guide to Veo 3 Audio Generation: How to Add AI Voice and Music to Videos (With Prompt Templates)
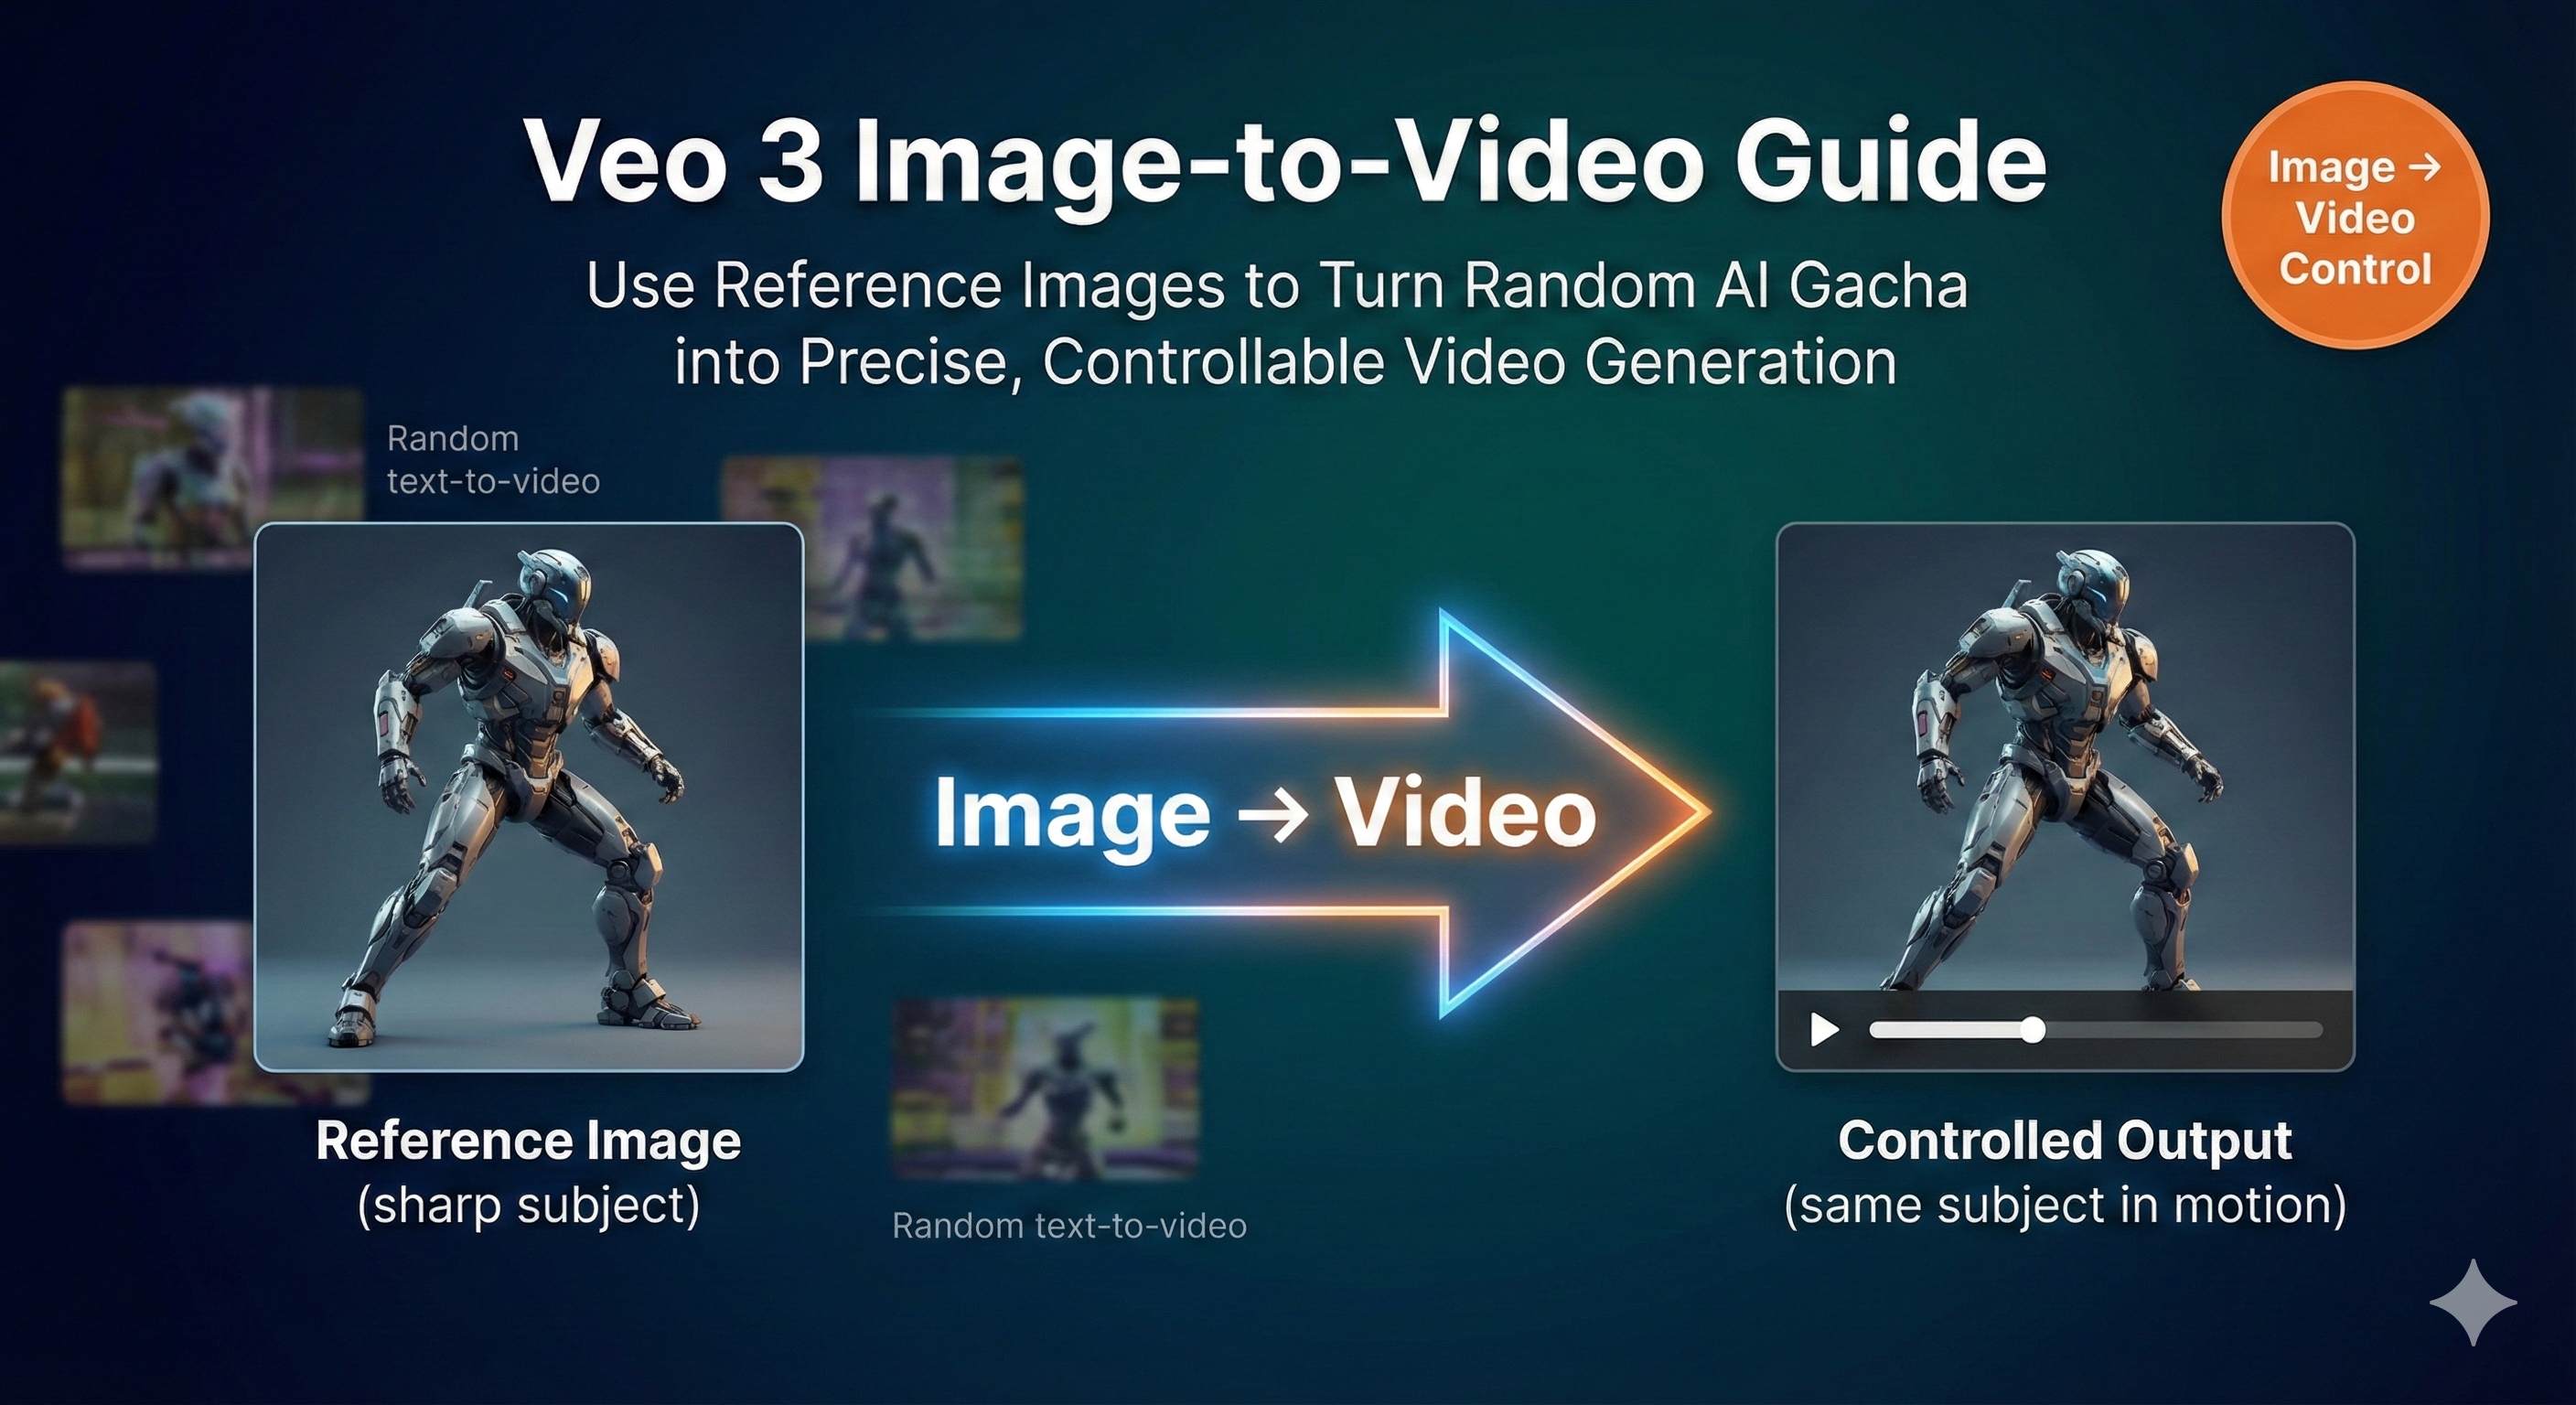
Master Veo 3 Image-to-Video: Using Reference Images for Precise Control

Comments
Sign in with GitHub to leave a comment