Master Veo 3 Image-to-Video: Using Reference Images for Precise Control
1 AM. I’m staring at the 47th AI-generated video on my screen—and the protagonist’s face is distorted again. This time, her eyes are asymmetrical, and her mouth twitches unnaturally, like a glitched game character. I clearly wrote “young woman with a gentle smile” in my prompt. Why does the AI insist on creating something out of a horror film?
Delete. Retry. Attempt #48.
Honestly, this is the reality of pure text-to-video generation—an endless “gacha” game. You craft a meticulously detailed prompt, wait 30 seconds with anticipation, and then your heart sinks the moment you open the result. Wrong facial expression, exaggerated movements, awkward camera angles… 99% of attempts are garbage. It’s like opening blind boxes, except these boxes are expensive—costing you time, compute credits, and your rapidly thinning hair.
Then I discovered Veo 3’s image guidance features, and the nightmare finally ended.
Now I just upload a reference image, tell the AI “follow this,” and get satisfactory results in 2-3 tries. No more guessing how the AI will interpret “gentle smile,” no more praying that attempt #50 will work. In this article, I’ll break down Veo 3’s three image guidance modes—first frame, first & last frame, and reference image—teaching you how to use existing image assets to control video outputs precisely and reduce “gacha” attempts from 50 to under 5.
Why Is Pure Text-to-Video So Hard to Control?
The root problem lies in language ambiguity itself.
When you write “a girl walking slowly by the sea,” what does the AI actually interpret? Is “slowly” 0.5 meters per second or 1 meter? Is “walking” a casual stroll or a thoughtful pace? Is “by the sea” on rocks, sand, or a wooden pier? The same seven-word phrase can have 100 different interpretations.
AI faces the same challenge. It fills in details based on patterns from training data. The problem is, what it fills in often isn’t what you wanted.
I remember one time I tried to generate a shot of “a girl turning and smiling.” Simple, right? Wrong. The AI produced dozens of versions: some smiled like insurance salespeople, others turned so dramatically they looked about to fall, and some literally rotated 180 degrees to face away from the camera. Every version technically “matched” my description, but none matched the image in my head.
This is the first pitfall of pure text-to-video: language ambiguity. You think you’ve been clear, but ambiguity lurks everywhere.
The second pitfall is even worse—AI’s unpredictable “creative liberties”.
It automatically adds elements you never mentioned. Ask it to generate “someone sitting in a cafe,” and it might add random background characters or strange objects floating past the window. Hand movements often distort—six fingers are common, and arms twisted into impossible angles happen regularly. Facial expressions are a disaster zone; eyes can deform entirely during a blink.
Most frustrating of all, you can’t edit it. Even slight dissatisfaction means starting over from scratch. Unlike image generation where you can use inpainting for local fixes, video generation is all or nothing—either accept it entirely or delete and retry.
Statistics show that creators using pure text-to-video need 10-50 attempts on average to get usable results. At 1 minute per attempt, that’s 10-50 minutes of pure waiting time. Factor in prompt writing and parameter adjustments, and a single 8-second usable video might cost you an hour or two.
This isn’t creation—it’s gambling.
Image guidance features finally let us take back control.
Veo 3’s Three Image Guidance Modes Explained
Veo 3 offers three distinct image guidance modes, each suited for different creative scenarios. Let me break them down one by one.
Mode One: First Frame to Video
This is the most intuitive approach. Upload an image, and AI uses it as the video’s first frame, then generates subsequent actions based on your prompt.
What do I use this mode for most? Bringing static illustrations to life.
Last year, while creating a brand video for a client, the designer produced a stunning set of scene illustrations—cartoon-style cafe with warm yellow tones and exquisite details. The client loved it but wanted it animated for added atmosphere. Previously, this request would be nearly impossible—either hire an animator (expensive) or give up (regrettable).
Now? I uploaded that illustration directly to Veo 3’s first frame mode with the prompt “camera slowly pushes in, leaves gently sway outside the window, coffee steams on the table.” 8-second video, one take. The key point—the cartoon style was perfectly preserved. Not the stiff kind of interpolated animation, but truly looked like the original artist drew the motion.
This is the core value of first frame mode: maintaining the original image’s artistic style.
Whether your image is watercolor, oil painting, flat illustration, or photograph, Veo 3 can animate it while preserving that style. For creators with brand visual guidelines, this is a lifesaver.
Usage Tips:
- Use high-resolution images, at least 1080p. Blurry inputs produce blurry outputs
- Don’t describe what’s already in the image (“a cafe”), describe the actions you want to see (“camera pushes in, leaves sway”)
- If generated motion is too strong or subtle, add “subtle movement” or “dynamic motion” to your prompt
Mode Two: First & Last Frame to Video
This is more advanced. You provide AI with two images—one for the beginning, one for the end—and it fills in the transition.
Sounds simple, but this feature is incredibly powerful.
The classic application is camera movement. Say you want a 180-degree orbiting shot—filming a character from front to back. Previously, you’d write extensive prompts like “camera rotates clockwise, consistent speed, maintains height…” and AI might not even understand. Now you just render two images: one front view, one back view, feed them to first & last frame mode, write “smooth 180-degree arc shot” in the prompt, done.
I’ve tried even crazier things—object transformation. First frame shows a real person, last frame shows that person as a cartoon character. AI generates a video of the person gradually “cartoonifying,” with a transition so smooth it’s unbelievable.
Some people use this for brand animations: first frame is logo A, last frame is logo B, with AI automatically generating the morphing transition. Saves thousands in outsourced motion graphics.
Usage Tips:
- Keep first and last frames consistent in style and resolution for smoother transitions
- If frames differ drastically (day to night), choose 8-second duration to give AI more space
- Prompt should describe “how to transition,” not just describe the frames. E.g., “The camera performs a smooth dolly-in, gradually revealing more details”
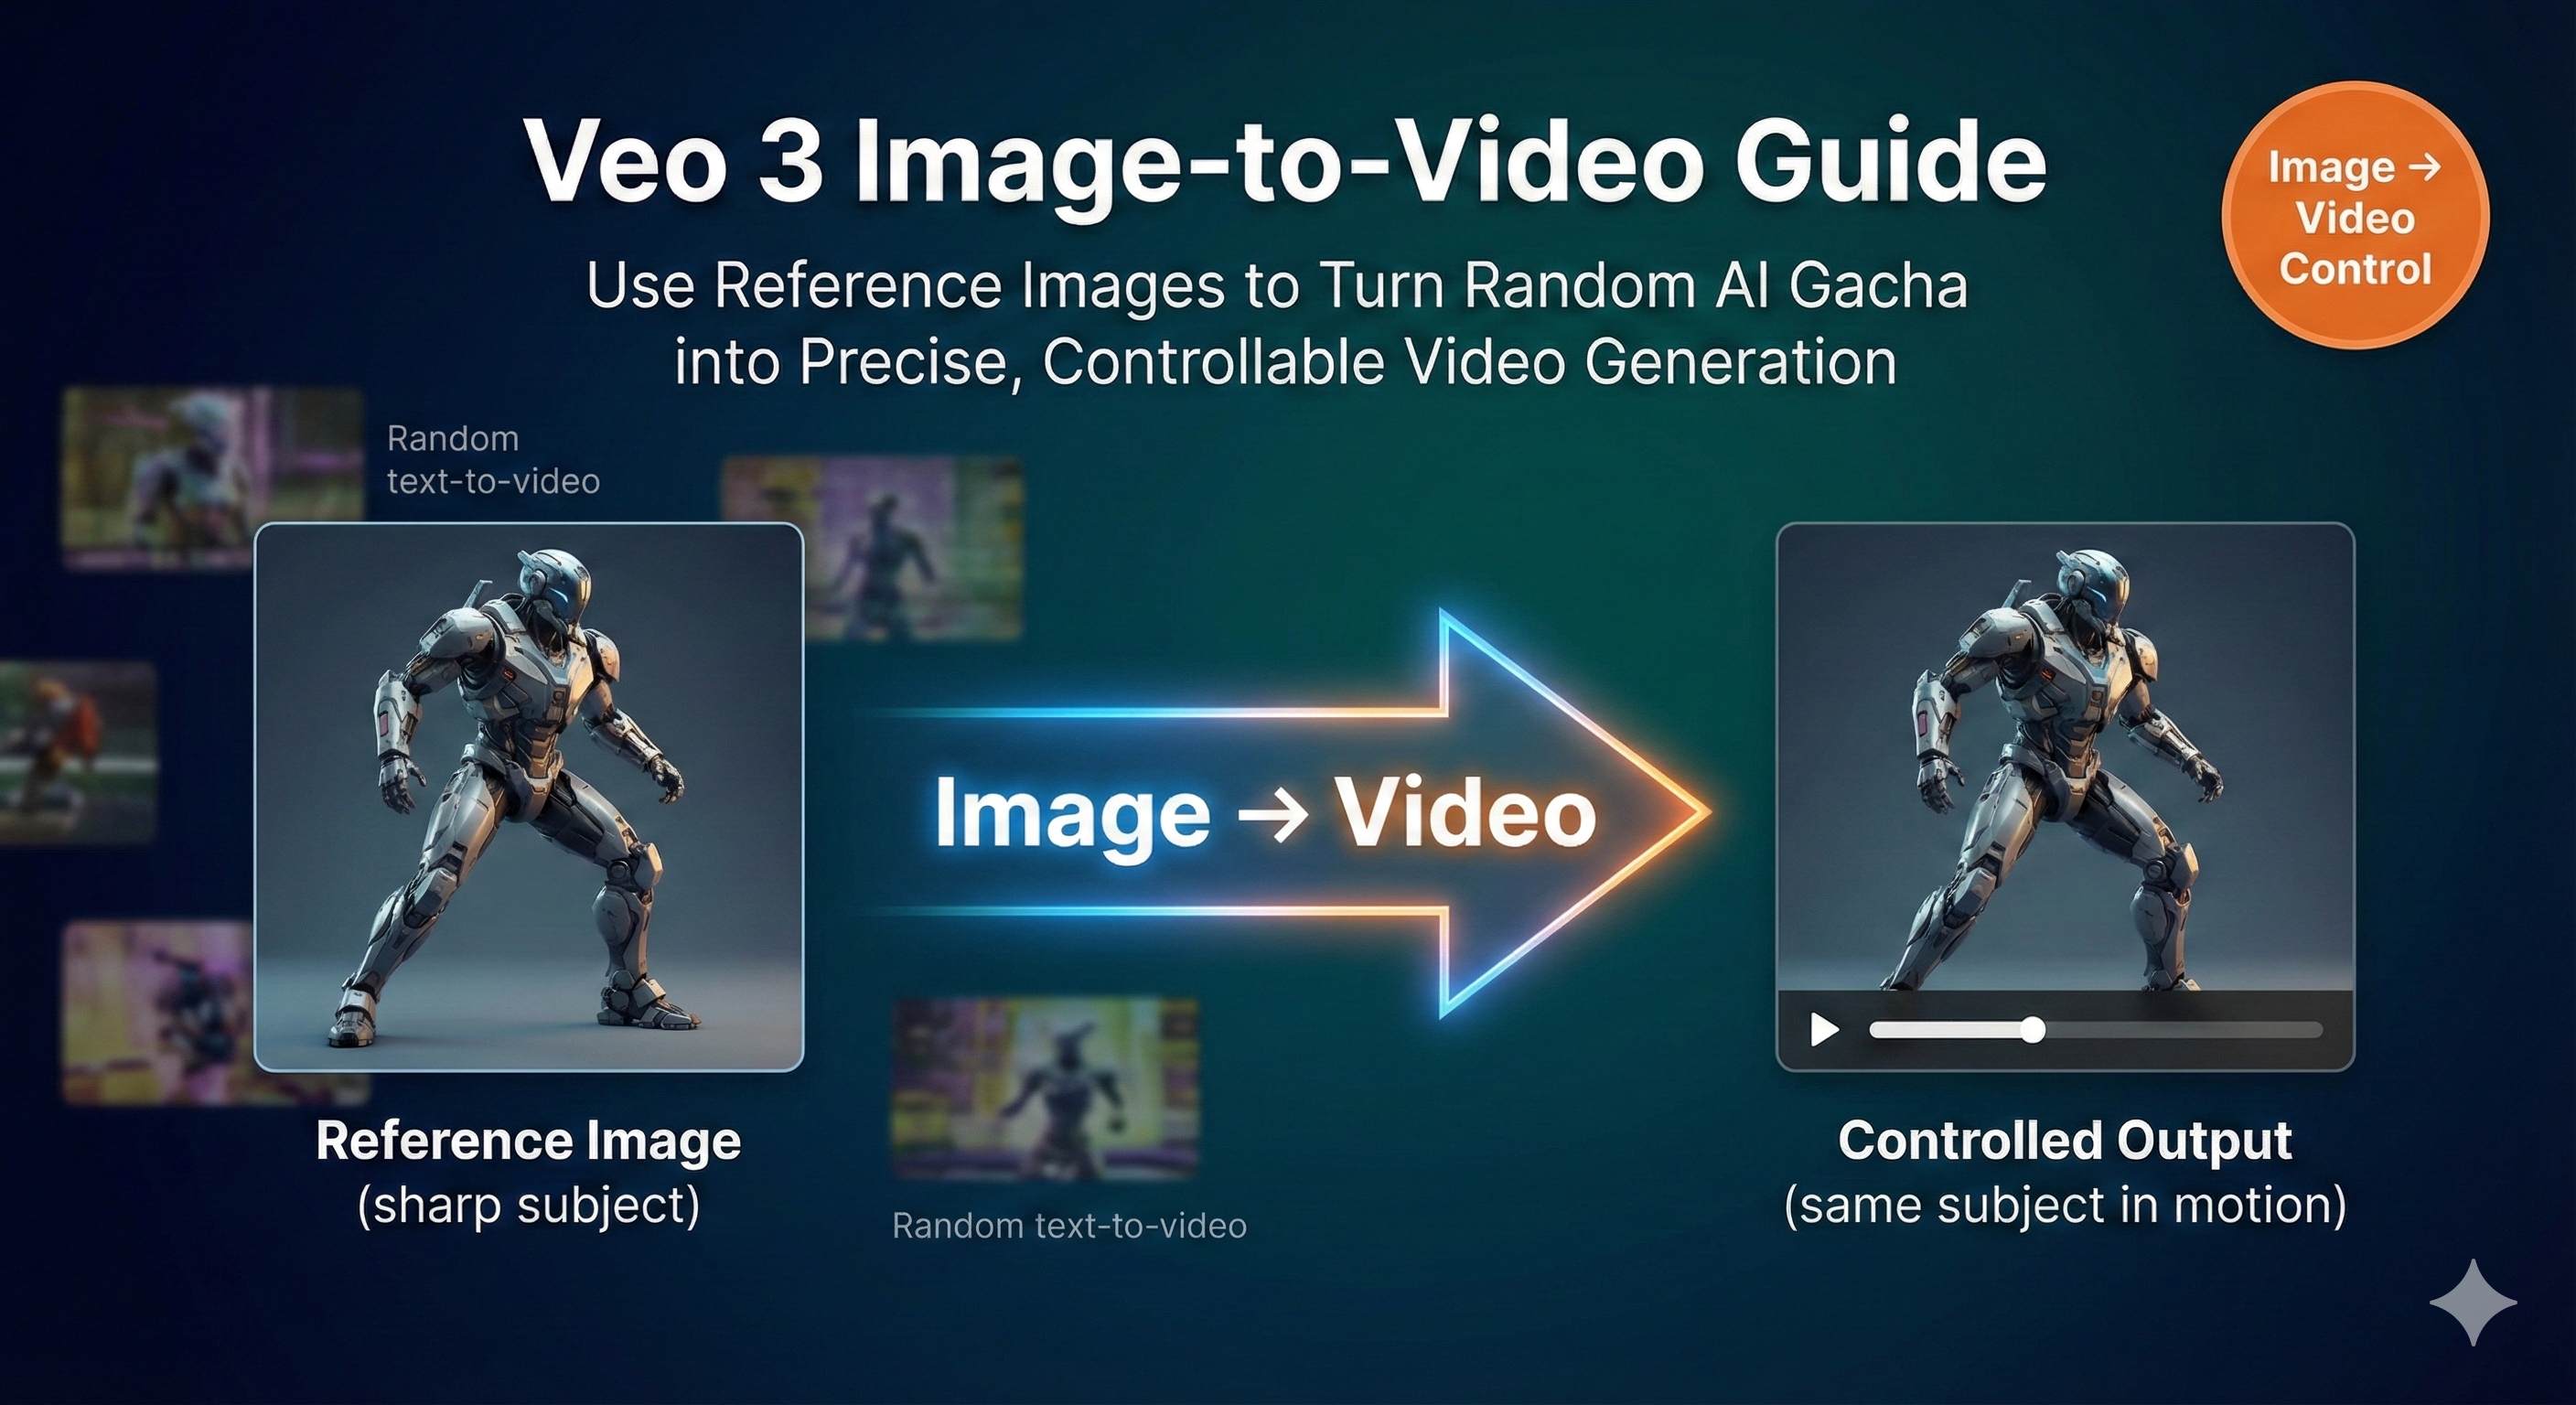
Mode Three: Reference Image (Style and Character Consistency)
This is my personal favorite.
The first two modes control “how the video starts/ends,” while Reference Image controls “what this character/product looks like throughout the entire video.”
You can upload up to 3 reference images showing different angles of the same subject. Then, regardless of what scenario you place it in via prompt—beach, cafe, spaceship—that subject’s appearance remains consistent.
This is essential for creators producing series content.
Imagine you’re creating a brand mascot series—10 episodes, each in different scenes. Previously, how would you handle this? Each generation would produce a new character, making a series impossible. Now with Reference Image, upload 3 standard shots of the mascot (front, side, 45-degree angle), then generate 10 videos in different scenarios—the mascot’s appearance, colors, and proportions stay identical.
I’ve used this for product showcase videos. The client’s product was a uniquely designed Bluetooth speaker. I uploaded 3 product photos, then generated 5 usage videos in different settings—living room, outdoors, office, gym, kitchen. In every video, the speaker’s appearance details were perfectly accurate. The client approved immediately, saying it saved half the budget compared to actual filming.
Usage Tips:
- Use 3 reference images from different angles (front, side, 3/4 view)
- Keep backgrounds simple to avoid distracting AI
- If the video shows subject “drift” (color changes), replace the blurriest reference image with a clearer one
- Lighting must be consistent—don’t mix bright sunlight with indoor lighting, AI gets confused
These three modes aren’t mutually exclusive. Advanced play is combining them: use Reference Image to ensure character consistency, then use first & last frame to control camera movement. Generated videos can achieve 90%+ controllability this way.
Hands-On Practice: Complete Workflow from Image to Video
Theory’s done—let’s get practical. I’ll walk you through the complete process of generating a usable video from scratch.
Step 1: Choose the Right Platform
Veo 3’s full functionality is primarily on Google Flow. Gemini App works too, but it’s a lite version supporting only basic first frame mode. For first & last frame or Reference Image, you must use Flow.
Access method: After logging into Flow, select “Frames to Video” in the prompt builder. Make sure to change quality settings to “Highest Quality,” otherwise you’re using an older model version with inferior results.
Note that Flow may have regional restrictions. If you can’t access it, the concepts and techniques in this article still apply to other platforms like Runway, Kling, etc.—the core logic is the same: “use images to guide generation.”
Step 2: Prepare Image Assets
Many people overlook this step, but it’s crucial.
Image quality directly determines video quality. My standards are:
- Resolution: Minimum 1080p, 2K even better
- Composition: Subject centered or off-center, not too close to edges (might get cropped)
- Clarity: No blur, minimal noise
- Style consistency: If using multiple reference images, ensure consistent lighting and tone
Real case: Once I was lazy and used a random 720p image from online. The generated video was terrible—heavy grain, details completely mushy. Found a 2K image instead, quality immediately jumped two levels.
File format: JPG or PNG both work. I usually use JPG since files are smaller and upload faster.
Step 3: Writing Prompts (The Key Part)
Prompts used with images are completely different from pure text-to-video prompts.
Core principle: Don’t describe what’s already in the image—describe the actions you want to see.
Wrong example:
Image: A girl standing by the sea
Prompt: “A girl standing by the sea” (Isn’t this redundant?)
Correct example:
Image: A girl standing by the sea
Prompt: “She turns towards the camera with a gentle smile, her hair flowing in the ocean breeze, golden hour backlight”
See the difference? Images define “what it is,” prompts define “how it moves.”
Three Essential Prompt Elements:
Camera & Motion
- “handheld close-up”
- “slow dolly-in”
- “steady tracking left”
- “locked-off” (fixed camera, suitable when you want only subject movement)
Lighting & Time
- “golden hour backlight” (warm atmosphere)
- “soft diffused light” (suitable for indoors)
- “noir hard shadows” (dramatic feel)
Action & Behavior
- This is the core part, be specific
- Don’t write “smile,” write “shows a warm smile, eyes crinkling with joy”
- Don’t write “walk,” write “walks slowly forward with light steps, occasionally glancing down”
If using first & last frame mode, prompt structure changes:
“The camera performs a smooth 180-degree arc shot, starting from the frontal view of the character and gradually circling around to end at the back view, maintaining consistent height and speed throughout the movement.”
Key is clearly stating “from where to where, how to transition.”
Step 4: Parameter Settings
Key parameter choices:
- Duration: Prefer 8 seconds. 4 seconds is too short for smooth motion, 6 seconds feels awkward, 8 seconds is just right
- Resolution: I usually use 1080p. 720p is faster but quality suffers; if time permits, try 1080p
- Generation count: Generate 2-4 variants for comparison, don’t generate just 1—give yourself options
- Seed: For reproducible results (e.g., fine-tuning multiple times), set a fixed seed value (between 0-4294967295). Otherwise, each generation is random
Version selection:
- Veo 3.1 Fast: Faster generation, supports text-to-video and first & last frame, but not Reference Image
- Veo 3.1 Full: Supports all features, highest quality, just slower
My habit is using Fast version for initial testing and rapid iteration, then using full version for final outputs.
Step 5: Generate and Troubleshoot
Click generate, wait 30-90 seconds. During this time, go get coffee (not joking, I actually do this every time).
After video generates, 90% of the time it’s: decent, but has minor issues. Don’t panic, this is normal. Common problems and solutions:
Problem 1: Subject drift or deformation
- Symptom: Character’s face gradually changes, or product color shifts
- Cause: Reference images not clear enough or insufficient quantity
- Solution: Replace the blurriest reference image, or add a third angle
Problem 2: Motion feels wrong
- Symptom: Action too fast/slow, or direction not as intended
- Cause: Prompt not specific enough
- Solution: Add specific motion descriptors like “slow and steady” or “quick but smooth”
Problem 3: Style drifts from original image
- Symptom: Uploaded cartoon image, but generated video starts trending realistic
- Cause: AI’s “creative liberties” again
- Solution: Add to prompt end “maintaining the [original style] style,” e.g., “maintaining the watercolor painting style”
Problem 4: First & last frame transition feels unnatural
- Symptom: Middle transition is choppy with obvious jumps
- Cause: Frames differ too much, or duration too short
- Solution: Increase duration to 8 seconds for more transition space; or adjust frames to be more similar
Don’t be discouraged by these issues. Remember, even adjusting 2-3 times beats pure text-to-video’s 50 attempts by far. Plus, each adjustment you know exactly what you’re fixing—you have a clear optimization direction, not blind guessing.
This is image-to-video’s biggest advantage—predictable iteration.
Advanced Techniques: Making Your Videos More Professional
After mastering basics, let’s discuss some advanced plays. These are lessons I learned from real-world practice that can elevate your video quality another level.
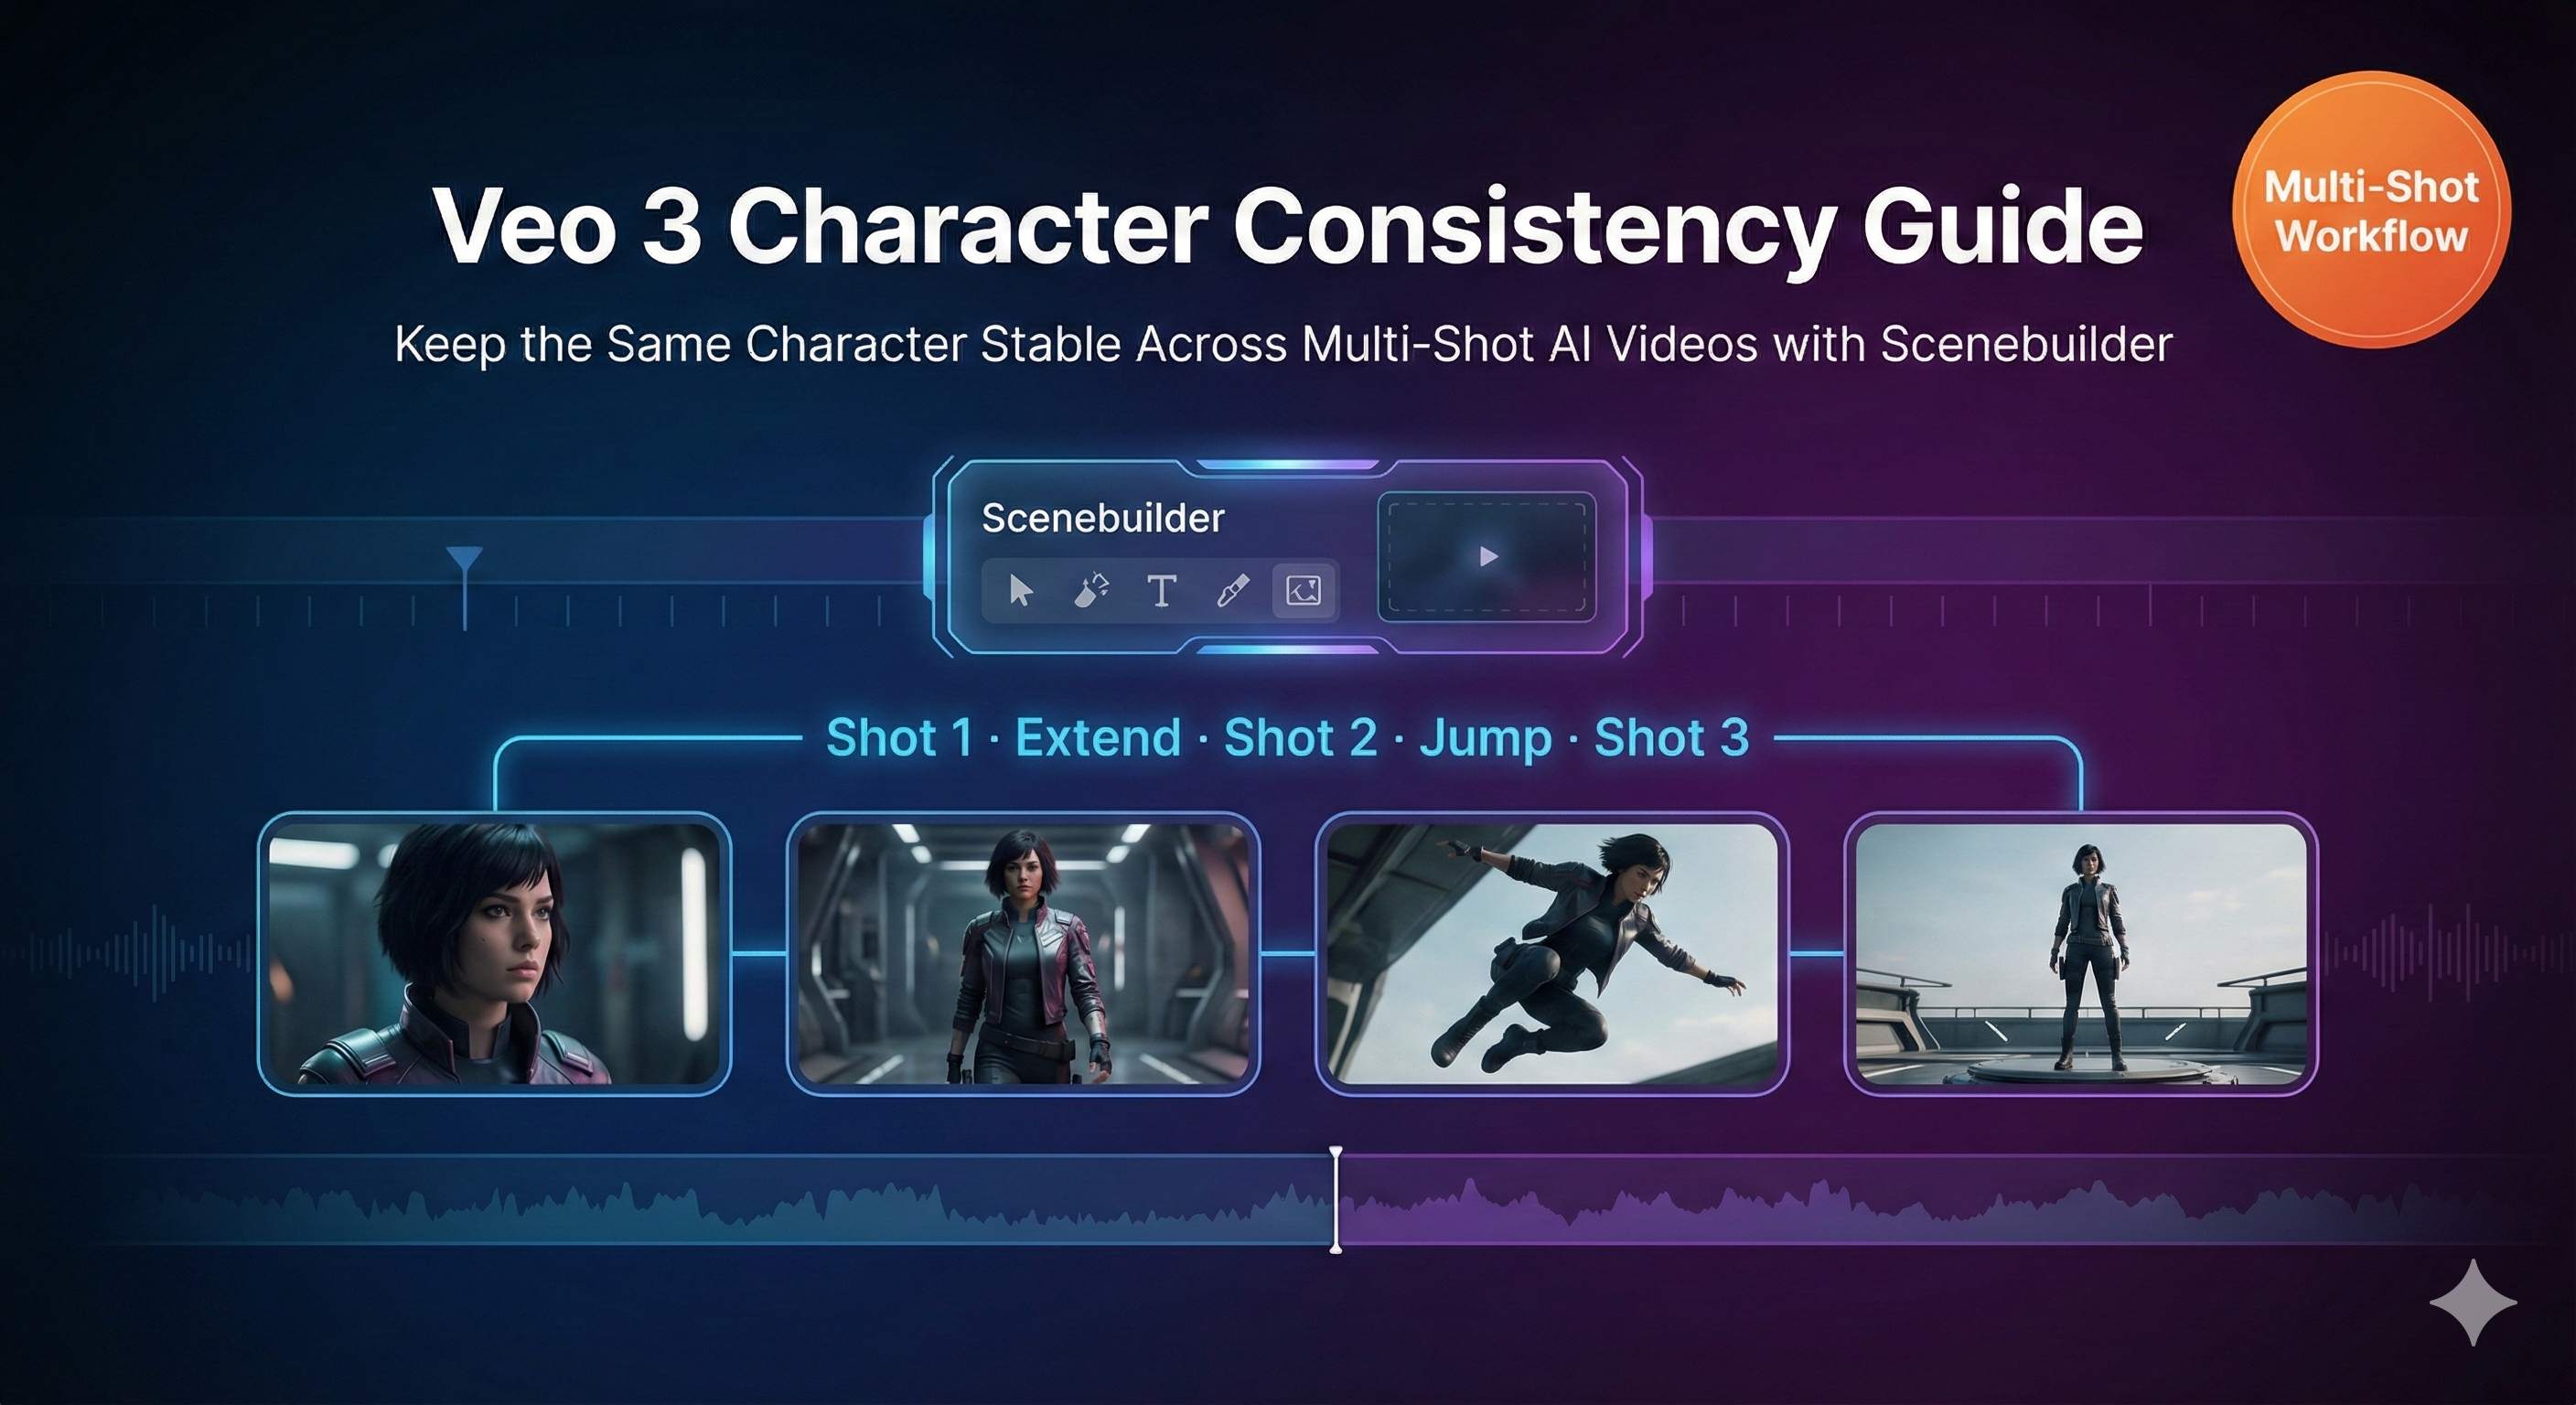
Technique 1: Multi-Segment Connection with Consistency
Single 8-second videos often aren’t enough, right? For longer videos, you need to connect multiple segments.
Key technique: Use the last frame of one video as the first frame of the next.
Specific operation: After generating the first segment, take a screenshot of the final frame and upload it as the first frame for the second segment. This makes the transition between segments smooth, without abrupt jumps.
Works even better with Reference Image. Use the same reference image set throughout to maintain character appearance, then control camera movement across segments with first & last frame.
I’ve done this for a singer performance video—5 segments, transitioning through audience view, side view, back view, close-up, and wide shot. Each segment used first & last frame for camera transitions, with 3 singer reference images maintaining consistent appearance throughout. Stitched all 5 segments in editing software, looked like a continuous shot but was actually 5 separate generations.
Technique 2: Creative Style Transfer Applications
This is cool: convert one visual style image into a video of another style.
Most common is real photo to anime style. Upload a real photo as first frame, write in prompt “anime style, cel-shaded, vibrant colors,” and the generated video gradually transitions from real person to animated effect. Great for opening animations or artistic shorts.
Works in reverse too: anime to realistic style. I’ve seen people use this to create “live-action” videos of anime characters with stunning results.
Another interesting application: unifying material styles. Say you have a bunch of images from different sources—photos, illustrations, 3D renders—with messy visual styles. Feed them all to Veo 3 with unified style descriptors, and output videos have consistent styling.
Technique 3: Complete Workflow Integration
Image-to-video is just one part of the entire creative process. To produce finished products, you need a complete pipeline.
My workflow looks like this:
Pre-production: Midjourney/DALL-E for concept images
- Spend 10-20 minutes generating high-quality keyframe images
- Rapid trial-and-error to find most satisfying composition and style
Production: Veo 3 converts images to videos
- Choose first frame, first & last frame, or Reference Image based on needs
- Usually 2-5 iterations yield satisfactory results
Post-production: Edit software for stitching and polishing
- Premiere/Final Cut/any editor works
- Color grading, transitions, pacing adjustments
- Important: Unify color tones across all segments for natural stitching
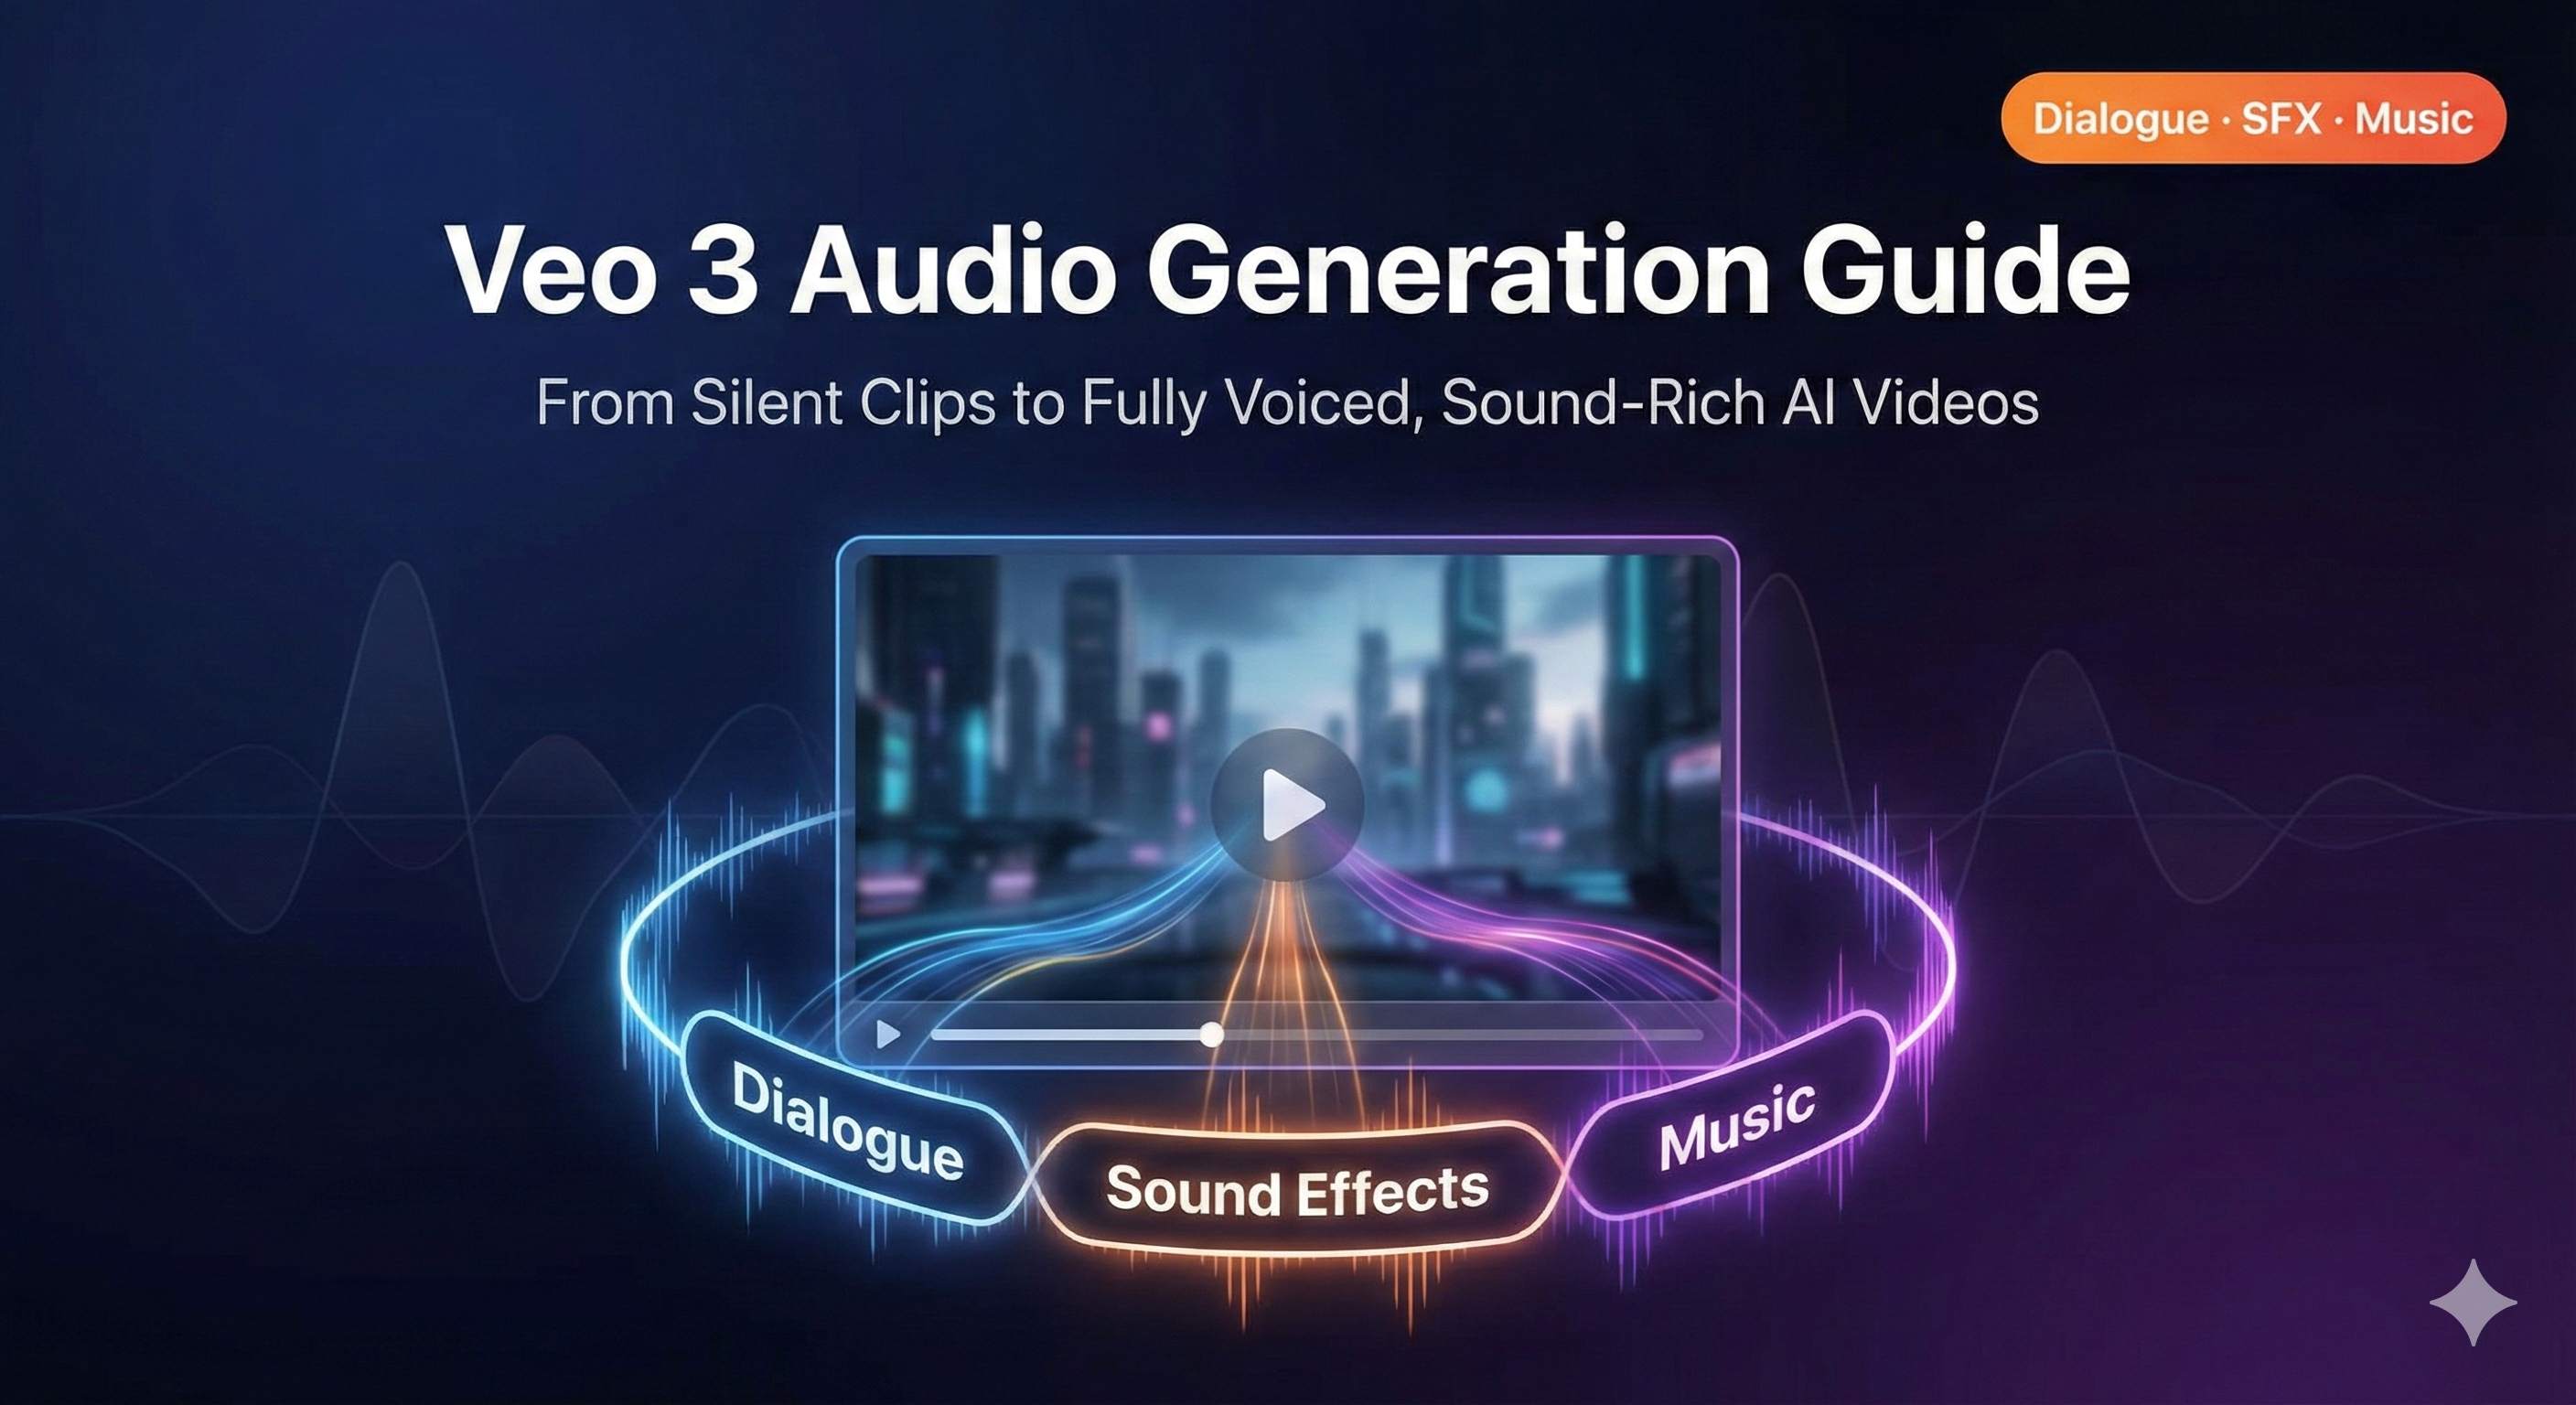
Audio: AI audio tools for voiceover and music
- Suno/Udio for background music
- ElevenLabs/Azure TTS for voiceover
- Add appropriate sound effects (Epidemic Sound or similar libraries)
With this pipeline, I can now complete a 1-2 minute high-quality short video in 2-3 hours. A year ago, this quality video would require either outsourcing (thousands of dollars) or self-shooting (at least a week for prep, shooting, and editing).
Technique 4: Real-World Commercial Applications
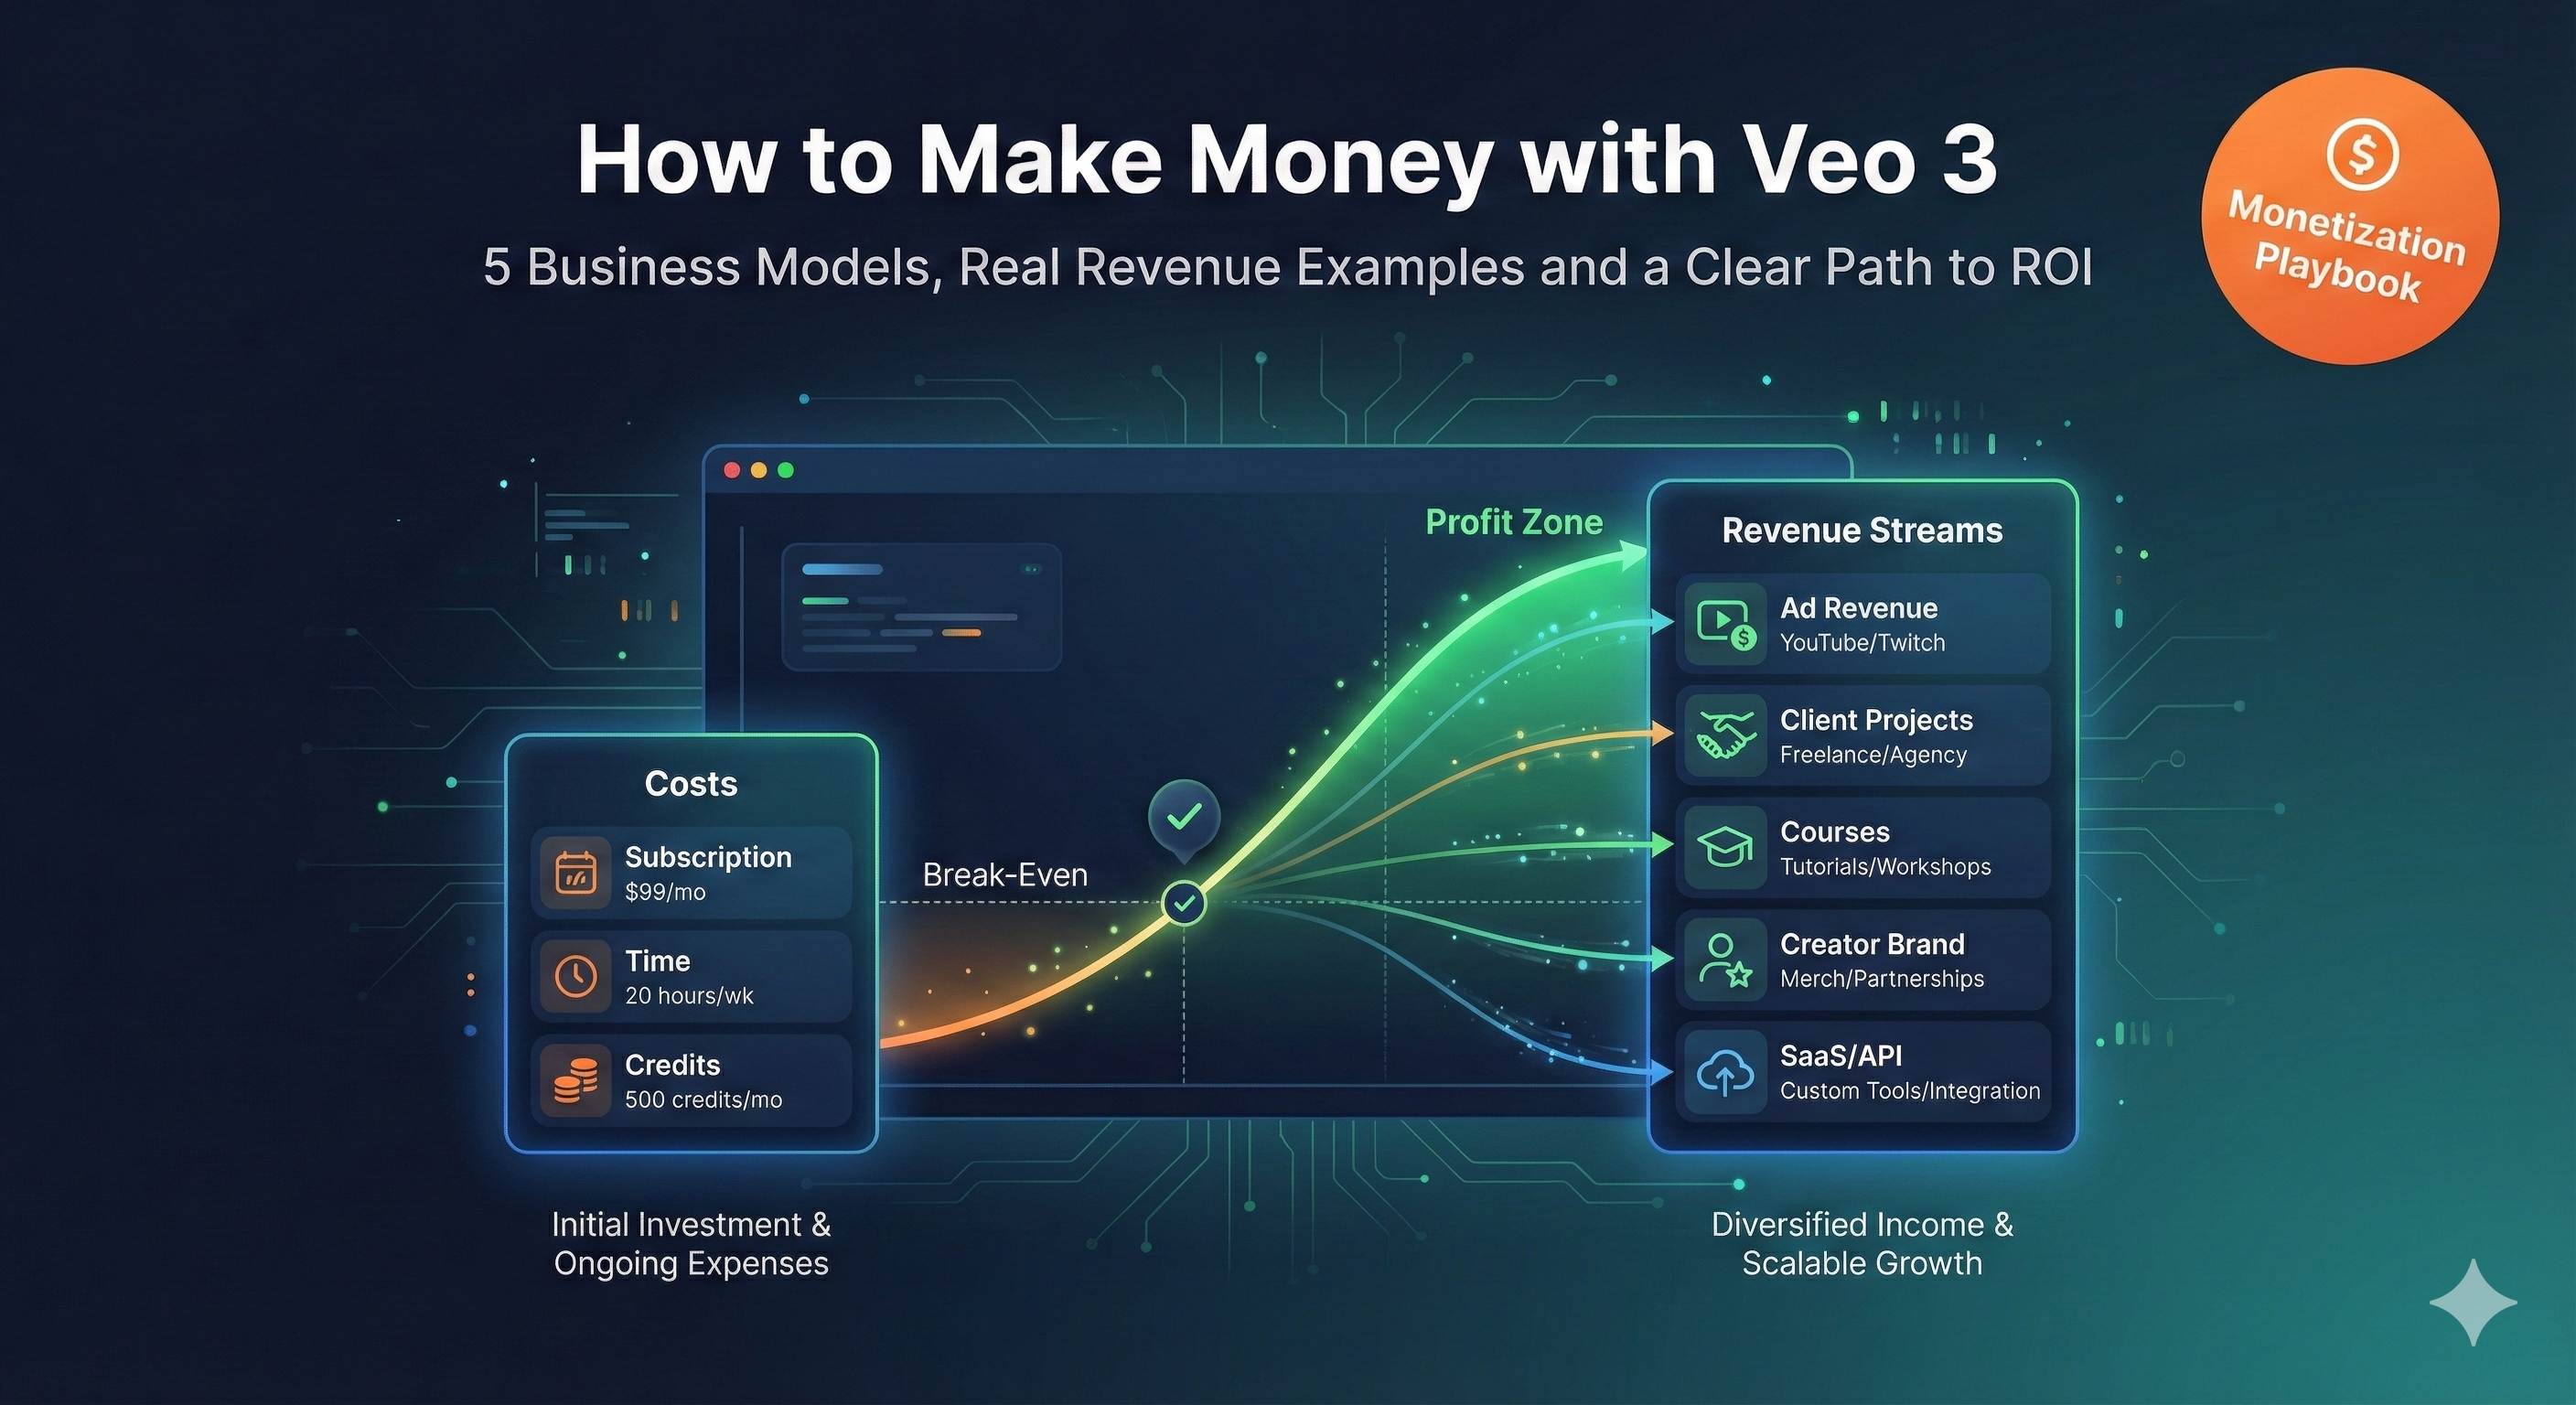
Let’s talk practical—how can this make money?
Scenario 1: Product showcase videos
Client provides product images, you generate usage videos in different scenarios. Charge per video, 8-second videos at $70-140 each, can produce 5-10 daily.
Scenario 2: Brand mascot series content
Use Reference Image to maintain mascot appearance, generate a full season of series videos. Suitable for project-based pricing, 10-20 episodes per season, quote $1,400-4,200.
Scenario 3: Social media content matrix
Convert client’s flat designs, posters, product images all into video versions. Data shows video content gets 3-5x higher engagement than images—many brands will pay for this.
Scenario 4: Educational training videos
Animate teaching illustrations. Historical events, scientific principles, product tutorials. Large market—many education institutions and knowledge bloggers have this need.
A friend of mine specializes in this, mainly serving small to medium brands. He says since mastering image-to-video, his business volume doubled because of fast delivery, controlled costs, and high client satisfaction.
One piece of advice: Don’t treat this as purely technical work. Clients don’t want “generate videos using Veo 3”—they want “help solve my marketing/communication/content problems.” You need to understand their business needs and provide appropriate visual solutions; technology is just the means of implementation.
Cost Comparison: Image-to-Video vs Pure Text-to-Video
Bottom line—how much time and money can image guidance actually save? Let me run the numbers.
Time Cost Comparison
Pure text-to-video:
- Average attempts: 10-50
- Wait time per attempt: 30-120 seconds
- Total time: 5-100 minutes pure waiting + prompt writing and parameter tuning
- Real experience: An afternoon might yield only 1-2 usable videos
Image-to-video:
- Average attempts: 2-5
- Wait time per attempt: 30-120 seconds
- Total time: 1-10 minutes pure waiting + image preparation
- Real experience: An afternoon can produce 5-8 usable videos
Time savings: 80-90%
Especially for projects with clear visual requirements (brand videos, product showcases), image-to-video is a game-changer.
Compute Cost Comparison
Assume platforms charge by credit or points, 1 unit per generation:
- Pure text-to-video: 10-50 units to get finished product
- Image-to-video: 2-5 units to get finished product
Cost savings: 80-90%
If you’re using pay-per-use API, this difference is real money. Over a month, savings could fund several more tool subscriptions.
Quality Stability Comparison
Can’t quantify this with numbers, but the difference is obvious:
Pure text-to-video:
- Highly random results, like lottery
- Unpredictable outputs
- Suitable for “wild imagination” creative exploration
Image-to-video:
- Stable, controllable results with a baseline
- Can predict general direction
- Suitable for commercial projects with specific requirements
For content needing formal publication representing brand image, image-to-video carries much lower risk. Clients won’t accept “I tried 50 times but couldn’t generate it.”
Creative Asset Reuse Value
This is image-to-video’s hidden advantage.
Illustrations you paid designers to create, product photos you commissioned, 3D renders you had made—now all can be repurposed into videos. These assets were gathering dust on hard drives; now they suddenly have new value.
For creators or brands with content accumulation, this is like activating dormant assets. I’ve seen people dig out three years of blog images, batch convert them to short videos, and their content matrix expanded several-fold.
Total calculation: If your work involves video content production, mastering image-to-video skills can boost efficiency 3-5x and reduce costs 80%+. This isn’t exaggeration—it’s real data from myself and dozens of peers.
Conclusion
After all this, the core message is simple: Image guidance transforms AI video from “blind box” to precise control.
Pure text-to-video isn’t worthless—it suits wild, imaginative creative exploration without specific visual expectations. But if you know what visuals you want, or have existing image assets, image-to-video’s efficiency and quality will crush pure text-to-video.
Three modes serve different purposes:
- First frame mode: Animate static images while maintaining style
- First & last frame mode: Precise control over camera movement and transitions
- Reference Image: Maintain character/product consistency across series videos
Master these three modes, combined with correct prompt techniques and parameter settings, and you can reduce “gacha” attempts from 50 to under 5.
My suggestion: Start with the simplest first frame mode. Find your favorite photo or illustration, upload to Veo 3 (or Runway, Kling, etc.), write a simple action description, see the results. If it doesn’t work once, adjust the prompt or swap the image—after 2-3 tries you’ll get the feel.
Once you experience that satisfaction of “generation matches expectations,” you won’t go back to pure text-to-video.
Final note: The techniques and concepts in this article aren’t exclusive to Veo 3. Runway, Kling, Pika, and other image-to-video tools share the same underlying logic—use images to give AI clearer guidance, reduce ambiguity, improve controllability. So even if you can’t access Veo 3 right now, these methods remain useful.
Go try it out. You surely have some decent images on your hard drive—make them move.
Published on: Dec 7, 2025 · Modified on: Dec 15, 2025
Related Posts
Complete Guide to Veo 3 Audio Generation: How to Add AI Voice and Music to Videos (With Prompt Templates)
The Complete Guide to Veo 3 Character Consistency: Creating Coherent Multi-Shot Videos with Scenebuilder
Comments
Sign in with GitHub to leave a comment