Dockerfile Tutorial for Beginners: Build Your First Docker Image from Scratch
1 AM. I’m staring at error messages scrolling across my terminal—“COPY ../config.json: no such file or directory”. This is the 8th failed build tonight. It runs perfectly locally, so why does it break when packaged into a Docker image? After browsing Stack Overflow and copying the top answer, my image ballooned from 200MB to 2GB. To be honest, I was frustrated, wondering what the heck this Dockerfile thing was all about.
You’ve probably been there too. Looking at that Dockerfile in your project, filled with FROM, RUN, COPY, CMD—each word makes sense individually, but together they’re incomprehensible. You copy a tutorial from the internet, and nine times out of ten it doesn’t work. What’s most infuriating? The error messages are always so vague—is it a path issue? Wrong instruction? Who knows?
Actually, Dockerfiles aren’t that mysterious. I spent two days figuring out what each instruction does and identifying the common pitfalls. It comes down to just a few key points. In this article, I’ll walk you through building your first Docker image from scratch in the most straightforward way possible. No fluff—every instruction comes with real code examples, plus I’ll share the 3 biggest traps beginners fall into. After reading this, you’ll be able to write a working Dockerfile for your Node.js or Python projects.
What is a Dockerfile?
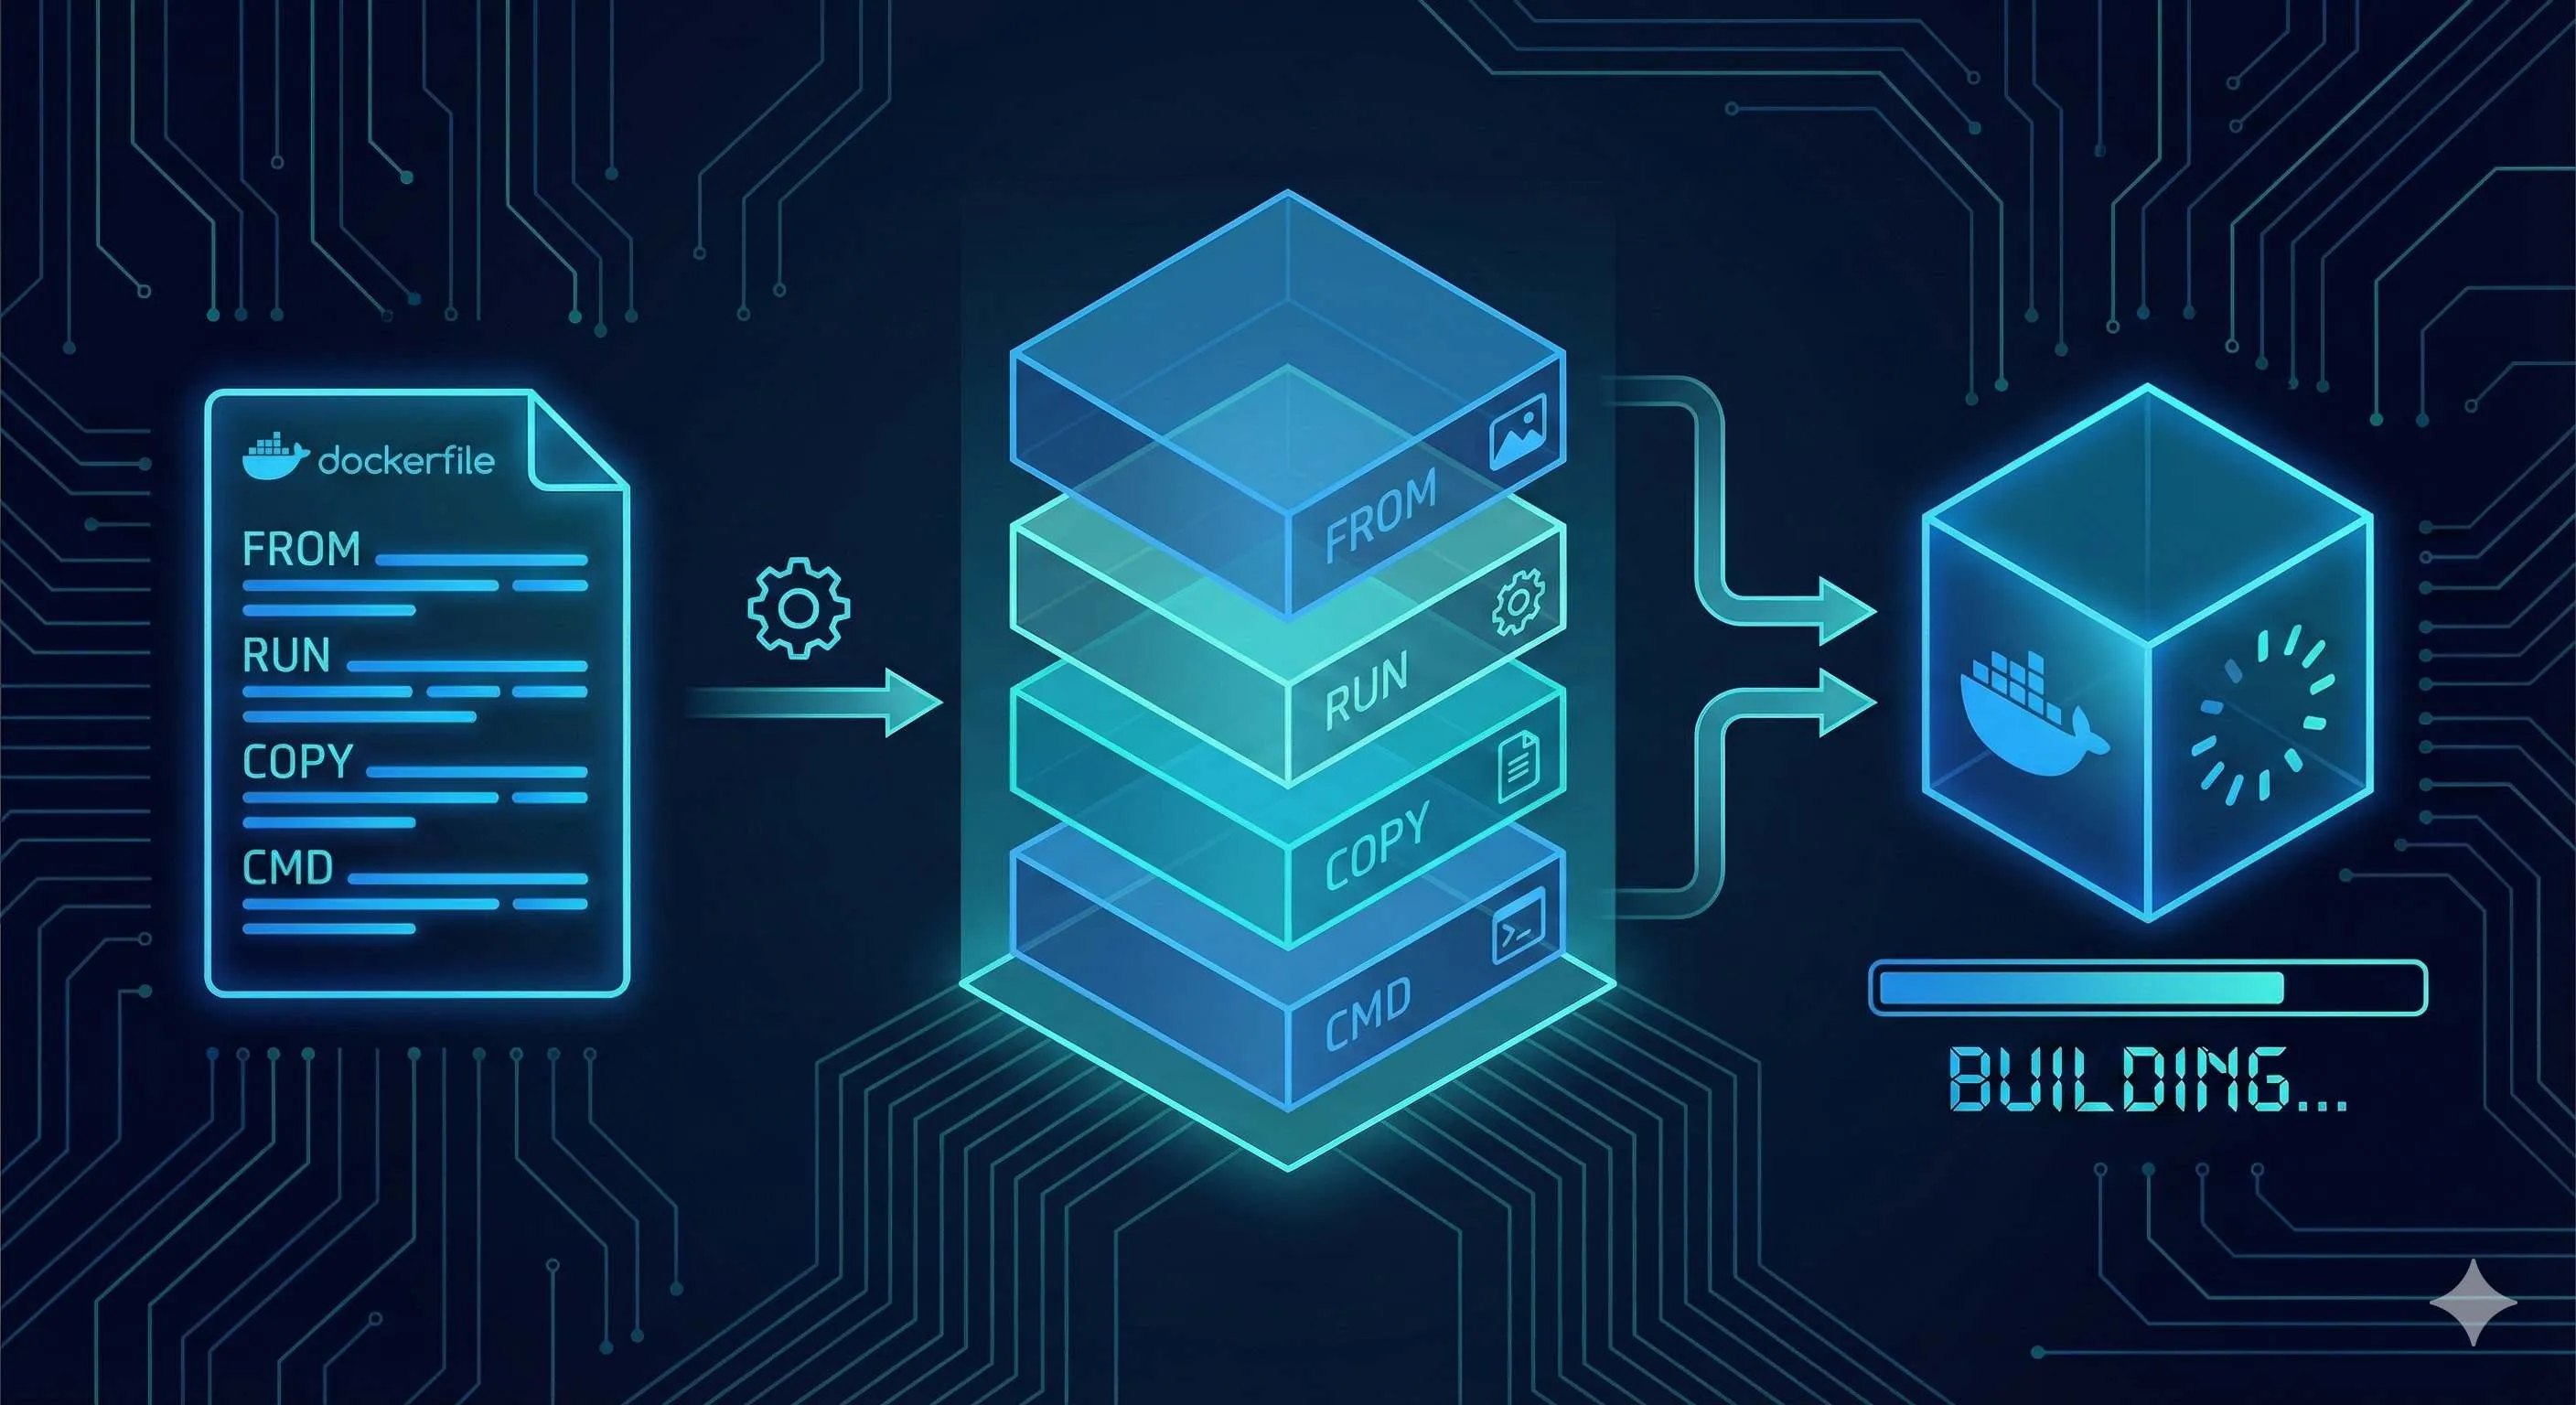
Simply put, a Dockerfile is a text file containing all the steps to build a Docker image. Think of it as a blueprint for renovating a house—it specifies laying the floor first, then painting walls, and finally installing lights. The Docker engine follows this blueprint step by step to “renovate” your application and package it into an image.
This image is a ready-to-run “environment snapshot”. For example, your Node.js app needs Node 18, some npm packages, and your source code—the Dockerfile packages all of this into the image. Anyone who gets this image can run docker run and it’ll work, no need to worry about environment configuration.
Basically, a Dockerfile does three things:
- Choose a base environment (like Node.js 18)
- Add your code and dependencies
- Tell the container what command to run on startup
After writing the Dockerfile, run docker build and your image is ready. Sounds simple? It actually isn’t that complex, but the devil is in the details. Let’s talk about those core instructions.
6 Essential Instructions
FROM - Choose Your Base Image
FROM must be the first instruction in a Dockerfile (except for comments and ARG). It determines what your “foundation” looks like.
Just like choosing a foundation for a house, writing a Dockerfile starts with selecting a base image. Node.js app? Use node:18-alpine. Python project? python:3.11-slim is a good choice. Nginx for reverse proxy? Go with nginx:alpine.
# Choose Node.js 18 Alpine Linux as base image
FROM node:18-alpine
Let me explain the difference between alpine and slim. Alpine is based on Alpine Linux, an ultra-lightweight image at just 5MB, perfect for production. A full node image is 900MB—180 times larger. But alpine has a gotcha: it uses musl libc instead of glibc, so some native dependencies might fail. If you encounter weird compilation errors, try switching to node:18-slim.
Common beginner mistake: Randomly picking a node image that doesn’t match your project requirements, leading to dependency installation errors. Remember: use the Node version FROM that matches what’s in package.json.
RUN - Execute Commands During Build
RUN executes commands during image build, used for installing software, creating directories, modifying config files, etc. Key point: each RUN creates a new image layer.
Here’s a bad example:
# ❌ Bad approach: creates 3 image layers
RUN apt-get update
RUN apt-get install -y python3
RUN apt-get clean
Each RUN adds a layer to the image, like layers of an onion wrapping outward. The problem is Docker’s layered storage mechanism—even if you delete files later, the data from previous layers remains, and the image size stays large. I made this mistake before, writing 7 RUN commands to install various things. Final image: 2GB. Took half an hour to upload to the server.
The correct approach is chaining commands with &&:
# ✅ Recommended: creates only 1 image layer
RUN apt-get update && \
    apt-get install -y python3 && \
    apt-get clean && \
    rm -rf /var/lib/apt/lists/*
Notice the backslash \ is a line continuation character, making the command less crowded. That final rm is crucial—cleaning package cache saves dozens of MB.
Another trap: never write RUN apt-get update alone. Docker caches each layer. If update is in its own layer, later software installations might use stale cache, leading to installation failures. Always combine update and install.
COPY vs ADD - Copying Files
Both instructions copy files into the image, but COPY is simple and direct, while ADD has more features but can cause issues. Docker’s official recommendation: use COPY unless you need ADD’s special features.
Here’s COPY’s basic usage:
# Copy a single file
COPY package.json /app/

# Copy an entire directory
COPY ./src /app/src

# Copy all current directory contents to container's /app
COPY . /app
Seems simple? But there’s a critical misconception—paths are relative to the build context, not the Dockerfile.
What’s a build context? It’s the directory specified by the dot (.) at the end of docker build. For example, if you run docker build . in your project root, the build context is the project root directory, and COPY can only access files in this directory and its subdirectories.
This is why I got that error at the beginning:
# ❌ Wrong: trying to access parent directory
COPY ../config.json /app/

# ❌ Wrong: trying to access absolute path
COPY /opt/myfile.txt /app/
The first tries to access the parent directory, the second an absolute path—both will fail. Docker is designed this way for security and reproducible builds—you can’t randomly access any file on the host.
Solutions:
- Move config.json into the project directory
- Or run build from parent directory:
docker build -f myproject/Dockerfile .
Now about ADD. Besides copying files, ADD automatically extracts tar archives and can download files from URLs:
# ADD auto-extracts
ADD myarchive.tar.gz /app/

# ADD can download URLs (not recommended)
ADD https://example.com/file.txt /app/
Sounds convenient? The problem is opaque behavior. When someone sees ADD, they don’t know if the file will be extracted or not, making it error-prone. I’d say, if you need extraction, explicitly write RUN tar -xzf, and if you need downloads, use RUN curl. Clear and straightforward.
WORKDIR - Set Working Directory
WORKDIR is like Linux’s cd command—it sets the working directory for subsequent instructions. If the directory doesn’t exist, Docker creates it automatically.
WORKDIR /app
COPY . .  # Now copies to /app
RUN npm install  # Executes in /app
Use absolute paths, not relative ones. Relative paths are based on the previous WORKDIR, which gets confusing.
With WORKDIR, you don’t need to write cd /app && in every RUN command. The code looks much cleaner.
CMD vs ENTRYPOINT - Container Startup Commands
These two are the most confusing. Simple rule: CMD can be overridden, ENTRYPOINT cannot.
First, CMD. It sets the default command when the container starts:
CMD ["node", "server.js"]With this, docker run my-app executes node server.js. But if you run docker run my-app npm test, CMD is overridden and actually executes npm test.
Now ENTRYPOINT. It defines the container’s main process and won’t be overridden:
ENTRYPOINT ["node"]
CMD ["server.js"]
With this combination, docker run my-app executes node server.js, and docker run my-app script.js executes node script.js. See the difference? ENTRYPOINT is fixed, and CMD or docker run parameters are appended after ENTRYPOINT.
When to use which?
- CMD only: Application services that might need different startup methods (like running
npm startin production,npm testin testing) - ENTRYPOINT + CMD combo: Tool images where the main command is fixed and only parameters differ (like Python scripts where the main command is
pythonand the script name is the parameter) - ENTRYPOINT only: Very specific scenarios where the container does one thing only
Here’s a comparison:
# Scenario 1: Web app (using CMD)
FROM node:18-alpine
WORKDIR /app
COPY . .
CMD ["npm", "start"]
# docker run my-app → npm start
# docker run my-app npm test → npm test (CMD overridden)

# Scenario 2: Python tool (using ENTRYPOINT + CMD)
FROM python:3.11-slim
ENTRYPOINT ["python"]
CMD ["main.py"]
# docker run my-tool → python main.py
# docker run my-tool script.py → python script.py
I was confused at first too, but then I remembered this phrase: ENTRYPOINT is “what to do”, CMD is “how to do it”.
ENV - Environment Variables
ENV sets environment variables that take effect when the container runs. You can use these variables in subsequent RUN, CMD, and other instructions.
ENV NODE_ENV=production
ENV PORT=3000

# Use in RUN
RUN echo "Environment: $NODE_ENV"

# App code can also read these environment variables
CMD ["node", "server.js"]
Common uses:
- Set
NODE_ENV=productionto tell Node.js this is production - Set
PATHto add custom command paths - Configure app parameters (port numbers, database addresses, etc.)
Note that ENV variables persist in the final image. If they contain sensitive info (like passwords), don’t use ENV. Pass them at runtime via docker run -e or use Docker Secrets.
Hands-On Practice - Build Your First Image
How to Build Your First Docker Image
Step-by-step guide to creating a Dockerfile and building a Node.js application image
⏱️ Estimated time: 15 min
- 1
Step1: Prepare the project
Create a simple Node.js app with package.json and server.js. The app should have a basic Express server listening on port 3000. - 2
Step2: Write the Dockerfile
Create a Dockerfile in the project root with: FROM node:18-alpine, WORKDIR /app, COPY package*.json, RUN npm install, COPY . ., EXPOSE 3000, and CMD ["npm", "start"]. - 3
Step3: Build the image
Run `docker build -t my-node-app:1.0 .` in the project root. Docker will execute each instruction sequentially, creating layers and caching them for faster subsequent builds. - 4
Step4: Run the container
Execute `docker run -p 3000:3000 my-node-app:1.0` to start the container. The -p flag maps host port 3000 to container port 3000. - 5
Step5: Verify it works
Open http://localhost:3000 in your browser. You should see 'Hello from Docker!' confirming the container is running successfully.
After all that theory, let’s get hands-on to truly understand. We’ll use a simple Node.js application as an example to build your first Docker image step by step.
Step 1: Prepare the Project
Create the simplest Node.js application:
mkdir my-node-app
cd my-node-app
Create package.json:
{
  "name": "my-node-app",
  "version": "1.0.0",
  "main": "server.js",
  "scripts": {
    "start": "node server.js"
  },
  "dependencies": {
    "express": "^4.18.2"
  }
}
Create server.js:
const express = require('express');
const app = express();
const PORT = 3000;

app.get('/', (req, res) => {
  res.send('Hello from Docker!');
});

app.listen(PORT, () => {
  console.log(`Server running on port ${PORT}`);
});
Step 2: Write the Dockerfile
Create Dockerfile in the project root (note: no file extension):
# 1. Choose base image
FROM node:18-alpine

# 2. Set working directory
WORKDIR /app

# 3. Copy dependency files (leverage cache)
COPY package*.json ./

# 4. Install dependencies
RUN npm install --production

# 5. Copy application code
COPY . .

# 6. Expose port
EXPOSE 3000

# 7. Start application
CMD ["npm", "start"]
Why copy package.json and source code separately? It’s all about Docker’s caching mechanism.
Docker builds sequentially, with each instruction as a layer. If a layer changes, all subsequent layers rebuild. package.json rarely changes, but source code changes frequently. If you copy all files first then install dependencies, every code change triggers dependency reinstallation—super slow.
With this order, as long as package.json doesn’t change, Docker uses the cached dependency layer and jumps straight to copying code. Build speed increases dramatically.
Step 3: Build the Image
In the project root, execute:
docker build -t my-node-app:1.0 .Parameter explanation:
-t my-node-app:1.0: Tag the image, format isname:version.: Build context, pointing to current directory
You’ll see a bunch of terminal output, each step corresponding to a Dockerfile instruction. If all goes well, you’ll see Successfully built xxx at the end.
Step 4: Run the Container
docker run -p 3000:3000 my-node-app:1.0Parameter explanation:
-p 3000:3000: Port mapping, format ishost-port:container-portmy-node-app:1.0: Image to run
You’ll see terminal output “Server running on port 3000”.
Step 5: Verify It Works
Open your browser and visit http://localhost:3000. Seeing “Hello from Docker!” means success!
Press Ctrl+C to stop the container.
Let’s Recap
The entire process:
- Write code (package.json + server.js)
- Write Dockerfile (tell Docker how to package)
- Build image (
docker build) - Run container (
docker run)
Not that complex, right? The key is understanding what each instruction does, plus the concepts of build context and caching mechanism.
Beginner Pitfall Guide
We’ve covered the correct approach. Now let’s discuss the traps beginners most easily fall into. I’ve hit all of these, so I can save you some time.
Pitfall 1: Build Context Path Errors
Symptom: COPY instruction errors “no such file or directory” even though the file is right there.
Cause: COPY paths are relative to the build context, not the Dockerfile.
# ❌ Wrong: trying to access parent directory
COPY ../config.json /app/

# ❌ Wrong: trying to access absolute path
COPY /opt/myfile.txt /app/Solutions:
- Move the file into the project directory
- Or adjust the build command:
docker build -f subdir/Dockerfile .(use -f to specify Dockerfile location, the final dot still uses parent directory as context)
There’s a hidden trap too: if you run docker build . in the root directory, Docker sends the entire directory to the Docker daemon, including large folders like node_modules and .git. I once sent several GB and waited 10 minutes before building even started.
Solution: create a .dockerignore file to exclude unnecessary files:
node_modules
.git
.env
*.log
Pitfall 2: Too Many Layers Bloating Image Size
Symptom: Image size is huge—code is just a few MB, but image is several GB.
Cause: Each RUN/COPY/ADD creates a new layer. Even if you delete files later, data from previous layers remains.
# ❌ Creates 7 layers, each preserving data
RUN apt-get update
RUN apt-get install -y curl
RUN apt-get install -y git
RUN curl -o tool.sh https://example.com/tool.sh
RUN chmod +x tool.sh
RUN ./tool.sh
RUN rm tool.sh # This deletion is useless! tool.sh still exists in previous layerSolution: Merge RUN instructions to complete install, use, and cleanup in the same layer:
# ✅ Creates only 1 layer, cleanup effective in same layer
RUN apt-get update && \
    apt-get install -y curl git && \
    curl -o tool.sh https://example.com/tool.sh && \
    chmod +x tool.sh && \
    ./tool.sh && \
    rm tool.sh && \
    apt-get clean && \
    rm -rf /var/lib/apt/lists/*
I wrote 7 separate RUN commands before, ending up with a 2GB image. After merging, it dropped to 200MB—10x difference.
Pitfall 3: Dependency Cache Invalidation
Symptom: Every build reinstalls dependencies, super slow.
Cause: Wrong COPY order—copying code and dependency files together means every code change triggers dependency reinstall.
# ❌ Wrong order: changing code triggers dependency reinstall
COPY . .
RUN npm install
Docker’s cache is sequential. With this approach, as soon as source code changes (even just a comment), the COPY layer changes and npm install has to rerun.
Solution: Copy dependency files first, install dependencies, then copy source code:
# ✅ Correct order: only package.json changes trigger reinstall
COPY package*.json ./
RUN npm install
COPY . .
This way, changing source code won’t trigger npm install rerun. Build speed drops from 5 minutes to 10 seconds. Sweet!
Extra Tip: EXPOSE Isn’t Required
Many tutorials include EXPOSE 3000, and beginners think without it the port can’t be accessed. Actually, EXPOSE is just documentation, telling others which port this image uses. It works without it.
Port mapping is really controlled by the docker run -p command:
# Even if Dockerfile has no EXPOSE, this still works
docker run -p 3000:3000 my-app
That said, it’s recommended to include EXPOSE for easier understanding.
Conclusion
After all that, Dockerfile basics boil down to three key points:
- Understand core instructions: FROM chooses base image, RUN installs stuff, COPY moves files, CMD starts the app. WORKDIR and ENV are helpers
- Grasp build context: Remember COPY can only access the directory specified by the dot at the end of
docker build. Don’t try accessing parent directories or absolute paths - Leverage caching: Put less-frequently-changing operations (installing dependencies) first, frequently-changing ones (copying code) later. Merge RUN instructions to reduce layers
Go find one of your small projects and give it a try. Start with the most basic Dockerfile, just get it running—don’t aim for perfection. Once you’re comfortable, move on to multi-stage builds and image optimization techniques.
Docker isn’t that hard. The key is hands-on practice. My first Dockerfile threw errors all night, but once I figured it out, it was actually pretty straightforward. You’ve got this.
What to learn next:
- Docker Compose (managing multi-container applications)
- Multi-stage builds (further reducing image size)
- Docker networking and volumes (container communication and data persistence)
Best of luck building your first Docker image! Feel free to drop questions in the comments.
FAQ
What is the difference between COPY and ADD in Dockerfile?
• Simple and direct - it only copies files
ADD:
• Can also extract archives and download from URLs
• This opaque behavior makes it error-prone
Docker officially recommends using COPY unless you specifically need ADD's special features.
Why does my Docker image size keep growing even after deleting files?
Even if you delete files in a later layer, the data remains in previous layers.
Solution: merge RUN commands to do install, use, and cleanup in the same layer.
What's the difference between CMD and ENTRYPOINT?
• Sets a default command that can be overridden when running the container
• Use for flexible startup commands
ENTRYPOINT:
• Defines the main process and cannot be overridden
• Arguments are appended to it
• Use ENTRYPOINT + CMD for tool images with fixed commands
Why should I copy package.json before source code?
If you copy source code first, every code change invalidates the cache and triggers dependency reinstallation.
Copying package.json first means only dependency changes trigger reinstalls, speeding up builds 10x.
Can I access files outside the build context in Dockerfile?
You cannot access parent directories or absolute paths.
Move files into the project directory or adjust the build command.
What is .dockerignore and why do I need it?
This prevents sending large folders like node_modules and .git to Docker, significantly speeding up builds and reducing image size.
Is EXPOSE required in Dockerfile?
Port mapping is controlled by `docker run -p`.
However, including EXPOSE is recommended for clarity and better tooling support.
12 min read · Published on: Dec 17, 2025 · Modified on: Apr 1, 2026
Related Posts
shadcn/ui Composition Patterns: Best Practices for Combining Components

shadcn/ui Composition Patterns: Best Practices for Combining Components
Astro + Tailwind: Configuring Island Components and Global Styles Without Conflicts

Astro + Tailwind: Configuring Island Components and Global Styles Without Conflicts
React Compiler + shadcn/ui: Frontend Development in the Auto-Optimization Era

Comments
Sign in with GitHub to leave a comment