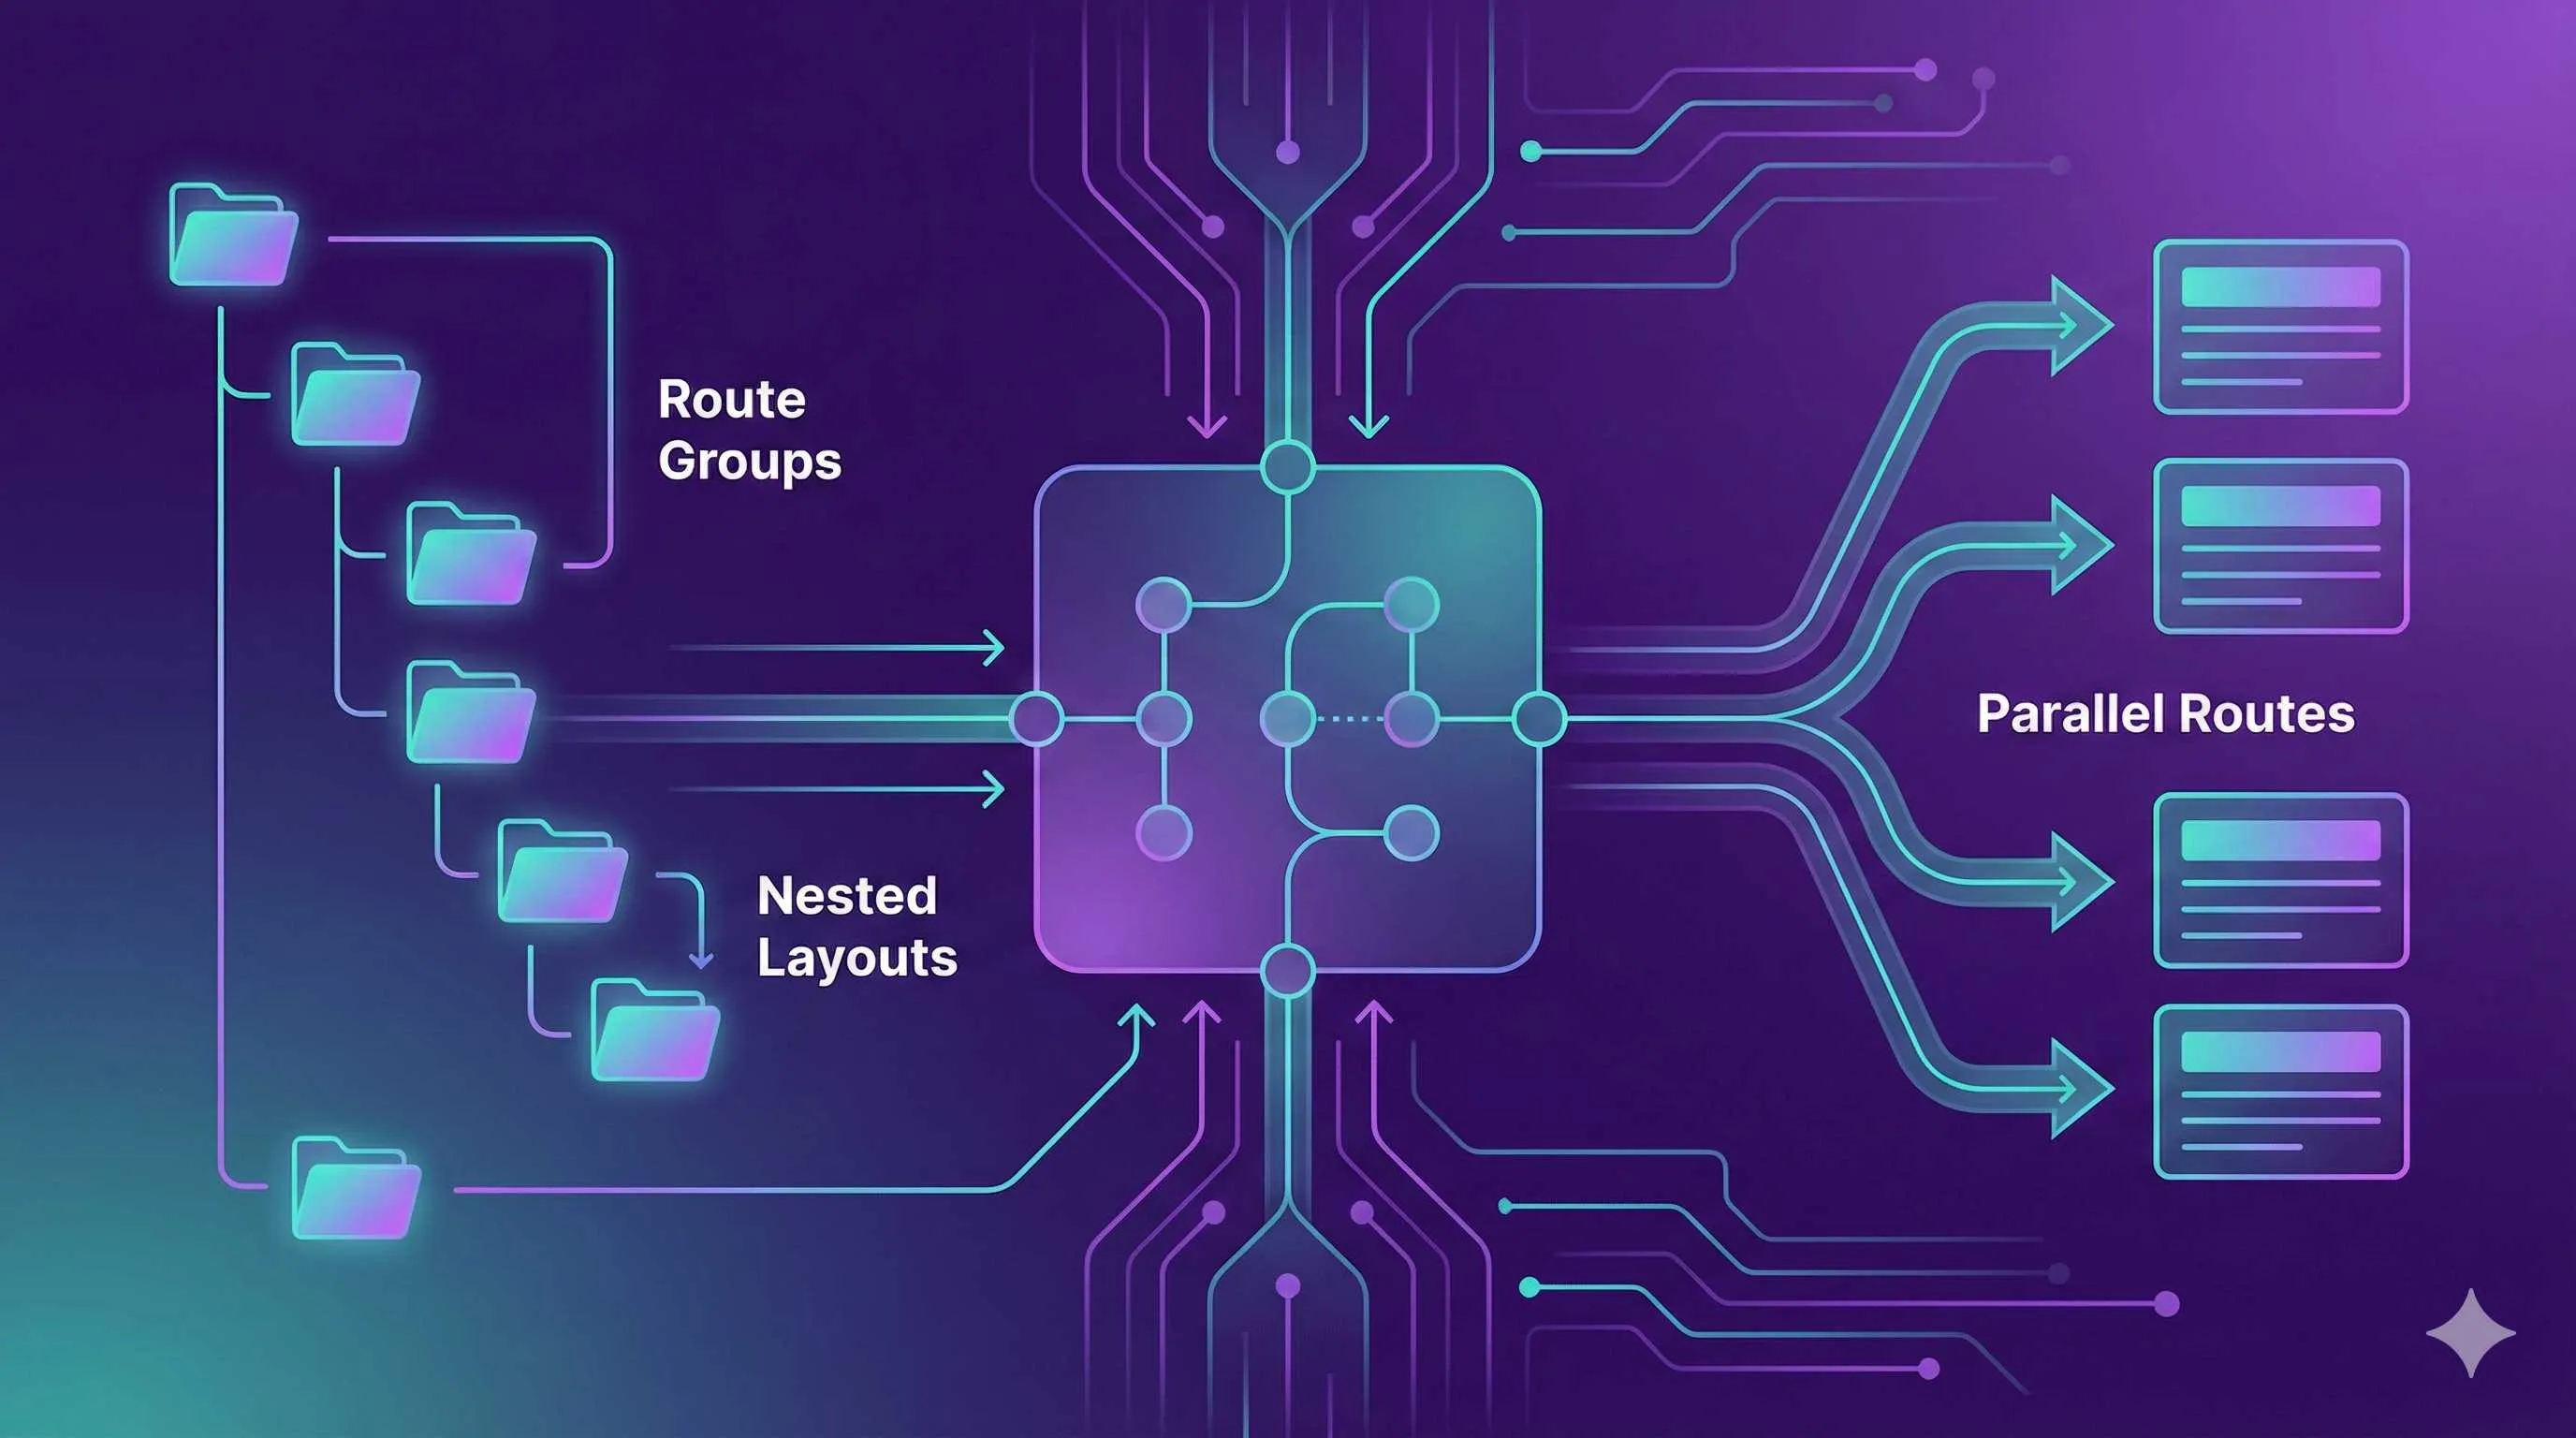
Next.js App Router in Practice: Solving Large Project Directory Chaos with Route Groups and Nested Layouts
1 AM. I stared blankly at the VS Code file tree on the left side of my screen. Over 120 folders cluttered the app directory, and I was trying to find the backend user management page. After five minutes of switching between dashboard-user-list, admin-users, and backend-user-management folders – they all looked the same.
Even worse was the morning code review. Mike had added a new /about route, which collided with the /about route the marketing team submitted last week. They stared at each other: “Your ‘about’ is for ‘about us,’ mine is for ‘about product’ – why should I change mine?”
To be honest, this wasn’t the first time. When the project started with just a dozen pages, the flat directory structure looked pretty clean. Six months later, the features multiplied tenfold, and the entire app directory became like an unorganized closet – you know the stuff is in there, but you have to dig through everything each time.
If you’re also working on a Next.js project, if your team has more than three people, if you have more than 50 pages, chances are you’ll encounter the same problems. The good news is that Next.js App Router actually provides four features specifically designed to solve this: route groups, nested layouts, parallel routes, and intercepting routes. But most tutorials online are demo-level “Hello World” examples, and when it comes to real projects, you’re still confused.
In this article, I’ll use a real e-commerce project example to show you how to actually use these four features, and how to reorganize a messy directory into a maintainable and scalable structure.
The Pain Points - Three Major Issues with Traditional Directory Structure
The Flat Directory Dilemma
Let’s first look at what our previous directory looked like:
app/
├── page.tsx              # Homepage
├── about/page.tsx        # About us
├── products/page.tsx     # Product list
├── product-detail/[id]/page.tsx
├── cart/page.tsx
├── checkout/page.tsx
├── dashboard/page.tsx    # Backend homepage
├── dashboard-users/page.tsx
├── dashboard-users-active/page.tsx
├── dashboard-users-blocked/page.tsx
├── dashboard-orders/page.tsx
├── dashboard-orders-pending/page.tsx
├── dashboard-settings/page.tsx
├── auth-login/page.tsx   # Login
├── auth-register/page.tsx
└── ... (80+ more folders)
Just looking at it gives you a headache. What’s worse is that the URL paths also become strange: /dashboard-users-active instead of /dashboard/users/active. To avoid conflicts, we had to add various prefixes to folder names, but that just masks the problem.
You can’t tell at a glance which pages belong to the frontend, which belong to the backend, and which are authentication-related. New team members spend days just familiarizing themselves with the directory structure.
Layout Duplication and Maintenance Difficulties
The frontend and backend have completely different layouts. The frontend has a top navigation bar and footer, while the backend has a sidebar and permission controls. The traditional approach is to manually import layouts in each page component:
// app/dashboard-users/page.tsx
import DashboardLayout from '@/components/DashboardLayout'

export default function UsersPage() {
  return (
    <DashboardLayout>
      <div>User management content</div>
    </DashboardLayout>
  )
}
This approach has several problems. First, it’s easy to forget – you create a new backend page, forget to add the layout, and the page looks bare. Second, it’s inconsistent – some people use DashboardLayout, others use AdminLayout, and eventually, maintenance becomes a mess.
What’s even worse is that if you need to modify the backend layout (like changing the sidebar style), you might need to check 20 files to confirm each page is using the correct layout component. To be honest, every time I modify a layout, I’m nervous.
Modal and Popup Route Dilemma
The product manager made a request: when users click on a product in the product list page, show details in a modal, and the URL should change to /product/123 so users can share the link. Sounds reasonable, but implementing it is a headache.
The traditional approach is to use client-side state management, manually control the modal’s show/hide, and then manually manipulate the URL. The code is messy, and there’s a fatal problem: if users refresh the page, the modal disappears, resulting in a poor experience.
You might say, just make two versions – one modal version and one full-page version. That’s possible, but it means maintaining two copies of the same content. When the product logic changes, both have to change, which is prone to bugs.
An Instagram-like experience – clicking an image in the feed opens a modal, refreshing the page shows the full image – looks simple, but implementing it with traditional routing is really troublesome.
Route Groups - Logical Grouping Without Affecting URLs
What Are Route Groups
Simply put, wrap folder names in parentheses, like (marketing), and the name inside the parentheses won’t appear in the URL. Sounds a bit abstract, let’s look at the code:
app/
├── (marketing)/           # Frontend marketing pages group
│   ├── layout.tsx         # Frontend-specific layout
│   ├── page.tsx           # URL: /
│   ├── about/page.tsx     # URL: /about
│   └── products/page.tsx  # URL: /products
├── (shop)/                # E-commerce functionality group
│   ├── layout.tsx
│   ├── cart/page.tsx      # URL: /cart
│   └── checkout/page.tsx  # URL: /checkout
└── (dashboard)/           # Backend management group
    ├── layout.tsx
    ├── dashboard/page.tsx # URL: /dashboard
    ├── users/page.tsx     # URL: /users (not /dashboard/users!)
    └── orders/page.tsx    # URL: /orders
Notice that (marketing), (shop), and (dashboard) – the names inside the parentheses don’t appear in the URL. (marketing)/about/page.tsx still routes to /about, not /marketing/about.
You might think, isn’t this redundant? The names in parentheses don’t affect the URL, so why have them?
Actually, the core value of route groups lies in organizing code rather than affecting routing. They let you group routes by business logic, team division, or functional modules. The directory structure becomes clear at a glance, but the URLs don’t become lengthy.
Real-World Case: Grouping by Team
Our team has three groups: the marketing group handles the website and promotional pages, the product group handles e-commerce functionality, and the backend group handles the management system. Previously, everyone worked in the same app directory, and file conflicts were commonplace. After using route groups:
app/
├── (team-marketing)/      # Marketing team responsible
│   ├── layout.tsx
│   ├── page.tsx           # Homepage
│   ├── about/page.tsx
│   └── pricing/page.tsx
├── (team-product)/        # Product team responsible
│   ├── layout.tsx
│   ├── products/page.tsx
│   └── product/[id]/page.tsx
└── (team-backend)/        # Backend team responsible
    ├── layout.tsx
    ├── dashboard/page.tsx
    └── admin/page.tsx
The benefits are obvious:
-
Reduced file conflicts. The marketing group works in
(team-marketing), the product group works in(team-product), and everyone stays in their lane. Git merge conflicts decreased significantly. -
Clearer code reviews. When looking at a Pull Request, you can immediately tell which team’s code is being changed.
-
Independent layouts. Each route group can have its own
layout.tsx. Marketing pages use marketing-style layouts, backend pages use backend-style layouts, without manually importing them in each page.
Another Case: Grouping by Layout Type
Some projects group by layout type rather than by team:
app/
├── (with-nav)/            # Pages with top navigation
│   ├── layout.tsx
│   ├── page.tsx
│   ├── about/page.tsx
│   └── products/page.tsx
├── (fullscreen)/          # Fullscreen pages (no navigation)
│   ├── layout.tsx
│   └── video/[id]/page.tsx
└── (auth)/                # Authentication pages (simple layout)
    ├── layout.tsx
    ├── login/page.tsx
    └── register/page.tsx
Login and registration pages usually don’t need a top navigation bar and footer, so use the (auth) route group to manage them separately with a simple layout. Video playback pages need fullscreen display, so they’re also grouped separately.
Important Notes
Route groups are useful, but there’s a pitfall: different route groups can’t have the same route path.
For example, you can’t have both (marketing)/about/page.tsx and (shop)/about/page.tsx, because they both resolve to /about, and Next.js doesn’t know which one to use, resulting in an error.
The solution is to plan routes carefully to ensure each path is unique. If you really can’t avoid it, add a prefix to one of them, like (shop)/about-us/page.tsx.
Also, route group names should be meaningful. Don’t use meaningless names like (group1) or (group2). Use names like (marketing), (dashboard), and (auth) that are immediately understandable, which facilitates team collaboration.
Nested Layouts - Automatic Layout Inheritance
How Nested Layouts Work
Route groups solve the directory organization problem, but there’s still another issue: the hierarchy of layouts. For example, a backend management system typically has this structure:
- Level 1: Top title bar + sidebar (shared by all backend pages)
- Level 2: User management module has its own tabs (active users, blocked users)
- Level 3: Specific page content
Next.js nested layouts are designed for this scenario. You place layout.tsx in folders at different levels, and they automatically nest:
app/(dashboard)/
├── layout.tsx              # Level 1 layout: top navigation + sidebar
├── users/
│   ├── layout.tsx          # Level 2 layout: user management tabs
│   ├── active/page.tsx     # /users/active
│   └── blocked/page.tsx    # /users/blocked
└── orders/
    ├── layout.tsx          # Level 2 layout: order management tabs
    ├── pending/page.tsx
    └── completed/page.tsx
When a user visits /users/active, the rendering hierarchy looks like this:
DashboardLayout (Level 1)
  └─ UsersLayout (Level 2)
      └─ ActiveUsersPage (Page)
The code looks like this:
// app/(dashboard)/layout.tsx - Level 1 layout
export default function DashboardLayout({
  children
}: {
  children: React.ReactNode
}) {
  return (
    <div className="dashboard-container">
      <TopBar />
      <div className="content-area">
        <Sidebar />
        <main>{children}</main>
      </div>
    </div>
  )
}

// app/(dashboard)/users/layout.tsx - Level 2 layout
export default function UsersLayout({
  children
}: {
  children: React.ReactNode
}) {
  return (
    <div className="users-section">
      <div className="tabs">
        <Link href="/users/active">Active Users</Link>
        <Link href="/users/blocked">Blocked Users</Link>
      </div>
      {children}
    </div>
  )
}

// app/(dashboard)/users/active/page.tsx - Page
export default function ActiveUsersPage() {
  return <div>Active user list...</div>
}
See? The page component doesn’t need to manually import layouts – Next.js automatically wraps them for you.
Performance Benefits of Partial Rendering
The most powerful feature of nested layouts is partial rendering. When you switch from “Active Users” to “Blocked Users”:
- Level 1 layout (top navigation, sidebar) doesn’t re-render
- Level 2 layout (tabs) also doesn’t re-render
- Only the page content re-renders
This means two things:
-
Better performance. No need to repeatedly render the same layout components, making page transitions faster.
-
Client-side state preservation. If the sidebar has a collapse/expand state, switching pages won’t lose that state.
In a project I worked on before, the backend sidebar had a search box, and when users entered content and then switched pages, the search box content would be cleared, which was a poor experience. After using nested layouts, this problem was naturally solved – the sidebar component doesn’t re-render at all, so of course the state is preserved.
Real-World Case: Multi-Level Navigation
Real projects often have three or even four levels of navigation. For example:
- Backend management (Level 1 layout: top bar + sidebar)
- User management (Level 2 layout: user management tabs)
- Active users (Level 3: page content)
- Blocked users (Level 3: page content)
- Order management (Level 2 layout: order management tabs)
- Pending orders (Level 3: page content)
- Completed orders (Level 3: page content)
- User management (Level 2 layout: user management tabs)
The directory structure perfectly corresponds to this hierarchy, and the code logic is crystal clear:
app/(dashboard)/
├── layout.tsx              # Level 1: top bar + sidebar
├── users/
│   ├── layout.tsx          # Level 2: user management area
│   ├── active/page.tsx     # Level 3: active users
│   └── blocked/page.tsx    # Level 3: blocked users
└── orders/
    ├── layout.tsx          # Level 2: order management area
    ├── pending/page.tsx    # Level 3: pending
    └── completed/page.tsx  # Level 3: completed
Performance Optimization Tips
Nested layouts are Server Components by default, which is good news – it means layout logic is rendered on the server, without increasing client-side JavaScript bundle size.
But if your layout has interactions (like search boxes, dropdown menus), you need to extract the interactive parts as Client Components:
// app/(dashboard)/layout.tsx - Keep as Server Component
import SearchBar from '@/components/SearchBar' // Client Component

export default function DashboardLayout({ children }) {
  return (
    <div>
      <SearchBar /> {/* Client Component */}
      <main>{children}</main>
    </div>
  )
}

// components/SearchBar.tsx - Client Component
'use client'
import { useState } from 'react'

export default function SearchBar() {
  const [query, setQuery] = useState('')
  // ...interaction logic
}
This way, you maintain the server-side advantages of layouts while not affecting interactive functionality.
Another trick is to set up loading.tsx for each layout level to show loading states. User experience will be much better:
app/(dashboard)/
├── layout.tsx
├── loading.tsx             # Level 1 loading state
└── users/
    ├── layout.tsx
    ├── loading.tsx         # Level 2 loading state
    └── active/
        ├── page.tsx
        └── loading.tsx     # Level 3 loading state
Each level can have its own loading animation without interfering with each other.
Parallel Routes - Rendering Multiple Pages Simultaneously
What Problem Do Parallel Routes Solve
Dashboard pages typically display multiple independent modules simultaneously, such as:
- Top left: data analytics panel
- Top right: team members panel
- Bottom: latest notifications panel
Each panel’s data is fetched independently, and loading speeds vary. The traditional approach is to write all this content in a single page component, but there’s a problem: if one panel’s data is slow, the entire page gets stuck in the loading state.
Parallel routes let you split these modules into independent “slots,” where each slot has its own loading state, error handling, and can even be conditionally rendered.
Basic Syntax
Creating parallel routes is simple – use the @ prefix for folder names:
app/dashboard/
├── layout.tsx
├── @analytics/page.tsx  # Analytics slot
├── @team/page.tsx       # Team slot
├── @notifications/page.tsx  # Notifications slot
└── page.tsx             # Default page
Notice @analytics, @team, @notifications – these folders starting with @ are slots.
Then in layout.tsx, you can receive these slots as props:
// app/dashboard/layout.tsx
export default function DashboardLayout({
  children,
  analytics,
  team,
  notifications,
}: {
  children: React.ReactNode
  analytics: React.ReactNode
  team: React.ReactNode
  notifications: React.ReactNode
}) {
  return (
    <div className="dashboard-grid">
      <div className="main-content">{children}</div>
      <div className="top-panels">
        <div className="panel">{analytics}</div>
        <div className="panel">{team}</div>
      </div>
      <div className="bottom-panel">{notifications}</div>
    </div>
  )
}
Each slot corresponds to an independent page component and can have its own loading and error states:
app/dashboard/
├── @analytics/
│   ├── page.tsx
│   ├── loading.tsx      # Analytics panel loading state
│   └── error.tsx        # Analytics panel error handling
├── @team/
│   ├── page.tsx
│   ├── loading.tsx
│   └── error.tsx
└── @notifications/
    ├── page.tsx
    ├── loading.tsx
    └── error.tsx
The benefit is that if the analytics panel data is slow, only that panel shows a loading animation, while other panels display normally. If one panel errors, it doesn’t affect the entire page.
Real-World Case: Conditional Rendering
Another powerful feature of parallel routes is conditional rendering. For example, the team panel should only be visible to administrators:
// app/dashboard/layout.tsx
import { auth } from '@/lib/auth'

export default async function DashboardLayout({
  analytics,
  team,
  notifications,
}) {
  const user = await auth()
  const isAdmin = user?.role === 'admin'

  return (
    <div className="dashboard-grid">
      <div>{analytics}</div>
      {isAdmin && <div>{team}</div>}  {/* Only visible to admins */}
      <div>{notifications}</div>
    </div>
  )
}
The Role of default.tsx
Parallel routes have an easy pitfall. When a user navigates from /dashboard to /dashboard/settings, the slots might not have corresponding pages. Next.js doesn’t know what to render and will throw an error.
The solution is to create default.tsx as fallback content:
// app/dashboard/@team/default.tsx
export default function Default() {
  return null  // Or return a placeholder component
}
With default.tsx, when a slot doesn’t have a corresponding page, this fallback content is rendered, avoiding errors.
When to Use Parallel Routes
To be frank, parallel routes aren’t used as widely as route groups and nested layouts. They’re suitable for:
- Dashboard multi-module displays: Multiple independent data panels that need independent loading
- A/B testing: Displaying different slot content based on user groups
- Permission control: Conditionally rendering certain slots based on user permissions
But if it’s just simple stacked content without needing independent loading states, just write it directly in the page component – no need for parallel routes.
Intercepting Routes - Implementing Modal Route
Instagram-Style Experience
To be honest, intercepting routes are the hardest of the four features to understand. The first time I read the documentation, I had no idea what problem it was trying to solve, until I saw the Instagram example.
On Instagram, when you’re browsing your feed and click on an image, the image enlarges in a modal, and the URL changes to /photo/abc123. At this point:
- If you refresh the page, the modal disappears and shows the full image page
- If you share the URL with someone else, they see the full image page, not the modal
- If you click the close button, the modal disappears and you return to the feed
The benefits of this experience are obvious: the URL is shareable, refreshing the page doesn’t lose context, but it maintains smooth client-side navigation. Traditional approaches struggle to achieve this effect.
Intercepting routes are designed to solve this problem.
Basic Syntax
Intercepting routes use a special folder naming convention:
(.)matches same-level routes(..)matches parent-level routes(..)(..)matches grandparent-level routes(...)matches root directory routes
Sounds a bit abstract, let’s look at the code:
app/
├── products/
│   ├── page.tsx                    # Product list page
│   └── (..)product/[id]/page.tsx   # Intercept /product/123, display as modal
└── product/
    └── [id]/page.tsx               # Full product detail page
When a user clicks a product link on the /products page (<Link href="/product/123">):
- Client-side navigation: Triggers interception, renders
(..)product/[id]/page.tsx(modal version) - Direct access to
/product/123or page refresh: Doesn’t trigger interception, renders normalproduct/[id]/page.tsx(full page)
Real-World Case: Product Detail Modal
In an e-commerce project I worked on, there was a requirement: clicking a product on the product list page should open a modal showing details.
Directory structure:
app/
├── (shop)/
│   └── products/
│       ├── page.tsx                     # Product list
│       └── (..)product/[id]/page.tsx    # Modal version
└── product/
    └── [id]/page.tsx                    # Full page version
Modal version code:
// app/(shop)/products/(..)product/[id]/page.tsx
'use client'
import { useRouter } from 'next/navigation'
import Modal from '@/components/Modal'
import ProductDetail from '@/components/ProductDetail'

export default function ProductModal({
  params
}: {
  params: { id: string }
}) {
  const router = useRouter()

  return (
    <Modal onClose={() => router.back()}>
      <ProductDetail id={params.id} />
    </Modal>
  )
}
Full page version:
// app/product/[id]/page.tsx
import ProductDetail from '@/components/ProductDetail'

export default function ProductPage({
  params
}: {
  params: { id: string }
}) {
  return (
    <div className="product-page">
      <ProductDetail id={params.id} />
    </div>
  )
}
Notice that the product detail component (ProductDetail) is reused, just wrapped in different containers. One is a modal, one is a full page.
Combining with Parallel Routes
Using intercepting routes alone can sometimes run into state management issues. A better approach is to combine them with parallel routes:
app/(shop)/products/
├── layout.tsx
├── page.tsx
├── @modal/
│   ├── (..)product/[id]/page.tsx  # Modal slot
│   └── default.tsx                # Default is empty
Layout component:
// app/(shop)/products/layout.tsx
export default function ProductsLayout({
  children,
  modal,
}: {
  children: React.ReactNode
  modal: React.ReactNode
}) {
  return (
    <>
      {children}
      {modal}
    </>
  )
}

// app/(shop)/products/@modal/default.tsx
export default function Default() {
  return null  // Return null when no modal
}
The benefit of this approach is that the modal and main content are completely separated, making state management clearer and easier to understand.
Important Notes
Intercepting routes have several important points to note:
-
Only intercepts on client-side navigation. If users directly type the URL in the browser address bar or refresh the page, interception doesn’t trigger.
-
Need to maintain two versions. Both modal version and full page version need to be implemented. While components can be reused, there’s still some code duplication.
-
Path matching is based on routes, not file system. Route groups don’t affect URLs, so
(..)matches URL paths, not folder paths, which can be confusing.
For example:
app/
├── (shop)/products/
│   └── (..)product/[id]/page.tsx  # Intercepts /product/[id]
Here (..) goes one level up from /products to the root directory, so it matches /product/[id], not /(shop)/product/[id].
When to Use Intercepting Routes
Intercepting routes are suitable for:
- Image galleries: Clicking an image in a list opens a modal showing the large image
- Product details: Clicking a product in a list opens a modal showing details
- Login popups: Login button in navigation opens a modal for login, but
/loginroute can also be accessed directly
Not suitable for:
- Simple popups (that don’t need URL changes)
- Scenarios that don’t need deep linking
Overall, intercepting routes are a very powerful feature, but also the most complex. If your project doesn’t have Instagram-like requirements, it’s okay not to use them for now.
Comprehensive Practice - Complete E-Commerce Project Directory Structure
We’ve covered the four features. Now let’s combine them to see how a real e-commerce project should organize its directories.
Project Requirements
A typical e-commerce project usually has these modules:
Frontend (user-facing):
- Homepage, about us (marketing pages)
- Product list, product details (supports modal)
- Shopping cart, checkout
Backend (admin-facing):
- Dashboard (multi-module display: data analytics, team, notifications)
- User management (active users, blocked users)
- Order management (pending, completed)
Authentication:
- Login, registration (independent layout, no navigation)
Final Directory Structure
app/
├── layout.tsx                          # Root layout
│
├── (marketing)/                        # Frontend route group
│   ├── layout.tsx                      # Frontend layout (header + footer)
│   ├── page.tsx                        # / (Homepage)
│   ├── about/page.tsx                  # /about
│   └── pricing/page.tsx                # /pricing
│
├── (shop)/                             # E-commerce functionality group
│   ├── layout.tsx                      # E-commerce layout
│   ├── products/
│   │   ├── layout.tsx                  # Product list layout (includes modal slot)
│   │   ├── page.tsx                    # /products
│   │   └── @modal/
│   │       ├── (..)product/[id]/page.tsx  # Product detail modal
│   │       └── default.tsx
│   ├── cart/page.tsx                   # /cart
│   └── checkout/page.tsx               # /checkout
│
├── product/
│   └── [id]/page.tsx                   # /product/123 (Full page)
│
├── (dashboard)/                        # Backend route group
│   ├── layout.tsx                      # Backend layout (sidebar + top bar)
│   ├── dashboard/
│   │   ├── layout.tsx                  # Dashboard layout (parallel routes)
│   │   ├── page.tsx                    # /dashboard (default content)
│   │   ├── @analytics/
│   │   │   ├── page.tsx                # Analytics module
│   │   │   ├── loading.tsx
│   │   │   └── default.tsx
│   │   ├── @team/
│   │   │   ├── page.tsx                # Team module
│   │   │   ├── loading.tsx
│   │   │   └── default.tsx
│   │   └── @notifications/
│   │       ├── page.tsx                # Notifications module
│   │       ├── loading.tsx
│   │       └── default.tsx
│   ├── users/
│   │   ├── layout.tsx                  # User management secondary layout
│   │   ├── active/page.tsx             # /users/active
│   │   └── blocked/page.tsx            # /users/blocked
│   └── orders/
│       ├── layout.tsx                  # Order management secondary layout
│       ├── pending/page.tsx            # /orders/pending
│       └── completed/page.tsx          # /orders/completed
│
└── (auth)/                             # Authentication route group
    ├── layout.tsx                      # Simple layout (no navigation)
    ├── login/page.tsx                  # /login
    └── register/page.tsx               # /register
Comparison with Traditional Structure
Let’s compare the traditional flat structure with the new structure:
| Dimension | Traditional Flat Structure | Using Route Groups + Nested Layouts |
|---|---|---|
| File Finding | Need to search through 100+ files, rely on naming prefixes | Grouped by business modules, clear at a glance |
| Layout Management | Manually import layout component in each page | Automatic inheritance, modify once applies everywhere |
| Team Collaboration | Everyone works in the same directory, prone to conflicts | Different teams/modules in different folders |
| URL Clarity | Need prefixes to avoid conflicts (dashboard-users-active) | Clean URLs (/users/active), clear directory structure |
| Modal Experience | Client-side state management, lose state on refresh | Route-driven, refresh shows full page |
| Performance | Re-render layouts when switching pages | Partial rendering, only render changed parts |
Concrete Benefits
After using the new structure, our team’s actual benefits:
-
50% improvement in file finding speed. Previously, finding a page required flipping through several pages; now just go to the corresponding route group.
-
Improved layout modification efficiency. Before, changing the backend sidebar required checking 20 files; now just modify
(dashboard)/layout.tsxonce, and all backend pages are automatically updated. -
60% reduction in code conflicts. Marketing group works in
(marketing), product group works in(shop), backend group works in(dashboard)– everyone minds their own business. -
Faster onboarding for new members. New interns understand the entire project architecture in five minutes just by looking at the directory structure, without much explanation needed.
Some Practical Suggestions
-
Don’t refactor all at once. Choose one module (like backend management) to test first, and after verifying feasibility, spread it to the entire project.
-
Route group names should be meaningful. We use
(marketing),(shop),(dashboard),(auth)– team members understand immediately. -
Documentation is important. Add a “Directory Structure Explanation” section in the project README, explaining the responsibilities of each route group to help new members understand.
-
Combine with TypeScript. Route groups and nested layouts combined with TypeScript path mapping (
@/*) make code organization even clearer.
// tsconfig.json
{
  "compilerOptions": {
    "paths": {
      "@/*": ["./src/*"],
      "@/components/*": ["./src/components/*"],
      "@/app/*": ["./src/app/*"]
    }
  }
}
Best Practices and Important Notes
Route Group Naming Conventions
Route group naming directly affects code maintainability. Our team summarized several rules:
Recommended names:
(marketing)- Marketing-related pages(dashboard)or(admin)- Backend management(auth)- Authentication-related(team-xxx)- Use when grouping by team(feature-xxx)- Use when grouping by feature
Avoid using:
(group1),(group2)- Meaningless names(temp),(test)- Temporary names- Long names like
(marketing-and-sales-pages)- Not concise
Remember, route group names are only for developers to see, they don’t appear in URLs, so name them so team members understand immediately.
Avoiding Route Conflicts
Different route groups can’t have the same route path – this is the easiest pitfall:
❌ Wrong example:
app/
├── (marketing)/about/page.tsx  # URL: /about
└── (shop)/about/page.tsx       # URL: /about - Conflict!
Solutions:
- Plan routes: Draw a route map before starting to ensure all paths are unique
- Add prefixes: If you really need two abouts, add a prefix to one, like
/about-usand/about-product - Adjust directories: Put conflicting routes at different levels
When to Use Parallel Routes
Parallel routes aren’t mandatory, only use them in these scenarios:
Suitable scenarios:
- Dashboard’s multiple independent data panels
- Side-by-side content needing independent loading states
- Different modules rendered conditionally based on user permissions
- A/B testing different content variants
Not suitable scenarios:
- Simple stacked content (just write directly in page component)
- Content that doesn’t need independent loading states
- Static layout areas
If you’re not sure whether to use parallel routes, chances are you don’t need them. It’s an advanced feature, and for most projects, route groups and nested layouts are enough.
Limitations of Intercepting Routes
Intercepting routes are powerful, but have several important points to note:
-
Only intercepts on client-side navigation. If users directly type URLs or refresh pages, interception doesn’t trigger.
-
Need to maintain two versions. Both modal version and full page version need implementation. While components can be reused, there’s still maintenance cost.
-
Path matching is based on routes, not file system. Route groups don’t affect URLs, so
(..)matches URL paths, not folder paths, which can be confusing.
If your requirement doesn’t need URL changes or deep linking, a regular client-side modal is enough – no need for intercepting routes.
Performance Optimization Tips
-
Keep layout components as Server Components. Layouts are Server Components by default, try to maintain this feature, only extract interactive parts as Client Components.
-
Use loading.tsx. Add loading.tsx for each route level to provide friendly loading states, which significantly improves user experience.
-
Use Suspense appropriately. Combine loading.tsx with Suspense for more fine-grained streaming rendering.
-
Avoid excessive nesting. Layout levels shouldn’t exceed 4 – too deep increases complexity and actually harms maintainability.
Migration Strategy
If you’re migrating from Pages Router to App Router, here’s the recommended approach:
-
Incremental migration: app directory and pages directory can coexist, migrate module by module, don’t change everything at once.
-
Migrate layouts first: Refactor layout logic using route groups and nested layouts – this is where you see the most benefit.
-
Then migrate data fetching: Change getServerSideProps to fetch, change getStaticProps to Server Component.
-
Finally migrate routing: Change getStaticPaths to generateStaticParams.
-
Gradual rollout: Use feature flags to control switching between old and new routes, allowing quick rollback if issues occur.
Team Collaboration Suggestions
-
Establish directory structure standards. Write clearly in README or Wiki about each route group’s responsibilities, naming rules, and process for adding new pages.
-
Code review focus. During PR review, focus on checking compliance with routing standards, whether there are route conflicts, and whether layouts are correctly nested.
-
Use ESLint rules. Configure ESLint to check route group naming, prohibit certain paths, etc.
-
Regular refactoring. After each iteration, take time to organize directory structure, delete deprecated pages, rename unreasonable route groups.
Debugging Tips
Debugging route groups and nested layouts can be a bit tricky sometimes. Here are some tips:
-
Check React DevTools. In the browser dev tools’ React tab, you can see the complete component tree to confirm whether layouts are correctly nested.
-
Use console.log. Add console.log in layout components to see if they’re re-rendering repeatedly, whether navigation triggers them every time.
-
Check Network tab. See which requests are from server-side, which are from client-side, confirm data fetching logic is correct.
-
Read Next.js output. In development mode, Next.js outputs lots of useful information, like route conflicts, missing layouts, etc. Pay attention to terminal warnings and errors.
Conclusion
Back to the scene at the beginning of the article: 1 AM, staring blankly at 120 densely packed folders, taking five minutes to find a page.
If your Next.js project encounters the same problems, these four features mentioned in this article will help you:
Route Groups let you group routes by business logic and team division. Directory structure is clear at a glance, but URLs don’t become lengthy.
Nested Layouts automatically handle layout inheritance. No need to manually import layout components in each page. Modifying a layout only requires changing one file.
Parallel Routes let you render multiple independent modules simultaneously. Each module has its own loading state and error handling, suitable for dashboard-style multi-panel scenarios.
Intercepting Routes achieve Instagram-like modal experience – shareable URLs, refreshing doesn’t lose context, but maintains smooth client-side navigation.
My suggestion is to start small. Choose one module (like backend management) to test, refactor using route groups and nested layouts, and see how it goes. After verifying feasibility, spread it to the entire project.
Don’t refactor all code at once – that’s too risky. Incremental migration, step by step, makes it easy to rollback if problems occur.
Finally, here’s a complete e-commerce project directory structure template that you can directly reference or copy. Feel free to leave comments if you have questions.
May your Next.js project directory bid farewell to chaos and become easier to maintain!
FAQ
When should I use route groups?
• Your project has more than 50 folders
• You need different root layouts for different functional areas
• Team collaboration conflicts are frequent
Route groups are especially suitable for multi-team projects, significantly reducing Git conflict rates and making directory structures clearer.
Do route groups affect URLs?
For example, (marketing)/about/page.js has the URL /about, not /marketing/about.
Do nested layouts affect performance?
This means you can preserve state in layouts (like sidebar scroll position, search box content), and these states remain unchanged during page navigation.
What's the difference between parallel routes and regular components?
• Each slot is an independent page fragment
• Can have their own loading.js and error.js
• Load in parallel without affecting each other
Regular components:
• Must wait for all data to load before rendering
• One component error affects the entire page
How do I choose between (.), (..), and (...) for intercepting routes?
• (..) intercepts parent routes
• (...) intercepts from root directory
If unsure, start with (...) to intercept from root, then adjust based on directory structure.
How do I avoid route conflicts?
If you really need routes with the same name, you can add a real directory level to the URL (without parentheses), or rename one of the routes.
How long does it take to refactor a large project?
• Medium projects (50-100 pages): 1-2 weeks
• Large projects: about 1 month
Recommendation: Start with one module as a pilot, verify feasibility, then spread to entire project. Incremental migration has lower risk.
19 min read · Published on: Dec 18, 2025 · Modified on: Mar 3, 2026
Related Posts
AI Keeps Writing Wrong Code? Master These 5 Prompt Techniques to Boost Efficiency by 50%

AI Keeps Writing Wrong Code? Master These 5 Prompt Techniques to Boost Efficiency by 50%
Cursor Advanced Tips: 10 Practical Methods to Double Development Efficiency (2026 Edition)

Cursor Advanced Tips: 10 Practical Methods to Double Development Efficiency (2026 Edition)
Complete Guide to Fixing Bugs with Cursor: An Efficient Workflow from Error Analysis to Solution Verification

Comments
Sign in with GitHub to leave a comment