Cursor Agent Mode Complete Guide: Let AI Handles Your Coding
It was 1 AM, and I was staring at a codebase I’d inherited—over 200 files scattered around waiting for refactoring. In the past, I would’ve needed to ask the AI questions one by one using Chat Mode, bouncing back and forth for two or three hours to get it done. Last week, I tried Agent Mode. I simply told Cursor “upgrade this project from the old Vue version to Vue 3,” grabbed a coffee, and by the time I finished it, the entire project had been modernized and all the breaking change errors were fixed automatically.
Honestly, it changed how I think about coding tools. It’s not “the tool helps me write code”—it’s “the tool codes for me.”
What Is Cursor Agent Mode?
Before jumping to tips, let’s be clear on what Agent Mode really is. Many people confuse it with regular Chat Mode, but the differences are pretty significant.
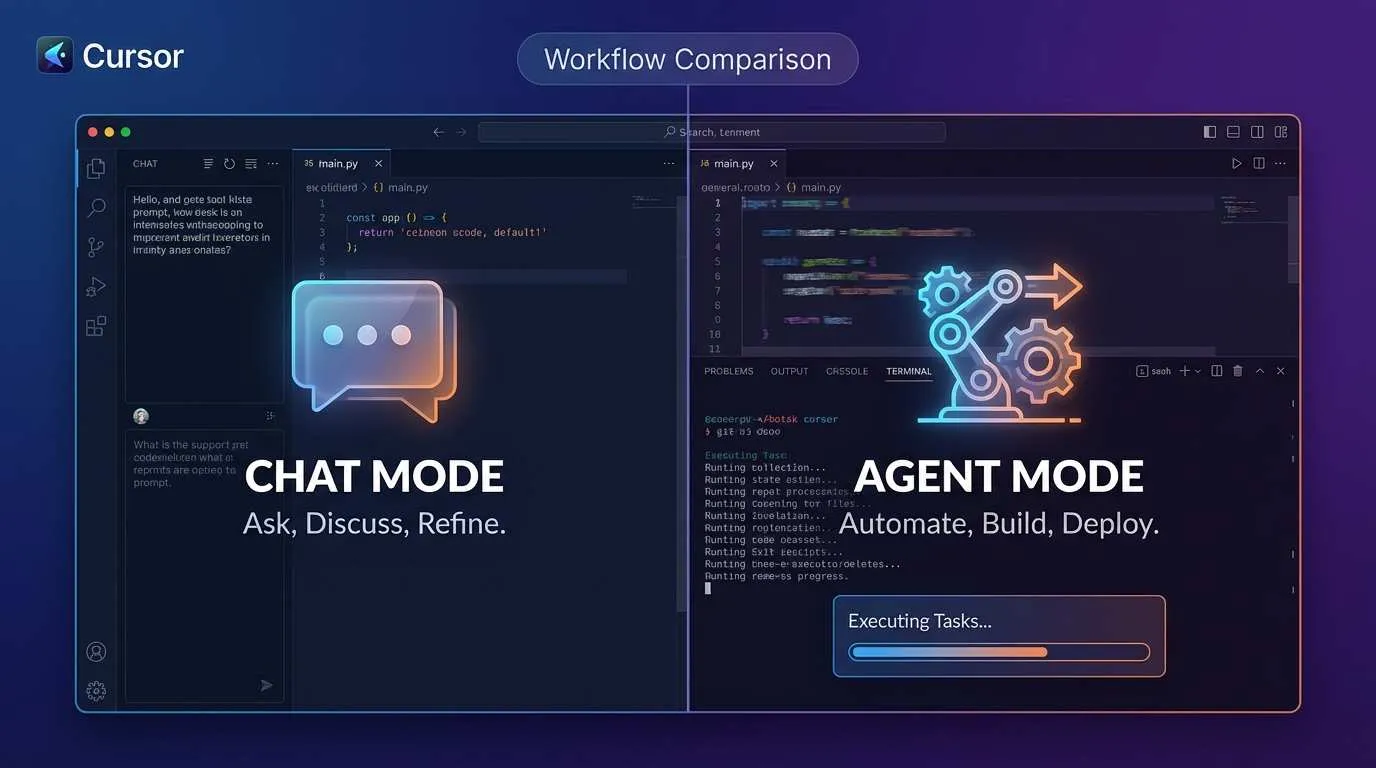
Chat Mode is more like an intelligent coding assistant. You ask “how do I write a React component,” it gives you a component. You hit a bug, you describe the issue, it suggests a fix. The whole process is passive—it’s waiting for your instructions.
Agent Mode is a completely different beast. It’s like having an actual programming partner with agency. You tell it “I need to refactor the entire project,” and it doesn’t just write code—it reads files on its own, understands the project structure, checks test results, spots problems, and fixes them automatically. It can navigate your project, open terminals, run commands, modify multiple files, and then verify the changes work. In short, Agent Mode has “thinking”—it reasons through the complete workflow instead of waiting for you to hand-hold it through each step.
This mode shines for tasks that touch multiple files or require multi-step workflows. Whether it’s scaffolding a new project, major refactoring, or cross-module changes—that’s when Agent Mode’s true power emerges.
Agent Mode vs Chat Mode: Real-World Comparison
Let me show you the difference with an actual example.
Say your task is this: add TypeScript support to an existing Next.js project. The project has 15 pages, 10 API routes, and a year of production history.
With Chat Mode, the flow looks like:
- Step one: Ask “how do I add TypeScript to a Next.js project,” get a tutorial
- Step two: Create tsconfig.json based on the tutorial, configure manually
- Step three: Ask “how do I configure tsconfig.json,” tweak it again and again
- Step four: Rename files from .js to .ts one by one, asking for help as you go
- Step five: Some page errors out due to type issues, ask again for the fix
- Step six: Run npm run build, get a pile of errors, have to ask about each one
In total, you’re asking the AI 10+ times, waiting for code generation each time, and manually copy-pasting. Usually takes an hour, and there’s plenty of room for mistakes.
With Agent Mode, you just say one thing: “upgrade this project to TypeScript, make sure all compilation passes.” Then go scroll through your phone. In the background:
- It reads the entire project and understands the file structure
- Automatically creates and configures tsconfig.json
- Renames files and adds type annotations systematically
- Runs compilation commands on its own, spots errors
- Sees the errors and auto-fixes type issues
- Finally runs a full build to verify everything
5-10 minutes, done. And the code quality is often better than what I’d do manually. The key point: I don’t have to manually do anything—it’s like having a senior engineer do the work.
The distinction is this: Chat Mode is “information exchange,” Agent Mode is “task execution.” One is Q&A, the other is delegation.
Three Must-Learn Agent Mode Techniques
Since Agent Mode is so powerful, how do you use it effectively? I’ve made my share of mistakes in the past six months and narrowed it down to three core techniques. Master these and your productivity can easily double.
Technique 1: Clearly Specify Project Goals and Constraints
This is the easiest mistake to make. Many people give vague instructions. If you just say “optimize this project,” Agent Mode becomes like a driver without a steering wheel—it might go in the wrong direction.
Here’s the right approach:
State your end goal clearly. Don’t say “improve the code,” say “cut first-screen load time from 3 seconds to 1 second.” AI needs a concrete, measurable target.
Define your tech stack and limitations. For example: “This is a React 18 + TypeScript + Tailwind CSS project using pnpm, with a Node 18+ target environment.” Now the AI won’t stupidly install a package that conflicts with your existing stack.
List what’s off-limits. This is critical. I once nearly let Agent rewrite the entire auth system because I didn’t explicitly say “don’t touch auth code.” So write it down in a .cursorrules file: “don’t modify src/auth directory,” “don’t change database schema”—that kind of thing.
My suggestion is to create a .cursorrules file in your project root that clearly lists all constraints. Agent Mode will automatically read it and strictly follow the rules. Much more efficient than repeating yourself every time.
Technique 2: Use Symbol Index to Optimize Context
This feature is a bit hidden—many people don’t know about it. Simply put, Symbol Index is a “symbol table” that Cursor builds for your project in the background. All your functions, classes, and variables get indexed.
Why does this matter? Because Agent Mode needs to understand the whole project, so it reads a lot of files. Without Symbol Index, it has to read all the code to get context, which eats up tons of tokens and is slow. With Symbol Index, AI can quickly know “that function is in this file” or “that class has these methods,” drastically reducing how much code needs to be read.
Enabling Symbol Index is simple: go to Cursor settings, find “Symbol Index,” and turn it on. Wait for the index to build (takes time on the first run, updates automatically after). Next time you use Agent Mode, token usage drops by 30-50% and speed roughly doubles. That’s not a small optimization—it’s a game-changer.
Technique 3: Set Clear Checkpoints and Acceptance Criteria
Agent Mode, smart as it is, isn’t perfect. So you need to define “intermediate checkpoints” that tell the AI when to pause and wait for you to confirm. This prevents a single mistake from cascading through everything.
Here’s how: explicitly add phased objectives to your instruction:
- Phase 1: Generate the new file structure, stop so I can review
- Phase 2: Migrate existing code to the new structure
- Phase 3: Run tests and build verification
Between each phase, you get a chance to check the AI’s work and confirm you’re on the right track before moving forward. Even if something goes wrong mid-process, it won’t blow up the entire project.
Also define clear “success metrics.” Don’t say “fix this bug,” say “fix this bug, then run all unit tests and ensure the pass rate is ≥95%.” That way the AI knows when the job is truly done.
Common Pitfalls and How to Avoid Them
Now that we’ve covered the techniques, let me warn you about some common traps.
Pitfall 1: Task Descriptions That Are Too Vague
I mentioned this before, but it’s worth emphasizing again. I’ve seen people tell Agent Mode “help me optimize performance” and then it just goes wild changing code. Vague instructions lead to vague results. Remember: clear instructions = high-quality output.
Pitfall 2: Over-Reliance Without Code Review
Some people enable Agent Mode and then completely hands off—that’s dangerous. The code the AI generates might be logically correct but could violate your coding standards, performance requirements, or security practices. You must review generated code, especially for critical modules like authentication, payments, or database operations.
Pitfall 3: Expecting Everything Done in One Shot
Don’t try to solve all problems with one big instruction. Large tasks need to be broken down. For something like “do a big refactor of the project,” split it into “step one: fix directory structure,” “step two: move files,” “step three: update imports”—and go step-by-step. Success rates are much higher.
Pitfall 4: Not Configuring Tool Permissions and Constraints
Cursor’s Agent Mode can access the terminal, modify files, and run commands. If you don’t explicitly set permissions, it might accidentally delete files or run dangerous commands. So make sure your .cursorrules clearly states “can run these commands,” “only modify, don’t delete files,” etc.
Conclusion
After six months of using Cursor Agent Mode, the deepest takeaway is this: it changes how you program. Not in the sense that you never write code again—we’ll always need to think, design architecture, and make critical decisions. But the “low-value” repetitive work—manually renaming extensions, copying-pasting changes file-by-file, routine refactoring—all that can be handed off to AI now.
The three big wins of Agent Mode are: autonomy (no need to hand-hold), completeness (handles whole projects, not snippets), and verifiability (can self-check and self-fix).
My advice: stop hesitating. Start with a small task using Agent Mode—like “add a loading state to this page” or “standardize API error handling across this module.” Review the output, and if it looks good, commit. After a few runs, you’ll naturally start using it for bigger tasks.
The future of programming might just look like this: humans handle thinking and decisions, AI handles implementation and verification. What we need to learn is how to work alongside such tools.
Complete Workflow for Using Cursor Agent Mode
From defining goals to verifying results, master the Agent Mode workflow
⏱️ Estimated time: 45 min
- 1
Step1: Step 1: Prepare Your Project and .cursorrules File
Create a .cursorrules file in your project root that clearly outlines your project's constraints and rules.
Example content:
```
# Project Constraints
- Tech Stack: React 18 + TypeScript + Tailwind CSS + pnpm
- Node Version: 18+
- Package Manager: Use pnpm, not npm or yarn
- No-touch zones: src/auth directory, database schema files
- Code Standards: Follow ESLint config, use Prettier for formatting
- Test Requirements: All changes require unit tests
# Allowed Operations
- Can modify any file in src (except auth directory)
- Can run npm/pnpm commands
- Can modify config files (tsconfig.json, vite.config.ts)
- Can create new pages and components
# Forbidden Operations
- Don't delete files, only modify or add new ones
- Don't touch .git directory
- Don't run dangerous commands (rm -rf, etc)
``` - 2
Step2: Step 2: Enable Symbol Index for Optimization
Enable Symbol Index in Cursor settings to boost Agent Mode efficiency.
Steps:
1. Open Cursor settings (Cmd/Ctrl + ,)
2. Search for "Symbol Index"
3. Find "Indexing: Enable Symbol Index"
4. Toggle to On
5. Wait for index building to complete
Index build time depends on project size:
• Small projects (<1000 files): 1-2 minutes
• Medium projects (1000-5000 files): 5-10 minutes
• Large projects (>5000 files): 10-30 minutes
Once done, Agent Mode token usage drops 30-50% and speed roughly doubles. - 3
Step3: Step 3: Give Agent Mode Clear Target Instructions
Provide a clear, specific, measurable instruction to Agent Mode.
Bad instructions:
❌ "Optimize this project's performance"
❌ "Improve code quality"
❌ "Refactor this module"
Good instructions:
✓ "Reduce homepage load time from 3 seconds to under 1 second using code splitting, image lazy-loading, and caching strategies"
✓ "Add TypeScript type definitions to the LoginPage component—ensure all props have type declarations and pass ESLint"
✓ "Split the utils directory by function into auth, string, and date subdirectories, and update all import statements"
Key elements:
1. Concrete result (not vague improvement)
2. Measurable criteria (seconds, coverage %, test pass rate)
3. Constraints (what can/can't be changed) - 4
Step4: Step 4: Set Checkpoints and Acceptance Criteria
Clearly divide tasks into phases to prevent a single error from affecting everything.
Phased instruction template:
```
Task: Refactor project authentication system
Phase 1: Analysis and Planning (pause and wait for approval)
- Analyze current auth-related code
- Generate new directory structure and API design
- List files that need modification
→ Stop here, waiting for my review
Phase 2: Code Migration (proceed)
- Create new auth directory and files
- Migrate existing auth logic
- Update import statements
Phase 3: Verification and Testing (pause and wait for approval)
- Run all unit tests, ensure pass rate ≥95%
- Manually test login flow
- Run build, ensure no errors
→ Stop here, waiting for confirmation all tests pass
Success Metrics:
- All unit tests pass (>95%)
- npm run build succeeds with no errors
- ESLint check passes
- No functional regressions
``` - 5
Step5: Step 5: Launch Agent Mode and Monitor Progress
Start Agent Mode in Cursor and observe execution.
Steps:
1. Open Cursor editor
2. Enter your task instruction in the Chat panel
3. Click the "Agent" mode button (not Chat)
4. Click "Send" or press Enter to launch
Monitoring Points:
• Check if Agent understood the task correctly
• Verify the files it reads and modifications are in scope
• If execution goes off track, hit "Stop" immediately
• When Agent pauses at checkpoints, review the code
Typical execution steps:
1. List project file structure
2. Read key files to understand current state
3. Generate modification plan
4. Execute file modifications
5. Run tests and verification
6. Auto-fix any discovered issues - 6
Step6: Step 6: Verify Results and Complete
After Agent finishes, do a final review and verification.
Verification Checklist:
□ Code Quality: Is generated code standards-compliant?
□ Tests Pass: Run npm test or the test script in package.json
□ Build Success: Run npm run build, ensure no errors
□ No New Issues: Test related functionality for correctness
□ Git Changes: Check git diff to confirm change scope matches expectations
If you spot problems:
1. Don't fix directly; tell Agent what's wrong
2. Agent can auto-fix and re-verify
3. Or you fix it, then have Agent handle the next task
Final pre-commit check:
✓ git status to confirm all changes tracked
✓ git diff --staged to review pending changes
✓ If satisfied, git add && git commit
Next tasks go faster: Agent's context persists in the project, so subsequent tasks become more efficient.
FAQ
What's the core difference between Agent Mode and Chat Mode? When should I use which?
Agent Mode is active execution: you set a goal, AI independently reads files, understands context, modifies multiple files, runs commands, checks results, and auto-fixes. Best for large tasks, cross-file changes, multi-step workflows.
Usage guidance:
• Single bug fix? Chat Mode is enough
• How to write one function? Chat Mode
• Upgrade an entire project? Agent Mode
• Multi-file refactoring? Agent Mode
• Large-scale changes and verification? Agent Mode
Quick rule of thumb: if your task needs "step-by-step" manual handling, use Agent; if it's a small problem solvable in one go, Chat is sufficient.
Why is enabling Symbol Index so important? How does it actually work?
Why it matters:
• Without it: Agent has to read all code to understand the project, eating tons of tokens
• With it: Agent can quickly query "where is this function" and only read necessary code
Results:
• Token usage drops 30-50%
• Execution speed improves 2x+
• Agent understands project more accurately, fewer mistakes
How it works:
1. You enable Symbol Index, Cursor scans the entire project in the background
2. Builds symbol table: Class X is in File A, Method Y is in Class Z
3. When Agent needs to understand something, it queries the symbol table instead of reading entire files
4. Dramatically reduces context overhead
For large projects (1000+ files), this optimization is most dramatic.
Could Agent Mode accidentally delete or corrupt my files?
Potential risks:
• Agent can modify or delete files
• Agent can run any terminal command
• Agent can commit git changes
Risk prevention:
Write rules in your .cursorrules like:
```
# Never delete files, only modify and add
Operation Constraints:
- Don't delete any existing files
- Only allow modifications to src and config directories
- Don't touch .git, node_modules, dist directories
- Don't run rm or delete commands
- Don't commit git changes, only modify files
```
Best practices:
1. Commit to git and create a new branch (gives you a rollback point)
2. Set .cursorrules to limit Agent's scope
3. Use checkpoints—Agent pauses each phase for your review
4. Don't grant Agent too much power, go step-by-step
Basically, if your .cursorrules is well-written, Agent will strictly follow it. It won't get clever about deleting things.
Why use a .cursorrules file? Can't I just say everything in each instruction?
Advantage 1: Persistence. .cursorrules lives in your project—all future Agent tasks read it automatically, no repetition
Advantage 2: Team sharing. Commit to git, everyone on the team sees project constraints
Advantage 3: Prevents oversights. If you forget a limit in an instruction, Agent might act incorrectly; .cursorrules is central management
Advantage 4: Completeness. .cursorrules can be very detailed (hundreds of lines), but super-long instructions feel redundant
Actual use:
• First new project: create .cursorrules, list all constraints
• Subsequent tasks: Agent auto-reads .cursorrules, instructions stay concise
• Rule changes: edit .cursorrules once, no need to update all task instructions
Comparison:
❌ Every time: "Don't delete auth directory, don't change database schema, don't touch .git..."
✓ .cursorrules once, Agent complies automatically thereafter
Recommended: use .cursorrules for global constraints + instructions for task goals.
What if Agent Mode makes a mistake during execution? Can I correct it mid-way?
If something goes wrong:
1. Click "Stop" to halt Agent immediately
2. Check what it's already done (usually there are partial changes)
3. Either: manually fix the errors and move forward
4. Or: tell Agent where it went wrong and let it self-correct
Common error types and fixes:
Error 1: Misunderstanding. You said "edit homepage," it modified the whole project
→ Stop immediately, tell it "only modify src/pages/index.tsx," restart
Error 2: Code issue. Generated code has logic errors, tests fail
→ Stop, tell Agent the exact error message, it auto-fixes
Error 3: Out of scope. Tries to modify files you forbade
→ If .cursorrules is set properly, this rarely happens; if so, Stop and update constraints
Continuing after interrupt:
• Same Agent instance can continue fixing the issue
• Or you manually fix and Agent tackles the next phase
• Agent remembers what it's already done and current context
For big tasks, best practice is phased execution—each phase pauses for you to check, then continues. This way, if something breaks, the damage is minimal.
11 min read · Published on: Jan 10, 2026 · Modified on: Mar 22, 2026
Related Posts
From Copilot to Antigravity: Mastering the Agent-First Development Paradigm

From Copilot to Antigravity: Mastering the Agent-First Development Paradigm
AI Keeps Writing Wrong Code? Master These 5 Prompt Techniques to Boost Efficiency by 50%

AI Keeps Writing Wrong Code? Master These 5 Prompt Techniques to Boost Efficiency by 50%
Cursor Advanced Tips: 10 Practical Methods to Double Development Efficiency (2026 Edition)

Comments
Sign in with GitHub to leave a comment