Complete Guide to Fixing Bugs with Cursor: An Efficient Workflow from Error Analysis to Solution Verification
1 AM. The console was a sea of glaring red.
I stared at the line TypeError: Cannot read property 'map' of undefined, rubbing my tired eyes. This was the third time tonight I’d seen this error. Copy the error, open a new tab, Google search, Stack Overflow… I could do this routine with my eyes closed. But half an hour later, after trying five or six solutions, the problem was still there.
Honestly, I was pretty frustrated.
Then I started using Cursor. I thought I’d found my savior—AI could help me fix bugs! Turned out that wasn’t quite how it worked. When I just threw error messages at the AI, its solutions were either off-base or fixed one problem while breaking another. I even started wondering if Cursor itself was the problem.
It wasn’t until I developed a complete Cursor debugging workflow that I realized the issue was with me—not that the tool was bad, but that I didn’t know how to use it properly.
In this article, I’ll share this workflow’s 4 key steps, all lessons learned from my own mistakes. If you’ve ever faced the dilemma of “I got an error but don’t know how to get AI to help,” I hope this experience can help you.
Step 1: Properly Collecting and Analyzing Error Information
I used to make a really dumb mistake: when I saw an error, I’d just copy the first line and throw it at Cursor.
For example, seeing Error: Cannot find module 'express', I’d just ask: “Cursor, help me fix this error.” The AI would be completely confused, giving solutions that were totally off-track. Later I realized—the complete error stack is what matters.
Don’t Just Look at the First Line—Read the Complete Stack
Error messages are like medical diagnosis: the symptom (first line) is just the surface; the cause is buried in the examination report (stack trace) that follows.
A complete error stack looks like this:
TypeError: Cannot read property 'map' of undefined
    at UserList.render (src/components/UserList.jsx:23:18)
    at finishClassComponent (react-dom.development.js:17485:31)
    at updateClassComponent (react-dom.development.js:17435:24)
The first line tells you “what went wrong,” the following lines tell you “where it went wrong.” See, the problem is in UserList.jsx at line 23, not in the React source code. This information is crucial.
My habit: When encountering an error, I first capture the complete stack information (usually 5-10 lines), not just copy the first line.
Identify Error Types—Don’t Lump Everything Together
Different types of errors require different handling approaches. I generally categorize them like this:
- Syntax errors: Like missing brackets or misspelled keywords. Cursor can spot these instantly.
- Runtime errors: Like
undefined is not a function, usually data or logic issues. - Type errors (TypeScript): Type mismatches. Need to show AI the relevant type definitions.
- Dependency/environment errors:
Module not foundtype issues, need to check package.json and node version.
When asking Cursor, I specify the error type, like: “This is a TypeScript type error…” This way the AI knows which direction to think.
Record Context: What Did You Do That Caused the Error
Once I changed a config file and the entire project wouldn’t start. I only gave Cursor the error message, and it suggested I modify code. After changing for ages, nothing worked.
Later I added: “I just changed the entry in webpack.config.js.” Cursor immediately realized the path was wrong.
Lesson: Tell the AI what operations you just performed. Even if you think that operation “should be fine.” Problems often hide in the places you think are “fine.”
My current habit is to record:
- Which files I changed
- What new dependencies I installed
- What environment I switched (like Node version)
This info doesn’t need to be lengthy—a sentence or two suffices. But it helps AI quickly narrow down the problem scope.
Step 2: Providing Precise Context to Cursor
When I first started using Cursor, I had a big misconception: I thought AI knew everything, just ask casually.
Turns out, AI has no idea what tech stack your project uses, what dependency versions you have, or what your config files look like. If you don’t tell it, it can only guess blindly. The result of blind guessing is—completely inapplicable solutions.
Later I learned a technique: provide context precisely, no more, no less.
Use the @ Symbol to Reference Relevant Files
Cursor has a super useful feature: @filename can directly reference file content.
When encountering a component error, I ask like this:
@UserList.jsx This component is throwing an error, the error message is:
[paste complete stack]
This way Cursor can see the complete component code, rather than just guessing based on your description.
Pitfall warning: Don’t reference too many files at once. I once tried @ referencing seven or eight files, and the AI couldn’t focus on the key points. Generally 2-3 relevant files are enough.
If an entire directory has issues, you can use @folder/. But honestly, this is rare—most of the time problems are concentrated in a few files.
Show Relevant Config Files
Some errors appear to be code problems but are actually configuration issues.
Like TypeScript type errors might be wrong tsconfig.json configuration. Dependencies not found might be version conflicts in package.json.
My experience: When encountering these types of errors, proactively show AI the config files:
- Type errors →
@tsconfig.json - Compilation errors →
@webpack.config.jsor@vite.config.js - Dependency errors →
@package.json - Environment issues → Tell AI your Node version, operating system
Once I encountered a really weird problem: the code was clearly fine, but it wouldn’t compile. After struggling for an hour, I showed package.json to Cursor, and it immediately found that React and React-DOM versions were inconsistent.
That moment of realization… if I’d shown it the config file earlier, could’ve saved an hour.
Provide Necessary Type Definitions
If you use TypeScript, this is especially important.
AI doesn’t know what your custom types look like. You say User type is throwing an error, but it doesn’t know what fields User actually has.
Solution: Show it the type definitions together.
Either directly @types/user.ts, or copy over the relevant interface:
interface User {
  id: string;
  name: string;
  email: string;
}

// Error here: Type 'undefined' is not assignable to type 'string'
const user: User = getUserData();
This way AI knows your expected data structure and can give more precise fix solutions.
Advanced tip: If the error involves third-party library types (like type declarations from node_modules), you can tell AI to look at that library’s type definition. Though this is rare—most of the time AI has basic understanding of common libraries’ types.
Step 3: Guiding Cursor to Generate Reliable Solutions
After collecting error info and providing context, next is getting Cursor to provide solutions.
But there’s a pitfall here: many people just say “help me fix this,” then the AI directly modifies code. After the change, you don’t know why it changed that way, and next time you encounter similar issues you still won’t know what to do.
My current approach is: first let AI explain, then let it modify code.
Ask in a Structured Way
Compare these two questioning approaches:
❌ Inefficient question:
Got an error here, help me fix it
[paste error message]
✅ Efficient question:
I'm encountering a type error while implementing user list functionality.

Context: Fetching user data from API, then rendering to list
Error message: TypeError: Cannot read property 'map' of undefined
Expected result: Display user list normally

@UserList.jsx
@api/users.ts
See the difference? The latter clearly states:
- What you’re doing (implementing what feature)
- What went wrong (error message)
- What result you expect
- Where the relevant code is
This way AI has a complete thinking framework, and its solutions will be much more reliable.
Utilize Cursor’s Different Features
Cursor isn’t just chat—it has several features suitable for different scenarios:
1. Cmd/Ctrl + K (Inline Edit)
Suitable for modifying a few lines of code. Select the lines with errors, press the shortcut, tell AI how you want to change it.
I often use this to quickly fix obvious small issues, like type annotations or parameter adjustments.
2. Chat (Chat Window)
Suitable for complex problems requiring multi-turn dialogue.
When I’m not sure where the problem is, I first ask: “What could be causing this error?” The AI gives several directions, then I continue questioning based on its analysis.
3. Composer (Multi-file Coordination)
Suitable for fixing problems involving multiple files.
Like when changing an API interface, components, type definitions, and test files all need updating. Composer can handle these related changes at once.
Choosing the right tool is important. I used to use Chat for everything, making simple problems complicated and complex problems unclear. Now I choose features based on problem type, and efficiency has improved a lot.
Ask “Why” First, Then “How”
This is what I consider most important.
Rather than directly letting AI modify code, better to first let it explain:
Round 1:
What could be causing this error? What are the possibilities?AI will analyze for you, like:
- Data might not be loaded before rendering
- API return format might be wrong
- Component state initialization might have issues
Round 2:
What are the solution options? What are the pros and cons of each?AI will list several solutions, you can choose the most suitable based on project circumstances.
Round 3:
I want to use the second approach, help me implement itBenefits of doing this:
- You understand the problem’s root cause
- You know there are multiple solution options
- You’re actively choosing rather than passively accepting AI’s first solution
Once I encountered a performance issue, AI’s first reaction was to use useMemo. I asked about other solutions, it said could also optimize data structure or change rendering logic. I ended up choosing to optimize data structure, fundamentally solving the problem—much better effect than adding useMemo.
If I’d just let it change directly, might’ve accepted the useMemo solution, treating symptoms not root cause.
Step 4: Verifying and Testing AI’s Fix Solutions
AI provided a fix solution, code’s been changed, is the problem solved?
Don’t celebrate yet.
I stepped on a big landmine once: completely trusted AI’s changes, committed without careful review. Result was after going live, discovered it fixed problem A but introduced problem B. That rollback was such a headache.
Since then, I’ve developed a habit: AI’s changes must be verified, can’t skip any steps.
Carefully Review Code Changes
After AI modifies code, first thing I do is check diff with Git:
git diffLine by line check:
- What did this line change?
- Why change it this way?
- Will it affect other functionality?
Once AI helped me fix a type error, casually changed a function’s parameter type from string to string | undefined. Looked fine, but this function was called in over a dozen places, and none of those places handled the undefined case.
If I hadn’t carefully checked the diff, this would’ve been a ticking time bomb.
My principle: Understand the intent of every change. If there’s something I don’t understand, ask AI: “Why change it this way? Are there side effects?”
Add Debug Logs to Verify Reasoning
Sometimes code changes and superficially doesn’t error anymore, but you’re not sure if it’s really fixed or just hiding the error.
At this point I add some console.log to verify key steps:
// Add logs where AI modified
console.log('User data:', users);
console.log('Data type:', Array.isArray(users));

return users.map(user => <UserItem key={user.id} {...user} />);
Then show Cursor the log output:
I added logs, output is like this:
User data: undefined
Data type: false

Looks like data still hasn't loaded, is the fix direction wrong?
AI will re-analyze based on logs, might discover the problem isn’t in rendering logic but in the data fetching layer.
This trick is super useful. Often you think the problem is at A, but it’s actually at B. Logs help you quickly locate the real problem.
Run Test Cases
If the project has unit tests, definitely run them after fixing:
npm testI know many projects don’t have comprehensive tests (including my earlier projects). But if they exist, definitely use them. Tests can catch edge cases both you and AI didn’t consider.
Once AI helped me fix an array processing bug, looked fine after the change. But running tests revealed it would error when the array was empty. AI only considered normal cases, didn’t consider empty arrays.
Manual testing is also important:
- Test the scenario that was erroring before (confirm problem solved)
- Test normal flow (confirm didn’t break existing functionality)
- Test edge cases (null values, extreme inputs, etc.)
I generally make a simple testing checklist:
- Is the original error scenario fixed
- Can normal data be processed correctly
- Is empty/abnormal data handled correctly
- Are other places calling this function working normally
Real Case: Side Effects After AI Fix
Here’s a real example.
Once I encountered a React component re-rendering issue, AI suggested wrapping a function with useCallback. After the change, it indeed stopped re-rendering.
But I noticed page load speed slowed down. After careful inspection, discovered the useCallback dependencies AI added included an object that was created anew each time, causing useCallback to completely fail and instead adding extra overhead.
I asked AI again: “Is there a problem with this dependency?” Only then did it realize, suggesting either caching the object with useMemo or passing primitive types instead.
Lesson: AI’s solution isn’t necessarily optimal, might even introduce new problems. You need to review AI’s changes like reviewing a colleague’s code.
Don’t Blindly Trust, But Don’t Over-Doubt Either
After all these verification steps, you might think it’s too much trouble.
Indeed, verification takes time. But compared to problems going live then emergency rollback, this time is totally worth it.
Plus after verifying more, you’ll discover AI’s problem patterns. Some errors it often makes (like ignoring null/undefined handling), you’ll proactively guard against.
Balance point: Simple changes get quick verification, complex changes get serious testing. Decide verification intensity based on change impact scope.
Real Case: A Complete Bug Fix Process
After all this theory, let’s look at a real case.
Last week I was working on a Next.js project, suddenly encountered a compilation error. Entire page white screen, console full of red.
Scenario Description
Error message looked like this:
Error: Element type is invalid: expected a string (for built-in components)
or a class/function (for composite components) but got: undefined.

Check the render method of `BlogPost`.
    at createFiberFromTypeAndProps (react-dom.development.js:25532:21)
    at createFiberFromElement (react-dom.development.js:25560:15)
My first reaction: What? undefined? I clearly imported the component.
Step 1: Collect Complete Error Info
I didn’t just copy the first line, but copied the complete stack (about 10 lines). Key info was in the second line: problem was in BlogPost component’s render method.
I also recorded context:
- Just installed a new dependency
react-markdown - Changed
BlogPost.tsximport statement
Step 2: Provide Precise Context
I opened Cursor Chat and asked like this:
I'm encountering a component import error in a Next.js project.

Context: Just installed react-markdown (v9.0.1), importing and using in BlogPost component
Error message: [paste complete stack]
Expected result: Render Markdown content normally

@components/BlogPost.tsx
@package.json
This way Cursor could see:
- The
react-markdownversion I’m using - Complete
BlogPostcomponent code - Project dependency situation
Step 3: Multi-turn Dialogue to Find Solution
Round 1, I first asked:
What could be causing this error?AI gave three possibilities:
- Import statement was wrong (named import vs default import)
react-markdownversion incompatible with React version- Component not fully installed before use
Round 2, I said:
I checked, dependencies are installed. Could it be the import statement?
My current syntax is: import { ReactMarkdown } from 'react-markdown'
AI immediately spotted the problem:
react-markdown v9 uses default export, not named export.
Should change to: import ReactMarkdown from 'react-markdown'
Step 4: Verify the Fix
I changed the import statement per AI’s suggestion, but didn’t immediately trust it.
First checked Git diff:
- import { ReactMarkdown } from 'react-markdown'
+ import ReactMarkdown from 'react-markdown'
Hmm, small change, should have no side effects.
Then ran the project:
npm run devPage displayed normally!
But I still wasn’t satisfied, tested a few more scenarios:
- Normal Markdown content rendering
- Markdown with code blocks
- Empty content case
All worked fine. Only then confirmed the problem was really solved.
Time Comparison
Traditional approach:
- Google search “react-markdown undefined error” → 10 minutes
- Check Stack Overflow answers, tried 3 solutions that didn’t work → 20 minutes
- Look through react-markdown official docs → 15 minutes
- Total: 45 minutes
Cursor-assisted approach:
- Collect error info and context → 2 minutes
- Multi-turn dialogue to locate problem → 3 minutes
- Verify fix → 2 minutes
- Total: 7 minutes
Over 6x efficiency improvement.
The key is: I gave Cursor sufficient context (version numbers, code, error info), it could directly pinpoint the problem’s root cause, rather than making me try one by one.
Conclusion
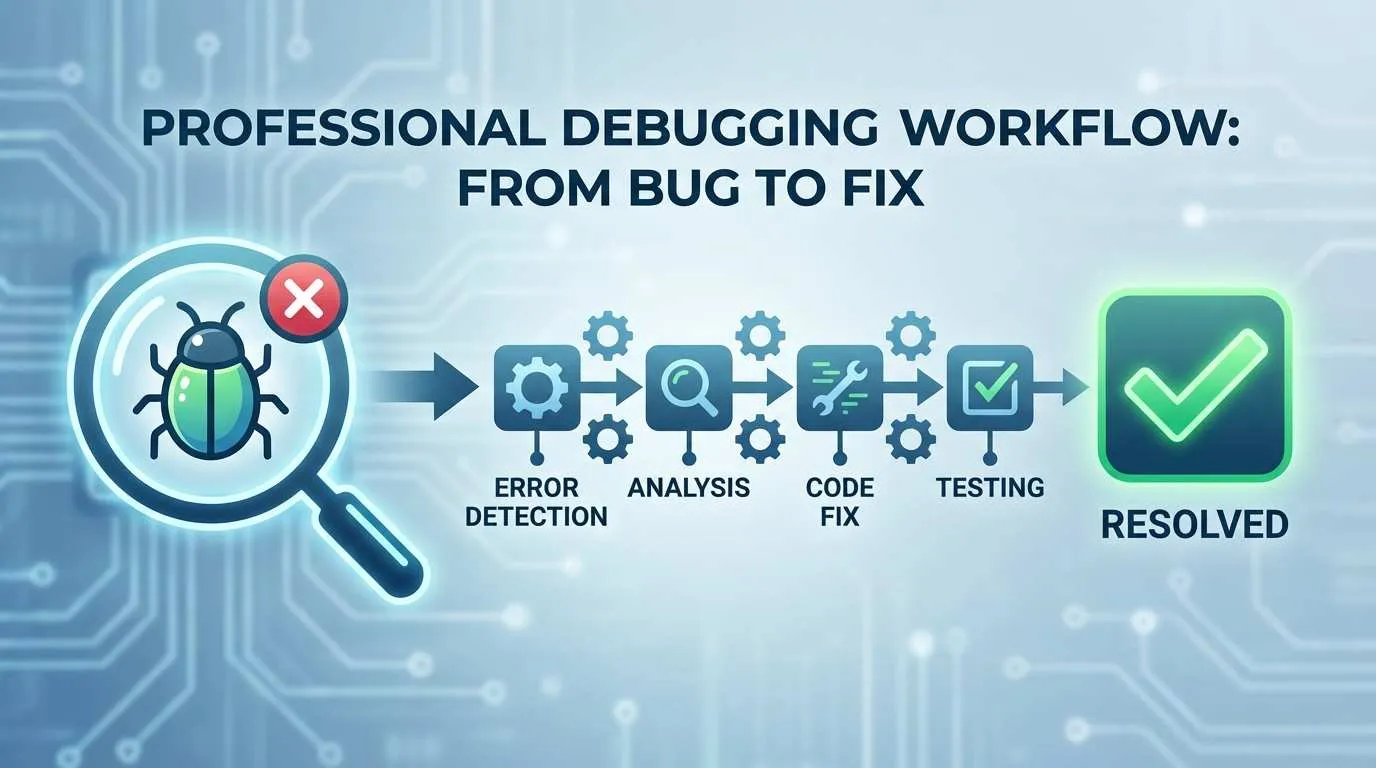
Let’s review this Cursor Debug workflow:
- Complete error collection: Don’t just look at first line, complete stack has value
- Precise context: Use @ to reference files, provide config and type definitions
- Rational solution selection: Ask why first, then how, actively choose rather than passively accept
- Rigorous verification testing: Review code, add logs, run tests—can’t skip any
This workflow might sound like many steps, but once familiar, the entire process might only take a few minutes. Compared to traditional Google + Stack Overflow + trial-and-error loop, efficiency is really much higher.
But one thing to be clear: Cursor is a tool, not magic.
It can’t think for you, can’t understand code logic for you. It’s just a very smart assistant that can help you quickly locate problems and provide suggestions. But ultimately you’re the decision maker.
My feeling now is, using Cursor Debug is like having an experienced colleague sitting beside you. When encountering problems, you can ask him “what’s going on here,” he analyzes several possible causes, then you judge based on actual situation.
Much easier than struggling through docs alone.
Final suggestion: Build your own Debug Checklist.
When I encounter errors now, I go through this checklist:
- Copy complete error stack
- Record what operations I just did
- Use @ to reference relevant files (2-3)
- If involves config/types, provide them too
- First let AI analyze causes, then choose solution
- Review code changes
- Test original scenario + edge cases
Develop this habit, Debug efficiency will make a qualitative leap.
Give it a try, you too can crush those headache-inducing errors.
Complete Cursor AI-Assisted Debug Process
Using Cursor's efficient 4-step systematic method to fix bugs, from error collection to verification testing
⏱️ Estimated time: 10 min
- 1
Step1: Step 1: Completely collect error information
Core principle: Complete stack matters more than first line
Required operations:
• Copy complete error stack (5-10 lines), not just first line error message
• Identify error type: syntax error/runtime error/type error/dependency error
• Record operation context: what files changed, what dependencies installed, what environment switched
Why do this:
Stack info contains exact error location (filename + line number), first line only tells you "what went wrong," following lines tell you "where it went wrong." Providing operation context helps AI quickly narrow troubleshooting scope.
Pitfall warning:
Don't skip mentioning an operation because you think it "should be fine"—many bugs hide in places you think are "fine." - 2
Step2: Step 2: Provide precise context
Core principle: Not too much, not too little, just enough for AI to understand
Required operations:
• Use @ to reference relevant files (2-3), avoid referencing too many at once
• Provide config files based on error type:
- Type errors → @tsconfig.json
- Compilation errors → @webpack.config.js or @vite.config.js
- Dependency errors → @package.json
• TypeScript projects: Provide relevant interface/type definitions
Why do this:
AI doesn't know your project's tech stack, dependency versions, custom types. Providing precise context lets AI give solutions applicable to your project, not generic talk.
Pitfall warning:
Keep referenced file count to 2-3, too many interferes with AI judgment. If unsure which files are relevant, first ask AI what files it needs to see. - 3
Step3: Step 3: Guide AI to generate reliable solution
Core principle: Ask why first, then ask how
Required operations:
• Round 1: Ask "What could be causing this error?"
• Round 2: Ask "What are the solution options? What are pros and cons of each?"
• Round 3: Choose most suitable solution, let AI implement
• Choose right tool:
- Cmd/Ctrl+K: Single file small changes
- Chat: Complex problems requiring multi-turn dialogue
- Composer: Multi-file coordinated changes
Why do this:
Directly letting AI change code means you don't understand the principle, next time still won't know. Multi-turn dialogue lets you understand problem root, actively choose optimal solution rather than passively accept first suggestion.
Pitfall warning:
AI's first reaction isn't necessarily optimal. For performance issues, it might suggest adding useMemo, but optimizing data structure might be more fundamental solution. - 4
Step4: Step 4: Rigorous verification testing
Core principle: Review AI's changes like reviewing colleague's code
Required operations:
• Use git diff to review changes line by line, understand intent of each change
• Add console.log to verify key steps, confirm fix reasoning is correct
• Run test cases (if available): npm test
• Manually test three scenarios:
- Original error scenario (confirm problem solved)
- Normal flow (confirm didn't break existing functionality)
- Edge cases (null values, abnormal inputs, etc.)
Why do this:
AI might fix problem A but introduce problem B. Like changing function parameter type but not considering compatibility at other call sites. Rigorous verification avoids embarrassment of rollback after going live.
Pitfall warning:
Simple changes can get quick verification, complex changes must be seriously tested. Verification time is far less than fix time for live problems.
FAQ
Why can't I just copy the error's first line to Cursor?
Example:
First line: TypeError: Cannot read property 'map' of undefined
Stack info: at UserList.render (src/components/UserList.jsx:23:18)
First line only indicates type error, stack tells you problem is at line 23 of UserList.jsx. Without stack info, AI can only guess blindly, solutions often unreliable.
Correct approach: Copy complete stack (5-10 lines), let AI precisely locate problem source.
How to determine which config files to show Cursor?
Type errors (TypeScript) → @tsconfig.json + relevant type definition files
Compilation errors → @webpack.config.js or @vite.config.js
Dependency errors (Module not found) → @package.json
Environment issues → Tell AI your Node version, operating system
Quick judgment technique:
If error message mentions config-related (like "compilation failed"), proactively provide compilation config; if mentions module not found, provide package.json; if type mismatch, provide tsconfig and type definitions.
Avoid referencing too many files (over 3), interferes with AI judgment.
How to choose between Cursor's Chat, Cmd+K, and Composer?
Cmd/Ctrl+K (Inline Edit):
• Suitable for single file, few lines of code small changes
• Like type annotations, parameter adjustments, variable renaming
• Advantage: Quick and direct, see effect immediately after change
Chat (Chat Window):
• Suitable for complex problems requiring multi-turn dialogue analysis
• Like when unsure of problem root, need AI to analyze first then give solution
• Advantage: Can discuss in depth, understand problem essence
Composer (Multi-file Coordination):
• Suitable for related changes involving multiple files
• Like changing API interface, components, types, tests all need changing
• Advantage: Handle multiple files at once, maintain code consistency
Consequence of wrong choice: Simple problems with Chat become unclear, complex problems with Cmd+K keep changing but still wrong.
How to verify AI's fix solution actually solved the problem?
1. Review code changes (git diff):
• Line by line check what changed, why changed this way
• Think whether it affects other functionality
• If don't understand some change, immediately ask AI
2. Add debug logs to verify reasoning:
• Add console.log at key locations
• Verify data flow matches expectations
• Confirm fix reasoning is correct, not just hiding error
3. Test three scenarios:
• Original error scenario (confirm problem solved)
• Normal flow (confirm didn't break functionality)
• Edge cases (null values, abnormal inputs)
Real case: When AI fixed type error, changed parameter type to string|undefined, superficially no error, but other dozen call sites didn't handle undefined, buried ticking time bomb. Discovered problem through git diff, avoided production incident.
Can Cursor Debug efficiency really improve 6x?
Traditional approach (45 minutes):
• Google search error message → 10 minutes
• Check Stack Overflow, tried 3 solutions that didn't work → 20 minutes
• Look through official docs for solution → 15 minutes
Cursor-assisted approach (7 minutes):
• Collect complete error info + context → 2 minutes
• Multi-turn dialogue to locate problem root → 3 minutes
• Verify fix solution → 2 minutes
Key to efficiency difference:
Traditional approach is "trial-and-error loop," each solution must be tried, most time wasted on invalid attempts. Cursor approach is "precise location," by providing context lets AI directly find problem root.
Note: Prerequisite is mastering correct questioning method. If just throwing error messages at AI, efficiency improvement limited or even slower.
15 min read · Published on: Jan 22, 2026 · Modified on: Mar 22, 2026
Related Posts
From Copilot to Antigravity: Mastering the Agent-First Development Paradigm

From Copilot to Antigravity: Mastering the Agent-First Development Paradigm
AI Keeps Writing Wrong Code? Master These 5 Prompt Techniques to Boost Efficiency by 50%

AI Keeps Writing Wrong Code? Master These 5 Prompt Techniques to Boost Efficiency by 50%
Cursor Advanced Tips: 10 Practical Methods to Double Development Efficiency (2026 Edition)

Comments
Sign in with GitHub to leave a comment