
Cocos Mini-Game Character Movement & Attack: Implementation from Nodes to Animation
Your character stands in the center of the screen. You press the arrow keys—nothing moves. You open the code and find movement logic, animation playback, and state judgment all piled into one update function. You changed the animation but forgot to update the state, you changed the state but forgot to update the speed, and finally you don’t even know what the character should be doing.
Node separation sounds abstract, but simply put, it’s separating movement and animation management—Player node handles horizontal displacement, Body node manages vertical jumping and attack animation, both running independently without interfering with each other. This article takes you from node architecture, through animation component configuration, state machine implementation, and input control solution selection, finally providing a complete set of side-scrolling fighting game character code.
Character Node Architecture Design — Horizontal Movement + Vertical Animation Overlay
Cocos Creator 3.7’s official tutorial has an easily overlooked design: Player and Body nodes are separated. Many people (including myself initially) think this is unnecessary—wouldn’t it be simple to use one node to manage movement, animation, and collision detection?
The problem lies in the inconsistent rhythm of animation and movement. Imagine your character is jumping—horizontally flying forward at constant speed, vertically drawing a parabola. If using a single node, update has to calculate horizontal displacement while also controlling jump height, and the code quickly becomes messy. By the time you add attack animation, hit effects, and even death rotation/scaling, a single node’s logic is basically out of control.
Benefits of node separation: movement is movement, animation is animation. Player node only manages x-coordinate increments/decrements, Body node only manages y-coordinate jumping and animation frame switching, neither stealing the show from the other.
Node Structure Diagram:
Player (Root Node)
  ├── PlayerControl.ts (Movement Logic)
  └── Body (Child Node)
       ├── Sprite (Character Image)
       └── Animation Component
Code Example — Player Node Movement Control:
// PlayerControl.ts - Player node script
@property(CCFloat)
speed: number = 200; // Movement speed

private moveDir: Vec2 = new Vec2(0, 0);

update(dt: number) {
  if (this.moveDir.mag() > 0.5) {
    const vx = this.moveDir.x * this.speed;
    this.node.x += vx * dt; // Only modify horizontal position
  }
}

// External call to set direction
setMoveDir(dir: Vec2) {
  this.moveDir = dir;
}
Code Example — Body Node Animation Control:
// BodyControl.ts - Body node script
@property(Animation)
animation: Animation = null;

jump(height: number = 100) {
  // Jump animation: vertical displacement + jump animation frame
  this.node.runAction(cc.jumpBy(1.0, 0, 0, height, 1));
  this.animation.play('jump');
}

attack() {
  this.animation.play('attack');
  // Automatically return to idle after attack ends
  this.scheduleOnce(() => {
    this.animation.play('idle');
  }, 0.5);
}
This way, movement logic is in the Player node, animation logic is in the Body node. Changing jump height doesn’t require touching movement code, changing movement speed doesn’t require searching through animation scripts—code maintenance becomes much easier.
Animation Component Configuration — Animation + AnimationClip Binding
The animation component is a built-in module of Cocos Creator, but you might have overlooked some key properties: defaultClip, clips array, and the easily ignored playOnLoad.
Core Properties of Animation Component:
defaultClip: The default animation to play (usually idle animation)clips: Animation resource array (idle, walk, attack, etc. AnimationClips)currentClip: Currently playing animation (runtime state)
Configuration steps are simple:
- Add Animation component to Body node
- Drag AnimationClip resources into clips array
- Set defaultClip to idle animation
- Check playOnLoad (make character idle at start)
Code Example — Animation Component Configuration:
// PlayerAnimation.ts - Animation control script
@property(Animation)
animation: Animation = null;

@property([AnimationClip])
clips: AnimationClip[] = []; // idle, walk, attack, jump

onLoad() {
  this.animation.clips = this.clips;
  this.animation.defaultClip = this.clips[0]; // Default idle
  this.animation.play();
}

playIdle() { this.animation.play('idle'); }
playMove() { this.animation.play('move'); }
playAttack() {
  this.animation.play('attack');
  this.scheduleOnce(() => { this.playIdle(); }, 0.5);
}
There’s a detail: when switching animations, it’s best to stop() before play(), especially for “one-time play” clips like attack animations. Without this, when a character is walking and you press the attack key, the attack animation might fight with the walk animation for frames—the screen looks like the character is swinging a sword while sliding, quite weird.
Correct Way to Switch Animations:
switchAnimation(name: string) {
  if (this.animation.currentClip?.name !== name) {
    this.animation.stop();
    this.animation.play(name);
  }
}
After configuring the animation component, the next step is the state machine—making animation switching follow rules, rather than scattering if (speed>0) play('move') type judgments everywhere.
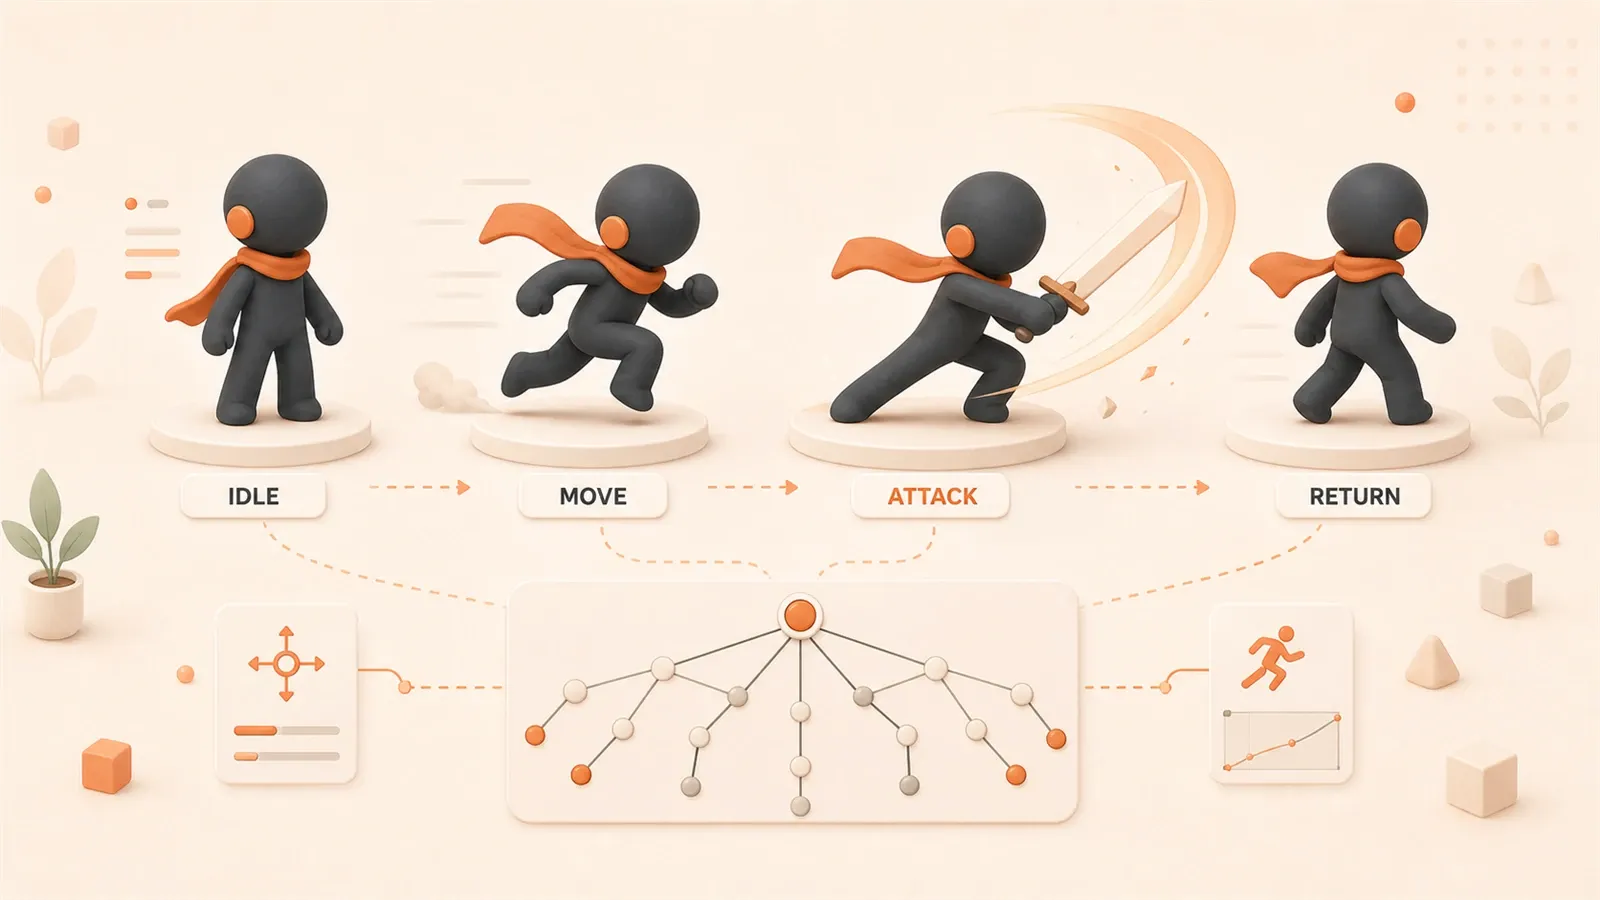
Animation State Machine Driven — Idle → Move → Attack → Return to Idle
Core concept of state machine: a character can only be in one state at any time (idle, move, attack), with clear transition conditions between states. Not arbitrary switching, but following rules.
I initially thought state machines were over-engineering—isn’t playing animation just play('attack')? Later I added jump state, then hit state, and finally found state switching judgments scattered everywhere: in movement script, in animation script, in input handling. Changed one judgment logic, forgot to update the other two places, and character behavior starts bugging out.
State Machine Flow Diagram:
[Entry] → [idle]
          ↓ speed>0
         [move]
          ↓ attackKey
         [attack] → [Exit] → [idle]
Three states: idle, move, attack. Transition conditions:
- idle → move: speed greater than 0
- move → idle: speed is 0
- any → attack: attack key pressed
- attack → idle: attack animation ends
Code Example — State Machine Implementation:
// PlayerStateMachine.ts
enum State {
  Idle = 'idle',
  Move = 'move',
  Attack = 'attack'
}

@property(Animation)
animation: Animation = null;

private currentState: State = State.Idle;
private isMoving: boolean = false;
private attackKeyPressed: boolean = false;

switchState(newState: State) {
  if (this.currentState === newState) return; // Prevent duplicates
  this.animation.stop();
  this.animation.play(newState);
  this.currentState = newState;
}

update(dt: number) {
  // Movement state judgment
  if (this.isMoving && this.currentState !== State.Move) {
    this.switchState(State.Move);
  } else if (!this.isMoving && this.currentState !== State.Idle) {
    this.switchState(State.Idle);
  }

  // Attack state (priority over movement)
  if (this.attackKeyPressed && this.currentState !== State.Attack) {
    this.switchState(State.Attack);
    this.scheduleOnce(() => { this.switchState(State.Idle); }, 0.5);
  }
}

setMoving(value: boolean) { this.isMoving = value; }

triggerAttack() {
  this.attackKeyPressed = true;
  this.scheduleOnce(() => { this.attackKeyPressed = false; }, 0.1);
}
Key details of state machine:
- State Priority: Attack takes priority over movement (cannot move while attacking)
- Prevent Duplicate Switching:
if (currentState === newState) returnavoids repeatedly playing same state - Timer Callback: Automatically return to idle after attack animation ends, rather than waiting for key release
The state machine centralizes animation switching logic in one place, changing transition conditions only requires modifying one place. Later when adding jump, hit, death states, just add values to State enum and supplement transition conditions—extensibility is much stronger than scattered if judgments.
Input Control Solution Comparison — Keyboard vs Touch vs Virtual Joystick
Each of the three solutions has applicable scenarios, choosing wrong will greatly impact operation feel.
| Solution | Applicable Scenarios | Advantages | Disadvantages | Implementation Complexity |
|---|---|---|---|---|
| Keyboard | PC, debugging phase | Simple and direct, fast response | Unavailable on mobile | Low |
| Touch | Full-screen movement games (flying, parkour) | Natural operation, no UI blocking | Low direction precision, easy mis-touch | Medium |
| Virtual Joystick | ARPG, fighting games | Precise direction, 360-degree control | UI occupies screen space | High |
Keyboard Input (First Choice for PC)
If your mini-game primarily runs on PC, or during debugging phase for quick logic verification, keyboard is the simplest solution.
Code Example — Keyboard Input:
// KeyboardInput.ts
private moveDir: Vec2 = new Vec2(0, 0);

onLoad() {
  input.on(Input.EventType.KEY_DOWN, this.onKeyDown, this);
  input.on(Input.EventType.KEY_UP, this.onKeyUp, this);
}

onKeyDown(event: EventKeyboard) {
  switch (event.keyCode) {
    case KeyCode.KEY_A:
    case KeyCode.ARROW_LEFT:
      this.moveDir.x = -1; break;
    case KeyCode.KEY_D:
    case KeyCode.ARROW_RIGHT:
      this.moveDir.x = 1; break;
    case KeyCode.KEY_J:
      this.playerStateMachine.triggerAttack(); break;
  }
}

onKeyUp(event: EventKeyboard) {
  switch (event.keyCode) {
    case KeyCode.KEY_A:
    case KeyCode.ARROW_LEFT:
    case KeyCode.KEY_D:
    case KeyCode.ARROW_RIGHT:
      this.moveDir.x = 0; break;
  }
}

update(dt: number) {
  this.playerControl.setMoveDir(this.moveDir);
  this.playerStateMachine.setMoving(this.moveDir.mag() > 0.5);
}
Keyboard input details:
- Key Mapping: Support both A/D and left/right arrows simultaneously, adapting to different player habits
- Attack Key: J key (commonly used in fighting games)
- State Sync: Update movement direction and state machine every frame
Virtual Joystick (First Choice for Mobile)
If your mini-game runs on mobile, and is a side-scrolling fighting game or ARPG that needs precise direction control, virtual joystick is almost essential.
Key implementation points for virtual joystick:
- Boundary Limitation: Joystick center cannot exceed background circle range
- Direction Normalization: Return unit vector
- Touch Release: Joystick automatically returns to center point
Code Example — Virtual Joystick Implementation:
// Joystick.ts
@property(Node)
joystickBg: Node = null;

@property(Node)
joystickHandle: Node = null;

@property(CCFloat)
radius: number = 100;

private moveDir: Vec2 = new Vec2(0, 0);

onLoad() {
  input.on(Input.EventType.TOUCH_MOVE, this.onTouchMove, this);
  input.on(Input.EventType.TOUCH_END, this.onTouchEnd, this);
}

onTouchMove(event: EventTouch) {
  const touchPos = event.getUILocation();
  const localPos = this.joystickBg.inverseTransformPoint(
    v3(), v3(touchPos.x, touchPos.y, 0)
  );

  const distance = localPos.length();
  if (distance > this.radius) {
    localPos.x = this.radius * localPos.x / distance;
    localPos.y = this.radius * localPos.y / distance;
  }

  this.joystickHandle.setPosition(localPos);
  this.moveDir = v2(localPos.x, localPos.y).normalize();
}

onTouchEnd() {
  this.joystickHandle.setPosition(Vec3.ZERO);
  this.moveDir = v2(0, 0);
}

getMoveDir(): Vec2 { return this.moveDir; }
Key details of virtual joystick:
- Coordinate Conversion: Use
inverseTransformPointto convert screen coordinates to node local coordinates - Radius Limitation:
if (distance > radius)ensures joystick doesn’t exceed background circle - Normalization:
normalize()returns unit vector, convenient for movement script to directly multiply by speed
If you’re making flying games or parkour games (don’t need precise direction), you can use full-screen touch—finger sliding anywhere on screen controls character movement. But the input logic for these games is different from virtual joystick, needs adjustment based on game type.
Practical Case — Complete Implementation of Side-Scrolling Fighting Character Control
Integrate the previous node architecture, animation configuration, state machine, and input control into a complete side-scrolling fighting game character control solution.
Complete Code Structure:
Player (Root Node)
  ├── PlayerControl.ts (Movement Control)
  ├── PlayerStateMachine.ts (State Machine)
  └── KeyboardInput.ts (Keyboard Input)

Body (Child Node)
  ├── Sprite (Character Image)
  ├── Animation Component
  └ AttackEffect (Attack Effect Node, optional)
Complete Code Example — PlayerControl.ts:
import { _decorator, Component, Node, Vec2, CCFloat } from 'cc';
const { ccclass, property } = _decorator;

@ccclass('PlayerControl')
export class PlayerControl extends Component {
  @property(CCFloat)
  speed: number = 200;

  private moveDir: Vec2 = new Vec2(0, 0);

  update(dt: number) {
    if (this.moveDir.mag() > 0.5) {
      const vx = this.moveDir.x * this.speed;
      this.node.x += vx * dt;
    }
  }

  setMoveDir(dir: Vec2) { this.moveDir = dir; }
}
Complete Code Example — PlayerStateMachine.ts:
import { _decorator, Component, Animation } from 'cc';
const { ccclass, property } = _decorator;

enum State {
  Idle = 'idle',
  Move = 'move',
  Attack = 'attack'
}

@ccclass('PlayerStateMachine')
export class PlayerStateMachine extends Component {
  @property(Animation)
  animation: Animation = null;

  private currentState: State = State.Idle;
  private isMoving: boolean = false;
  private attackKeyPressed: boolean = false;

  onLoad() { this.animation.play('idle'); }

  switchState(newState: State) {
    if (this.currentState === newState) return;
    this.animation.stop();
    this.animation.play(newState);
    this.currentState = newState;
  }

  update(dt: number) {
    if (this.isMoving && this.currentState !== State.Move) {
      this.switchState(State.Move);
    } else if (!this.isMoving && this.currentState !== State.Idle) {
      this.switchState(State.Idle);
    }

    if (this.attackKeyPressed && this.currentState !== State.Attack) {
      this.switchState(State.Attack);
      this.scheduleOnce(() => { this.switchState(State.Idle); }, 0.5);
    }
  }

  setMoving(value: boolean) { this.isMoving = value; }
  triggerAttack() {
    this.attackKeyPressed = true;
    this.scheduleOnce(() => { this.attackKeyPressed = false; }, 0.1);
  }
}
Complete Code Example — KeyboardInput.ts:
import { _decorator, Component, input, Input, EventKeyboard, KeyCode, Vec2 } from 'cc';
import { PlayerControl } from './PlayerControl';
import { PlayerStateMachine } from './PlayerStateMachine';
const { ccclass, property } = _decorator;

@ccclass('KeyboardInput')
export class KeyboardInput extends Component {
  @property(PlayerControl)
  playerControl: PlayerControl = null;

  @property(PlayerStateMachine)
  stateMachine: PlayerStateMachine = null;

  private moveDir: Vec2 = new Vec2(0, 0);

  onLoad() {
    input.on(Input.EventType.KEY_DOWN, this.onKeyDown, this);
    input.on(Input.EventType.KEY_UP, this.onKeyUp, this);
  }

  onDestroy() {
    input.off(Input.EventType.KEY_DOWN, this.onKeyDown, this);
    input.off(Input.EventType.KEY_UP, this.onKeyUp, this);
  }

  onKeyDown(event: EventKeyboard) {
    switch (event.keyCode) {
      case KeyCode.KEY_A:
      case KeyCode.ARROW_LEFT:
        this.moveDir.x = -1; break;
      case KeyCode.KEY_D:
      case KeyCode.ARROW_RIGHT:
        this.moveDir.x = 1; break;
      case KeyCode.KEY_J:
        this.stateMachine.triggerAttack(); break;
    }
  }

  onKeyUp(event: EventKeyboard) {
    switch (event.keyCode) {
      case KeyCode.KEY_A:
      case KeyCode.ARROW_LEFT:
      case KeyCode.KEY_D:
      case KeyCode.ARROW_RIGHT:
        this.moveDir.x = 0; break;
    }
  }

  update(dt: number) {
    this.playerControl.setMoveDir(this.moveDir);
    this.stateMachine.setMoving(this.moveDir.mag() > 0.5);
  }
}
Runtime Results:
- Start game → Character idle animation plays
- Press A/D or left/right arrow → Character moves + walk animation
- Press J key → Character attacks + attack animation → returns to idle after 0.5 seconds
- Release direction key → Character stops moving + idle animation
Common Problems and Solutions:
- Animation Switching Stutter: Check if AnimationClip frame rate is too low (recommended 12-24fps)
- State Residue: After attack animation ends, doesn’t return to idle, check if timer callback is executing normally
- Input Conflict: Character still moving while attacking, check if attack state priority is placed before movement judgment in state machine
After complete code integration, character control logic is clear: movement belongs to PlayerControl, animation belongs to StateMachine, input belongs to KeyboardInput, three scripts communicate through interfaces, without interfering with each other.
Summary
Core architecture has three layers:
- Node Separation: Player manages movement, Body manages animation, neither steals the show
- State Machine: idle, move, attack three states, clear and centralized transition conditions
- Input Control: PC uses keyboard, mobile uses virtual joystick, choose solution based on game type
Benefits of this three-layer architecture: changing one part doesn’t affect another. Speed up movement, animation logic doesn’t need changes; add effects to attack animation, movement script doesn’t need changes; switch input to virtual joystick, state machine logic doesn’t need changes.
Next step, you can combine with the three-layer nested architecture from Part 4 of this series “Mini-Game State Machine Design” to add more complex state management for characters—such as jump, hit, death, skill release, etc. Character state machine is just a sub-module of game state machine, extending follows same approach: define states, set transition conditions, centrally manage switching logic.
Cocos Creator Character Movement and Attack Implementation Process
From node architecture design to input control, complete implementation of side-scrolling fighting game character control
⏱️ Estimated time: 45 min
- 1
Step 1: Design Node Architecture
Create a Player root node to mount movement control script, create a Body child node to mount animation component and Sprite. Player only controls x-coordinate increments/decrements, Body handles y-coordinate jumping and animation frame switching. - 2
Step 2: Configure Animation Component
Add Animation component to Body node, drag in AnimationClip resources for idle, walk, attack, etc. Set defaultClip to idle animation, check playOnLoad. In code, switch animations via animation.play('clipName'). - 3
Step 3: Implement State Machine
Define State enum (Idle, Move, Attack), implement switchState method. In update, judge state switching based on isMoving and attackKeyPressed, attack state uses scheduleOnce timer to return to idle after 0.5 seconds. - 4
Step 4: Connect Input Control
Create KeyboardInput script to listen for KEY_DOWN and KEY_UP events. A/D and arrow keys control movement direction, J key triggers attack. Sync moveDir to PlayerControl and StateMachine every frame in update. - 5
Step 5: Test and Optimize
Run game to verify: idle animation plays normally, pressing direction keys makes character move and switch to walk animation, attack key triggers attack animation then automatically returns to idle, animation switching is smooth without stuttering.
FAQ
Why separate Player and Body into two nodes?
Character is swinging sword while sliding during animation switching, how to fix?
After attack animation ends, character is still playing attack frames, not returning to idle animation?
Which input solution should I choose for PC and mobile?
How to implement virtual joystick boundary limits and normalization?
Why does the state machine use a timer to return to idle instead of waiting for key release?
11 min read · Published on: May 21, 2026 · Modified on: Jul 14, 2026
AI-Assisted Cocos Mini Game Development
If you landed here from search, the fastest way to build context is to jump to the previous or next post in this same series.
Previous
Game UI Asset Naming Conventions: Transparent Images, Buttons, Icons, and Character Sprites
Master game UI asset naming conventions with complete formulas for button states, icon categories, and character animation frames. Learn 7 golden rules from Tencent's game team to organize your project files and boost team collaboration efficiency by 80%.
Part 9 of 21
Next
Where Does Game Feel Come From: Flash, Shake, Floating Text, Sound, Particle Feedback
Game feel design in practice: from the 19-feature framework to specific parameters. Detailed guide covering 50-100ms flash, 0.08s 40Hz vibration, 12ms sound sync, with Cocos Creator and Unity code examples.
Part 11 of 21
Related Posts
Small Games as Product Experiments: A Complete Guide for Indie Developers to Validate Gameplay and Monetization at Low Cost

Small Games as Product Experiments: A Complete Guide for Indie Developers to Validate Gameplay and Monetization at Low Cost
Indie Game Development: Validate Gameplay First, Build Systems Later (MVP Practical Guide)

Comments
Sign in with GitHub to leave a comment