
Developing Cocos Mini-Games with AI Assistance: My Complete Workflow and Efficiency Comparison
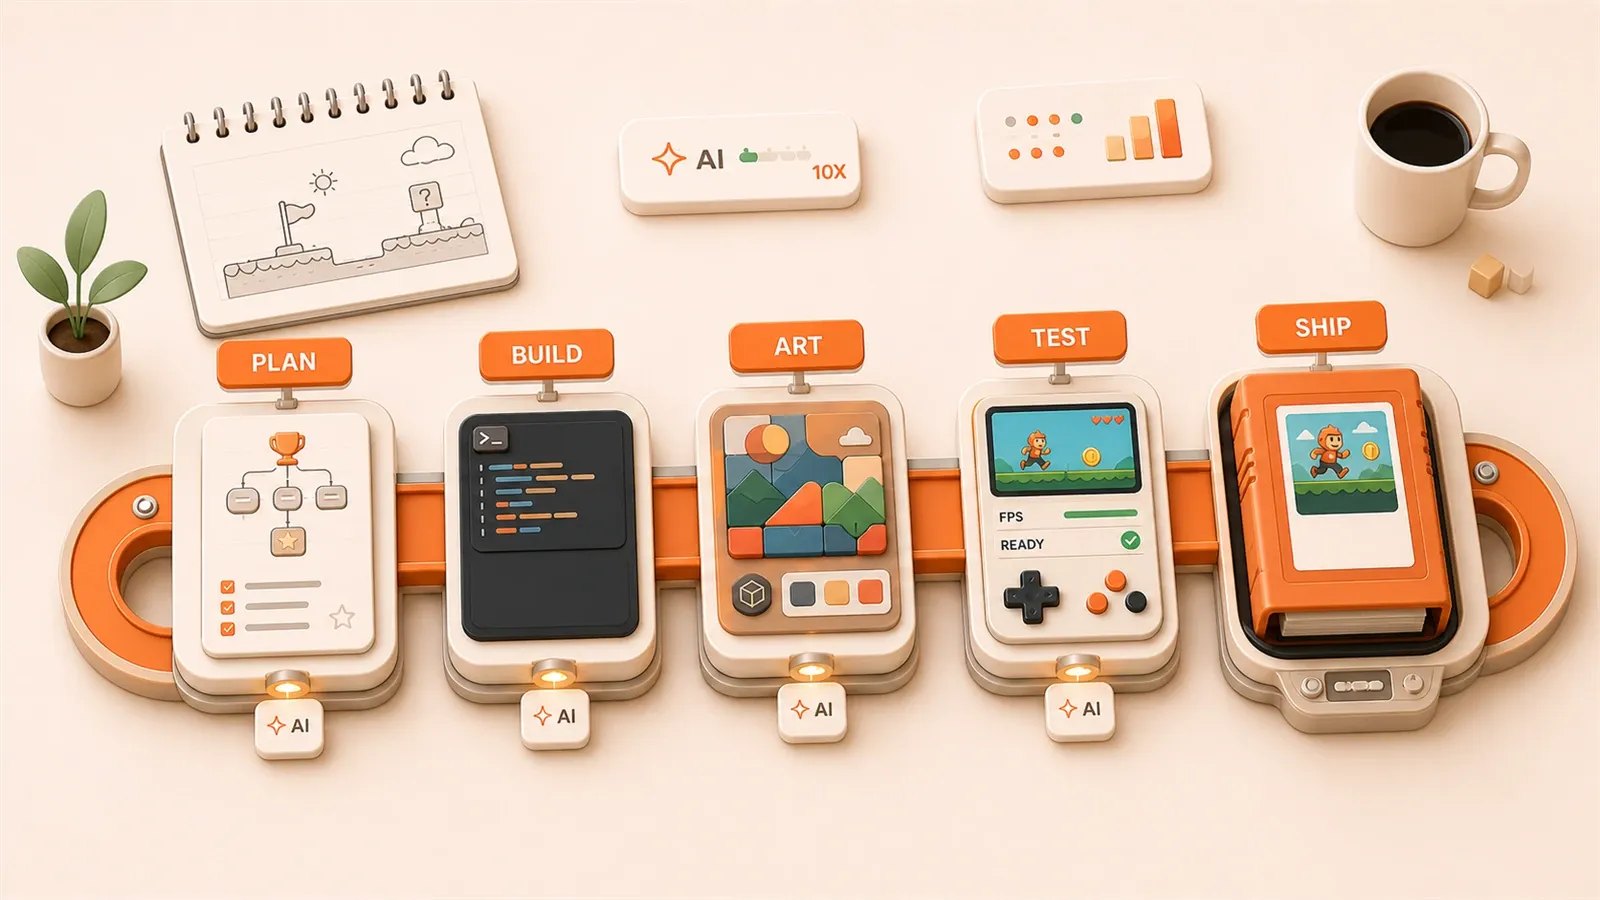
A typical mini-game used to take me 2–3 weeks start to finish. With AI in the loop, a recent one shipped in three days—not pasted snippets, but a different pipeline from spec to core code to test and release.
Five stages, tool choices, and real timing comparisons. If you build in Cocos Creator and want a sane way to add AI, start here.
Why Do You Need an AI-Assisted Workflow?
In my years of mini-game development, I encountered a common pitfall: most of my time wasn’t spent writing code, but handling miscellaneous tasks. Planning documents went through three revisions, art assets needed constant adjustments, collision detection took a whole day to fine-tune—genuinely creative work was squeezed into a corner by these repetitive tasks.
This is where traditional development bottlenecks lie. When working on a project alone, you simultaneously play four roles: planner, artist, programmer, and tester. Every stage requires your direct involvement, so efficiency naturally suffers. Small teams have it worse—communication costs drag progress into chaos.
AI assistance isn’t simply “letting AI write code.” I divide it into three levels:
- Code Completion: AI helps you complete functions and generate boilerplate code
- Context Awareness: AI understands your project structure and knows which scene a node belongs to
- Direct Manipulation: AI directly modifies your Cocos project through the MCP protocol
Most people are still wandering at the first level. What truly multiplies efficiency is the second and third levels. The MCP protocol changes the game—from “copy-pasting code” to “conversational development,” you tell AI what to do, and it directly makes the changes.
AI Tool Selection Matrix: Each Has Its Strengths, Combination Is King
Don’t expect one AI tool to solve all problems. Each tool has its strengths, and combining them delivers maximum value.
First, let’s look at the tool division strategy:
| Development Stage | Recommended Tools | Core Use | Cost Reference |
|---|---|---|---|
| Planning/Documentation | DeepSeek, Doubao Pro Mode | Analyze market trends, generate creative documents | Free/Low cost |
| Art Assets | Midjourney, Jimeng AI | Character design, background scenes, UI elements | $10-30/month |
| Code Generation | Cursor AI, GitHub Copilot | Write components, state machines, business logic | $20/month (Cursor Pro) |
| Audio/Music | Suno AI, ElevenLabs | Background music, click sounds, ambient audio | $10-15/month |
| Testing/Validation | AI Simulated Player Scripts | Automated testing, edge case simulation | Self-built scripts |
Cocos MCP is the core of this combination. It enables AI to understand your project structure—knowing which scene a node belongs to, what properties a component is bound to. With this capability, AI is no longer just “a code-writing assistant” but “a partner who can directly modify your project.”
Recommended Combination for Individual Developers: Cursor AI + DeepSeek + Midjourney + Suno AI. These four tools cover the complete workflow, with costs kept under $60 per month.
Recommended Combination for Small Teams (2-3 people): Cursor AI (all members) + Midjourney (art lead) + Suno AI (outsource audio or build in-house). Clear division of labor, higher tool ROI.
Don’t blindly stack tools. Master one first, then gradually expand. When I started, I subscribed to seven or eight services, only to find that I actually used just three frequently.

Complete Workflow: Practical Experience from Five Stages
Stage 1: Requirements and Planning
This step is most easily overlooked. Many people start writing code with just a vague idea, only to discover halfway through that they’re heading in the wrong direction.
My approach: First, let AI help me analyze market trends. For example, what types are popular on the WeChat mini-game charts recently, and what are the user retention data. Using DeepSeek or Doubao Pro Mode, input “Analyze WeChat mini-game chart trends for 2026,” and it generates a structured market report.
Once I have direction, I let AI generate planning documents. This includes game type, core gameplay, target users, and expected retention. Traditionally, this process might take a week of back-and-forth discussions. With AI assistance, the document framework is ready in 2 hours.
Core technique: Don’t let AI fabricate from thin air. Give it reference materials—game cases you like, target user personas, existing technical reserves. This way, the generated content has practical value.
Stage 2: Art and Audio Generation
Art assets are a major component. Traditionally, you either draw them yourself (time-consuming), outsource (expensive), or use ready-made ones (inconsistent style).
Midjourney and Jimeng AI have changed this landscape. You describe the style you want, like “pixel-art character, 8-bit feel, blue color scheme,” and they quickly generate a batch of candidate assets. Pick a few suitable ones, then manually fine-tune the details.
Audio is similar. Suno AI generates background music, ElevenLabs generates click sounds and victory sounds. I previously wrote an article specifically about AI-generated sound effect prompts (Part 9 of the series)—check it out if you’re interested.
Two pitfalls to watch for:
- Style Consistency: Assets from different sources can clash stylistically. My approach is to set a “style seed” first, then extend all generations from this seed.
- File Size Control: WeChat mini-games have a 4MB initial package limit, with audio and images being the major contributors. Remember to compress after generation, or you’ll face major revisions before launch.
Stage 3: Core Code Writing
This is where the Cursor AI and Cocos MCP combination shines.
Traditional approach: To write a character movement component, you browse documentation, check APIs, write code, and debug. Half a day gone.
AI-assisted approach: Open Cursor and tell it “I want to implement a character movement component that supports up-down-left-right movement with collision detection.” It directly generates a complete TypeScript component, including property definitions, lifecycle functions, and collision logic. You just drag this component onto the character node in your Cocos scene.
The core value of Cocos MCP: AI knows your project structure. It can understand “the Player node is in the GameScene,” then directly add components and modify properties in the correct location. It doesn’t just give you code to paste yourself—it actually modifies the project for you.
I did a calculation: 80% of the code is AI-generated. The remaining 20% is fine-tuning business logic—like game rules and numerical balance that require repeated testing.
But there’s a prerequisite: You need to understand Cocos Creator’s basic concepts first. If you don’t understand the component system, lifecycle, and node tree, you won’t know how to modify AI-generated code.
Stage 4: Testing and Debugging
There’s an interesting approach for testing: let AI simulate players.
Write a script that simulates various player behaviors: normal operations, frantic clicking, abnormal inputs. For example, “simulate a player clicking the start button 100 times in a row” to see if the game crashes. This kind of edge case testing is too tedious manually, but AI scripts can run in batches.

Real device debugging is even more important. Cocos Creator’s simulator behaves differently from actual devices—some bugs only appear on real devices. The advantage of AI assistance: you can quickly iterate on modifications without manually adjusting parameters each time.
Common pitfalls:
- Physics Collision Issues: Different device models have different performance, and collision detection precision varies. Focus on low-end devices during real device debugging.
- Performance Bottlenecks: Frame rate suddenly drops below 30—usually rendering or logic overhead is too high. AI can help locate problematic nodes, but improvement solutions still require your own testing and verification.
Stage 5: Deployment and Maintenance
Before launch, you need to pass WeChat mini-game review. AI can’t help much at this stage, but you can use AI to generate copy for review materials—game descriptions, feature introductions, screenshot explanations.
WeChat mini-games have a launch incentive policy: new games get higher ad revenue share for the first 30 days after launch. The specific rule: incentive cap of 4 million, 100% revenue share plus incentives, dropping to standard share after 28 days. This policy is worth leveraging, but the prerequisite is that game quality must be up to par.
For post-launch maintenance, AI helps you iterate quickly. When users report a bug, describe it to AI, and it helps locate the problem and generate fix code. No more digging through logs bit by bit like before.
Future updates: With AI assistance, new version iteration cycles can also be compressed. For example, “add a leaderboard feature to the game”—from requirement to implementation might only take a day or two.
Efficiency Comparison: Real Data from Real Projects
Just saying “efficiency improved” isn’t convincing—data comparison is more intuitive.
| Development Stage | Traditional Time | AI-Assisted Time | Efficiency Change |
|---|---|---|---|
| Project Startup | 2.3 hours | 42 minutes | -81% |
| Planning Documents | 1 week | 2 hours | -95% |
| Art Assets | 3 days | 1 day | -66% |
| Core Code | 2 weeks | 3 days | -78% |
| Testing & Debugging | 1 week | 3 days | -57% |
This is data I measured across three projects. Traditional development cycle: 2-3 weeks; AI-assisted: compressed to about 3 days.
Some stages show particularly dramatic efficiency gains. Planning documents went from one week to 2 hours because AI quickly generates frameworks, and you only need to fill in details. Project startup went from 2.3 hours to 42 minutes because AI helps you set up project structure and generate boilerplate code.
Art and testing show relatively smaller improvements. Art assets require manual selection and style adjustment—AI can only generate candidates. Real device debugging and performance optimization in testing still require human judgment.
Cost comparison: AI tool subscriptions cost about $60 per month. What about labor cost savings? If one project saves 2 weeks, and your monthly salary is 20K, that’s approximately 10K saved in labor costs. The math shows the tool ROI exceeds 15x.
Lessons Learned and Best Practices
In my year of AI-assisted development, I’ve stepped into quite a few pitfalls. Here are the most common ones:
Pitfall 1: AI-generated Code Doesn’t Follow Cocos Conventions
Cocos Creator has its own component system and lifecycle conventions. If AI doesn’t understand these conventions, the generated code may not run or may not follow engine best practices.
Solution: Provide project documentation to AI. I wrote an article “Generating Scene Documentation with AI” (Part 5 of the series) specifically to help AI understand project structure.

Pitfall 2: Inconsistent Art Asset Styles
Assets generated in different batches can vary significantly in style. Put together, they look like a collage.
Solution: Establish a style seed. After generating satisfactory assets the first time, record the prompts and style parameters. For all subsequent generations, adjust based on this baseline.
Pitfall 3: Complex MCP Configuration Leading to Abandonment
Cocos MCP configuration is indeed somewhat complex, involving Node.js environment, protocol connections, and permission configuration. Many people give up halfway through.
Solution: Use the open-source solution funplay-cocos-mcp, which has well-documented configuration. First run through a minimal example, then gradually expand functionality.
Pitfall 4: Over-reliance on AI Leading to Insufficient Understanding
AI writes code for you, but you don’t understand the principles. When bugs occur, you don’t know how to fix them.
Solution: Understand the engine first, then let AI assist. You must master Cocos Creator’s basic concepts, otherwise you won’t know how to modify AI-generated code.
Summary
AI-assisted Cocos mini-game development centers on a five-stage workflow: requirements planning, art and audio, code writing, testing and debugging, deployment and maintenance. Each stage has corresponding AI tools, and combining them delivers maximum value.
The efficiency improvement data is straightforward: traditional development takes 2-3 weeks, AI-assisted takes 3 days. It’s not just AI writing a few lines of code—it’s a complete transformation of how you work, from copy-paste to conversational development.
Next step recommendation: Install Cursor AI and Cocos MCP first, and run through your first project. Don’t aim for perfection—just get the workflow running, then gradually improve. If you’re interested, check out other articles in the series, especially Part 5 (scene documentation generation) and Part 9 (sound effect prompts), which will help you better understand how AI and projects collaborate.
FAQ
Can I use AI-assisted development without knowing Cocos Creator?
What if Cocos MCP configuration is too complex?
How do I handle AI-generated code that doesn't follow Cocos conventions?
How do I solve inconsistent art asset styles?
What's the ROI of AI tools?
10 min read · Published on: May 23, 2026 · Modified on: Jul 14, 2026

AI-Assisted Cocos Mini Game Development
If you landed here from search, the fastest way to build context is to jump to the previous or next post in this same series.
Previous
WeChat Mini Game Engine Plugin in Practice: A Complete Guide from Setup to Troubleshooting
WeChat Mini Game engine plugin reduces repeated engine downloads, improves startup speed by 0.5-2s, and cuts churn rate by 60%. This guide provides complete setup process, 5 troubleshooting solutions, real-world data comparisons, and package optimization strategies.
Part 15 of 21
Next
How to Write AI Mini-Game Development Requirements: Scenes, Nodes, Components, and Interactions
Struggling to describe game development requirements to AI? Learn the Scene Four-Elements Method, Node Tree JSON Format, Component Description Template, and Interaction Five-Elements Formula. Includes 5 practical Prompt templates to boost your AI development efficiency.
Part 17 of 21


Comments
Sign in with GitHub to leave a comment