
ComfyUI Upscaling and Inpainting: Hires Fix, FaceDetailer, and Local Repairs
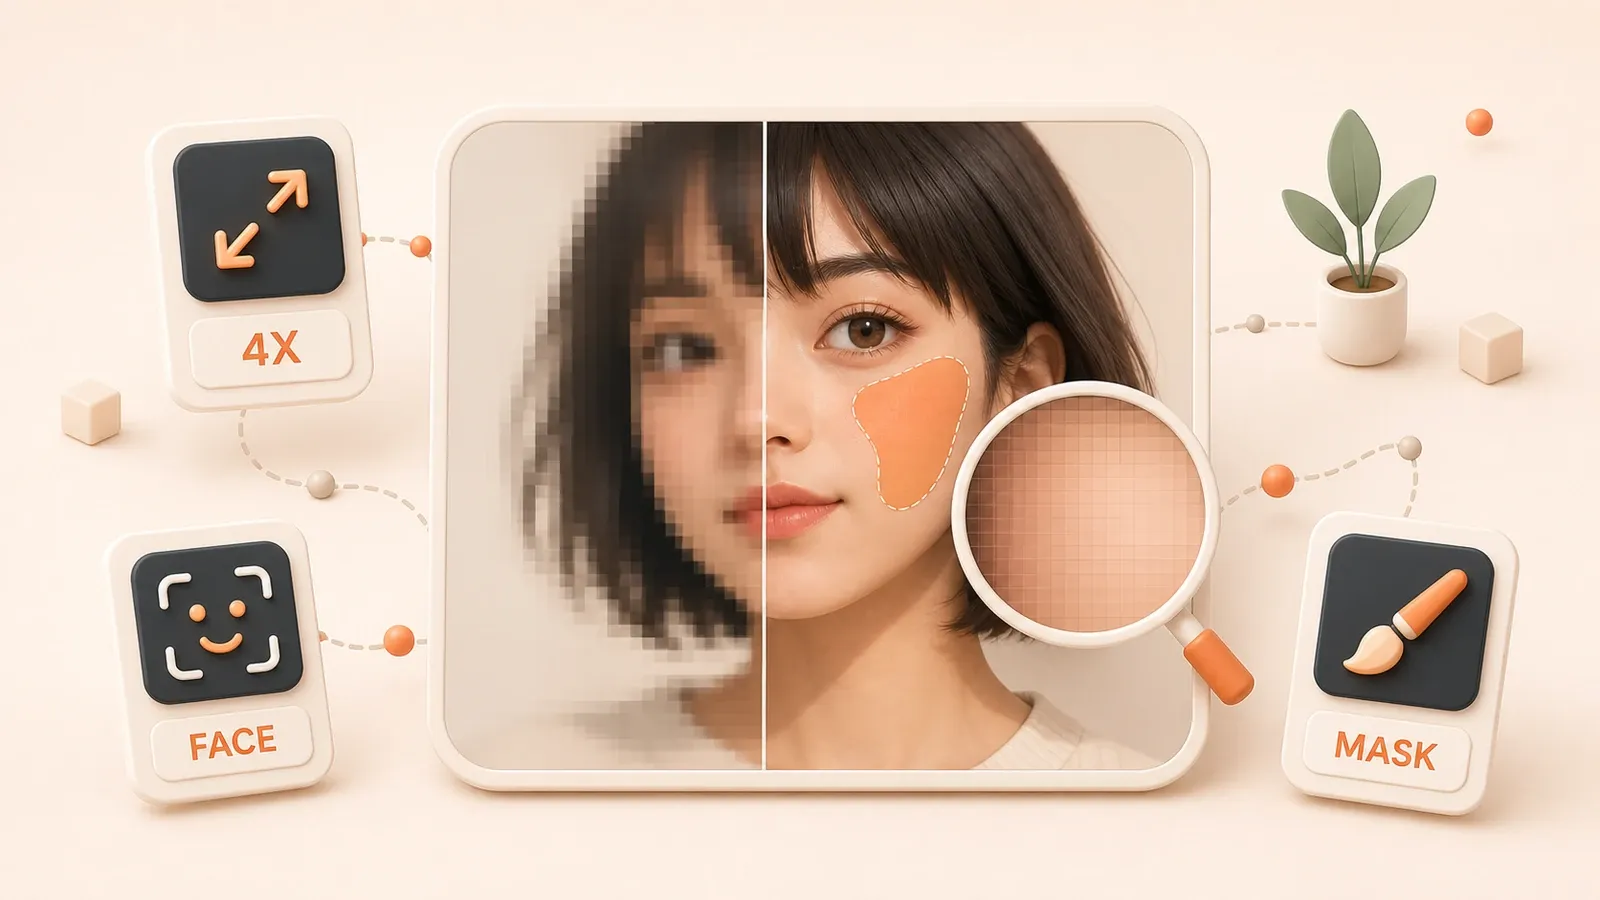
"The official ComfyUI image-upscaling tutorial documents the Load Upscale Model and Upscale Image (Using Model) workflow and the upscale_models directory."
You generated a 768×1024 character image. The composition and lighting work, but the face in the distance is soft. A direct 4x upscale makes the detail look hard and pasted on; FaceDetailer makes the person look different; an inpaint pass on a small background flaw shifts the color of the entire backdrop.
Pixel upscaling, latent resampling, FaceDetailer, and manual inpainting solve different problems. The sections below cover node connections, parameter meaning, a first task for each path, and fixes for blur after upscaling, edits outside a mask, and identity drift after face repair.
Post-processing quality: where the four paths differ
After generating an image you like, the remaining problem usually falls into one of three buckets: the resolution is too low, the detail is too soft, or one local region needs correction. ComfyUI has four main post-processing paths, and each has a different boundary.
Pixel upscaling uses models such as ESRGAN to increase image dimensions. It normally does not resample the prompt or deliberately change composition, although a super-resolution model can reconstruct or invent texture. Use it when the source image already works and you only need a larger output.
Latent resampling enlarges the latent and samples it again. It allows structural change and fits cases where you want newly generated material or extra detail.
FaceDetailer detects a face region and performs a local repair. It is useful for a small, soft face. Hands and other objects require the matching Detector and Detailer or a manual mask; FaceDetailer is not a universal repair node.
Manual inpainting uses Mask Editor to specify the area that should receive most of the change. It works for a logo edge, a small background defect, or a particular object, but sampling and compositing can still alter the visual result outside the mask.
These paths are not interchangeable. Pixel upscaling does not preserve identity by itself, FaceDetailer is not face swapping, and inpainting does not guarantee that every pixel outside the mask stays identical. First decide whether the problem is size, regenerated detail, a detected region, or a specific local edit.
Pixel upscaling: UpscaleModelLoader + Upscale Image using Model
Pixel upscaling is the simplest post-processing path. If the image is already correct and only needs a larger output, it is usually the least destructive place to start.
Your first upscale task
Assume you generated a 768×1024 image and want a larger version.
First, download an upscale model that matches the image type from Real-ESRGAN or another trusted model source, such as RealESRGAN_x4plus.pth or RealESRGAN_x4plus_anime_6B.pth.
Second, place the model file in ComfyUI/models/upscale_models/.
Third, refresh the ComfyUI interface or restart it so that the model list is scanned again. If the model is still missing, check the path, extension, and extra_model_paths.yaml.

Fourth, connect the nodes. UpscaleModelLoader selects the model. Upscale Image (Using Model) receives upscale_model and image. Connect the generated image to its image input.
Fifth, run the node and inspect the output dimensions. A 4x model normally produces four times the width and height, but treat the node output as the source of truth for final size and resource use.
Choosing an upscale model
| Model | Best starting point | Characteristics |
|---|---|---|
| 4x-ESRGAN | General upscaling | Official tutorial example and a useful baseline |
| RealESRGAN_x4plus | Photos and realistic scenes | General restoration model worth testing on natural texture |
| RealESRGAN_x4plus_anime_6B | Anime and illustration | Anime-oriented model worth testing on lines and flat color |
| realesr-general-x4v3 | Lightweight general use | A lighter model direction for batch comparisons |
There is no universal “best upscale model.” Results depend on the image type, base model style, compression artifacts, and scale. Start an illustration with the anime model and a photo with a general model, then compare edges, skin, hair, and fine texture.
Model directory reminder
Upscale models normally go in upscale_models, not upscale_model. UpscaleModelLoader can also read extra directories configured through extra_model_paths.yaml. If the list does not update, check the path and file first, then refresh or restart.
Latent upscale and a second sample: LatentUpscale + KSampler
Pixel upscaling does not reinterpret the prompt. If you want new material or detail after enlarging the image, use latent upscaling followed by another sampling pass. The denoise value determines how much of the source survives.
LatentUpscale parameters
| Parameter | Purpose | Notes |
|---|---|---|
upscale_method | Upscaling algorithm | Common options include nearest-exact, bilinear, and bislerp |
width / height | Target dimensions | Set one side to 0 to preserve aspect ratio from the other side |
crop | Cropping behavior | Common options are disabled and center |
LatentUpscale outputs a larger latent, which then goes into KSampler. A denoise value near 1.0 regenerates more of the image: detail may increase, but composition, face, and clothing can drift. A value near 0.0 retains more of the source and adds less new detail.
There is no denoise recipe that works for every model. Start low when you only need a little detail. Keep the seed, sampler, steps, CFG, checkpoint, and LoRA weights fixed, and change one variable at a time. When a higher value starts changing identity or growing arbitrary clothing texture, return to the previous stable value.
How it differs from pixel upscaling
| Path | Structural change? | More detail? | Best fit |
|---|---|---|---|
| Pixel upscaling | Normally does not alter composition intentionally | Reconstructs pixel detail | The source is correct and only needs more resolution |
| Latent resampling | Yes, depending on denoise | Regenerates detail | Some change is acceptable and material or local structure should be redrawn |
Latent resampling is not a simple resize. If the workflow already uses ControlNet, IPAdapter, or regional prompting, a second pass can weaken those upstream constraints. Save the original output and workflow before testing a separate resampling branch.
FaceDetailer repair: automatic face refinement in Impact Pack
A soft face in the distance is a common failure. FaceDetailer combines face detection with a Detailer path in Impact Pack: it detects a local region and then applies detail or inpainting to the crop. It can improve a small face, but it is not an identity-consistency or face-swap tool.
Installing Impact Pack
Impact Pack is a third-party custom node pack, and its maintainer recommends installing it through ComfyUI Manager. Open the custom-node installation area, search for ComfyUI-Impact-Pack, install it, and restart ComfyUI.
Impact Pack changes frequently, including node structure and compatibility requirements. Its current README also notes that some Ultralytics Detector Provider nodes require the separate Impact Subpack. If an old workflow has red nodes, a missing detector, or different parameters, check the current Impact Pack README, Subpack instructions, and Manager status instead of copying an old screenshot.
Your first face-repair task
Assume the generated image contains a soft face in the distance.
First, add FaceDetailer from the Impact Pack menu.
Second, connect the workflow’s image, model, clip, vae, detector, and any other required inputs. Inputs can change between versions, so use the current node and README as the authority.
Third, focus on the detected area, guide_size, max_size, noise_mask, inpaint_model, and cycle. guide_size controls the reference size used while detailing a small region. max_size limits the region’s long edge and VRAM use.
Fourth, begin with conservative denoise. A value around 0.3–0.5 can be a practical starting range for face repair, not an official fixed setting. The smaller the source face and the larger the detection box, the more cautious you should be.
Fifth, compare the source and repaired images. Confirm that the face is clearer without unnecessarily changing identity, expression, hair, or background.
FaceDetailer parameter table
| Parameter | Purpose | Adjustment guidance |
|---|---|---|
guide_size | Reference size for the region processed by Detailer | Start with a moderate size; larger values increase redraw and VRAM pressure |
max_size | Maximum size for the processed region | Use it to constrain VRAM and oversized detection boxes |
noise_mask | Whether to apply a noise mask to the detected region | Treat it as a switch and confirm behavior in the installed version |
inpaint_model | Whether to use the inpaint-model path | Configure it when the workflow uses a dedicated inpaint checkpoint |
cycle | Number of Detailer passes | Start with 1; repeated passes can drift farther from the source face |
The detector determines which region is processed. If FaceDetailer makes a face worse, verify that the detector selected the correct face, then reduce the region, denoise, or guide size. A broken hand needs a hand detector and Detailer or manual inpainting; FaceDetailer should not be expected to repair it automatically.
FaceDetailer boundaries
FaceDetailer can improve facial detail, but it does not promise to preserve the original identity. Use FaceID, InstantID, ReActor, or LoRA when identity consistency is the real requirement. Only use owned or authorized material for a real person’s face.

Manual inpainting: change one region without rebuilding everything
Manual inpainting is more controllable when the target is a logo edge, a small background flaw, or one hand. The mask tells the workflow where to focus, but the final affected area still depends on encoding, conditioning, denoise, and compositing.
Mask Editor steps
Assume a product image has a small background defect.
First, load the source in Load Image, right-click the node, and choose Open in MaskEditor.
Second, paint over only the region that needs correction.
Third, use the eraser to fix excess coverage and leave a sensible transition margin around the edge.
Fourth, click Save so the mask returns to the image node and can feed the inpainting path.
Two common inpainting connections
Native workflows commonly use one of two conditioning paths. Do not mechanically chain both into a single path.
The first uses VAE Encode (for Inpainting). It receives pixels, vae, mask, and grow_mask_by, and outputs a latent that includes a noise mask. Connect that latent to KSampler, then decode the result with VAE Decode.
The second uses InpaintModelConditioning. It receives positive and negative conditioning, vae, pixels, and mask, and outputs processed positive conditioning, negative conditioning, and a latent for KSampler. Use this path when the workflow needs dedicated inpaint conditioning.
KSampler itself receives sampling inputs such as model, positive conditioning, negative conditioning, and latent. The VAE belongs in the encoding and decoding nodes before and after it; it is not connected directly to KSampler.
What grow_mask_by does
grow_mask_by expands the mask outward to provide a transition area in latent space. A mask that is too tight can create a hard edge, while one that is too large can redraw content that was already correct. Start with a small expansion, inspect the seam and background, and increase it gradually.
Fixing visible seams
If the edge has a seam, mismatched brightness, or a pasted-on look, modestly increase grow_mask_by, lower denoise, and feather the mask. Third-party inpaint nodes can add preprocessing such as Expand Mask and Blur Masked, but confirm node names and behavior against the installed version.
Advanced options: Ultimate SD Upscale and comfyui-inpaint-nodes
Pixel and latent upscaling cover the basic paths. A very large full-image pass can exhaust VRAM, however, and difficult seams may need more precise mask preprocessing. The following custom nodes are advanced options, not required dependencies for a first workflow.
Ultimate SD Upscale: tiled enhancement
Upscaling a 1024×1536 image to 4096×6144 can make a full-image second pass expensive. Ultimate SD Upscale divides the image into tiles, runs image-to-image diffusion on each tile, and combines the result.
Tiling keeps each pass closer to the diffusion model’s training size and reduces the hardware pressure of processing the full image at once. The tradeoff is slower execution and the possibility of seams, repeating textures, or inconsistent styling between tiles.
Install it by searching for ComfyUI_UltimateSDUpscale in ComfyUI Manager. Installation entry points, menus, and parameters can change, so verify them against the current README and node interface.
comfyui-inpaint-nodes: mask preprocessing
comfyui-inpaint-nodes provides Fooocus inpaint support, LaMa, MAT, and tools for expanding, shrinking, blurring, and filling masks. Fooocus inpaint models normally go in ComfyUI/models/inpaint, but confirm model compatibility and the conditioning path in the repository’s current README.

| Need | Preprocessing to test |
|---|---|
| Visible seam around the edit | Expand Mask plus Blur Masked |
| More precise mask extent | Shrink Mask or Expand Mask |
| A better initial fill inside the mask | Fill Masked |
| Object removal or outpainting | LaMa, MAT, or the matching outpaint workflow |
Denoise is not a universal fix. A value near 1.0 redraws the masked region more completely, while a lower value retains more source content, but behavior also depends on the model and conditioning path. If content outside the mask shifts, verify connections and compositing before shrinking the mask, lowering denoise, or changing the transition width.
Decision table: scenario × post-processing path
| Scenario | Recommended path | Why | Alternative |
|---|---|---|---|
| The source is correct and only needs more resolution | Pixel upscaling | Normally preserves composition while enhancing pixels | Latent resampling when detail must be regenerated |
| Material or detail should be regenerated | Latent resampling | Denoise controls retention versus redraw | Ultimate SD Upscale for a very large image |
| A distant face is soft | FaceDetailer | Detects a face and details it locally | Manual inpainting when detection is wrong |
| A hand, object, or logo has a local error | Manual inpainting or the matching Detailer | A mask or detector constrains the work area | Return to generation when the structure is wrong |
| The target resolution exceeds available VRAM | Ultimate SD Upscale | Tiled img2img lowers per-tile pressure | Reduce target size and use pixel upscaling |
| The edit has a visible edge seam | Expand and feather the mask | Gives the local redraw a transition region | Reduce the edit strength and denoise |
Strengths and tradeoffs
| Path | Strengths | Weaknesses | VRAM demand |
|---|---|---|---|
| Pixel upscaling | Fast, normally preserves composition, many model choices | Cannot fix structural errors and may create artificial texture | Low to medium |
| Latent resampling | Can redraw material and detail, highly adjustable | Denoise needs tuning and the image can drift | Medium to high |
| FaceDetailer | Detects faces automatically without a hand-drawn face mask | Does not preserve identity and can over-repair | Medium to high |
| Manual inpainting | Targets a defined area with clear control | Requires a mask, edge tuning, and correct conditioning | Medium |
| Ultimate SD Upscale | Processes very large images in tiles | Slower and can create tile seams | Depends on tile and model |
Do not enable every post-processing node at once. Use the least destructive path that solves the current problem, save the intermediate result, and then decide whether another sampling or local repair pass is justified.
Recommended order: upscale, repair the face, then inpaint
Post-processing order affects the result. A character image can start with conservative upscaling, then repair detected regions, then make a manual local edit. This is a useful baseline, not a fixed recipe for every image.
Why this order works
Save the source image and workflow first. If the only issue is size, use pixel upscaling because it normally does not resample the prompt.
Next, inspect the face, hands, and other small regions. Use FaceDetailer for a face and the matching Detector and Detailer or manual mask for a hand or object. A larger source makes it easier to judge whether repair is excessive.
Use manual inpainting last for a logo, edge, background flaw, or other exact region so that an earlier full-image operation does not undo the local repair.
Risks of a second pass
When the workflow already uses ControlNet, IPAdapter, or regional prompting, latent resampling and the local sampling inside a Detailer can weaken upstream conditions. Pose, line art, hair color, clothing, and reference identity can all drift.
If a second pass is necessary, keep the original conditions, fix the seed and other parameters, and start at low denoise. When the upstream result matters more than new detail, test pixel upscaling first and decide whether resampling is worth the change.
Related reading
- ComfyUI beginner guide: interface basics, model folders, and the first generation.
- Reuse ComfyUI workflows: importing workflows, missing nodes, and reproducibility troubleshooting.
- Stable Diffusion model selection: base models, VAE, VRAM, and licensing boundaries.
Common failures: blur, face drift, seams, and mask spill
| Symptom | Common cause | What to do |
|---|---|---|
| The upscale is soft or unnaturally hard | The model does not match the image type, or repeated upscaling is excessive | Compare general, photo, and anime-oriented models and reduce repeated processing |
| The face no longer looks like the person | Second-pass denoise is too high or the Detailer region is too large | Lower denoise and shrink the detected region; use a dedicated identity method when identity is the issue |
| Arbitrary texture appears | Tiled upscale or high denoise is redrawing too aggressively | Lower denoise, remove new prompt information, and test on a smaller image first |
| The mask edge has a seam | The mask is too tight, lacks transition, or shifts local brightness | Adjust grow_mask_by, feather the edge, and reduce edit strength |
| Content outside the mask changes | Mask, noise mask, conditioning, or compositing is incorrect | Verify connections, shrink the mask, and lower denoise |
| FaceDetailer cannot find the face | The face is too small, the angle is unusual, or the detector does not match | Apply a conservative upscale or change detector; do not force repair with high denoise |
| The upscale model is missing | The path or extension is wrong, or the list was not refreshed | Put it in upscale_models or configure an extra path, then refresh or restart |
| Ultimate SD Upscale is a red node | The custom node is missing or its version and dependencies do not match | Check installation and updates in Manager; troubleshoot complex conflicts separately |
| The workflow runs out of VRAM | Resolution, tile, batch, or Detailer region is too large | Reduce size and batch, cap max_size, shrink the tile, or use pixel upscaling |
Next step: keep repairing or return to generation?
Continue post-processing when composition, identity, pose, and product shape are already correct and only resolution, a small face, a hand, or a local defect remains. The ideal change fits inside a small detector box or mask.
Return to generation when identity, pose, clothing, subject count, or product structure is wrong. Adding more denoise and inpainting usually increases uncertainty rather than fixing the underlying constraint. Correct the prompt, ControlNet, reference image, or model choice instead.
A character or product that must remain stable across many outputs also needs more than repeated inpainting. Post-processing finishes one image that is already mostly correct; it does not replace identity assets, structural control, or training.
Conclusion
ComfyUI post-processing has four main paths: pixel upscaling, latent resampling, FaceDetailer face repair, and manual inpainting. Start with pixel upscaling when the source content is right. Use a low-denoise latent second pass only when detail should be regenerated. Use FaceDetailer for a soft distant face without treating it as identity preservation, and use a manual mask plus an inpaint conditioning path for a specific local error.
A practical character-image sequence is conservative upscaling, detected-region repair, and a final manual edit. If a full-image second pass exceeds available VRAM, Ultimate SD Upscale can process tiles, but every seam and local style transition still needs review. Comparing each intermediate image with the source makes it much easier to locate face drift, artificial texture, and changes outside the mask.
Choose and run a ComfyUI post-processing path
Classify the problem as size, regenerated detail, a small detected defect, or a specific local edit, then use the least destructive path first.
- 1
Step 1: Preserve the original output
Save the source image, workflow, seed, checkpoint, sampler, steps, and CFG so that each later test changes only one variable. - 2
Step 2: Decide whether the image only needs to be larger
If composition, identity, and texture are already correct, start with UpscaleModelLoader and Upscale Image (Using Model). - 3
Step 3: Decide whether to resample
Use LatentUpscale plus KSampler only when you want regenerated material or detail, and begin with a low denoise value. - 4
Step 4: Repair a small face or detected region
Use FaceDetailer or another Detector-plus-Detailer path, limiting guide_size, max_size, and denoise so it does not redraw the background. - 5
Step 5: Draw a mask for a specific edit
Cover only the target area in Mask Editor, leave a small transition margin, and connect either VAE Encode (for Inpainting) or an InpaintModelConditioning path. - 6
Step 6: Check seams and spill outside the mask
If you see hard edges, color shifts, or a pasted-on patch, adjust grow_mask_by, feathering, and denoise, then verify the mask and noise mask. - 7
Step 7: Reduce VRAM pressure on very large images
Lower the target size or use Ultimate SD Upscale for tiled processing, then inspect every tile boundary and texture transition. - 8
Step 8: Keep the smallest successful change
Compare the source, pixel-upscaled, resampled, and locally repaired versions, and retain the result that meets the goal with the least structural drift.
FAQ
How do you build a Hires Fix workflow in ComfyUI?
What is the difference between Latent Upscale and Upscale Image (Using Model)?
Where do ComfyUI upscale models go?
Is FaceDetailer a face-swap tool?
Why does inpainting change pixels outside the mask?
What should you change when FaceDetailer makes a face look worse?
When should you use Ultimate SD Upscale?
16 min read · Published on: Jul 22, 2026 · Modified on: Jul 22, 2026

ComfyUI & Stable Diffusion: Setup, Models, and Workflows
If you landed here from search, the fastest way to build context is to jump to the previous or next post in this same series.
Previous
ComfyUI Regional Prompting for Multi-Subject Compositions: Regional, Cutoff, and Conditioning Combine
Separate ComfyUI subjects with Set Area, RegionalPrompt, and Cutoff, covering coordinates, mask sampling, ControlNet pairing, strength, and second-pass color bleed.
Part 11 of 16
Next
ComfyUI Low-VRAM Optimization: Run SDXL, FLUX, and Video Workflows on 6–8GB GPUs
Run ComfyUI on 6–8GB GPUs by budgeting model weights, T5, VAE, resolution, and batch size, then troubleshoot OOM errors and slow FLUX or video workflows.
Part 13 of 16


Comments
Sign in with GitHub to leave a comment