
ComfyUI IPAdapter: Reference Image Style, Composition, and Model Pairing
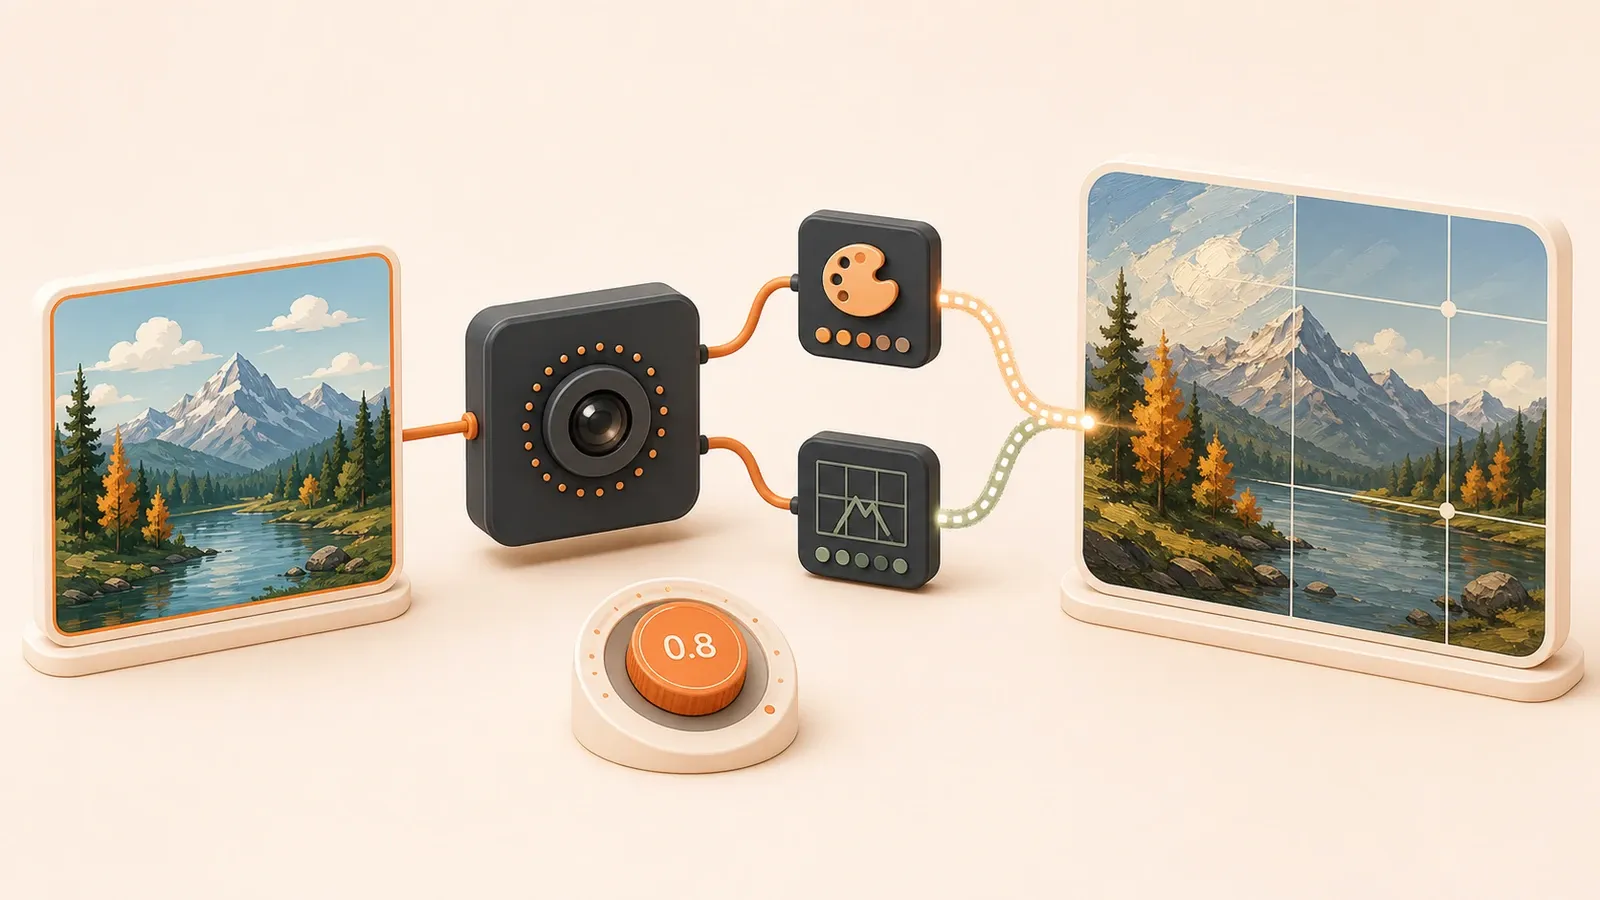
"The cubiq ComfyUI_IPAdapter_plus README documents IPAdapter and CLIP Vision pairing, Unified Loader filenames, FaceID dependencies, and the recommended starting weight."
You have a picture of Van Gogh’s Starry Night and want AI to generate a landscape in the same style, but no amount of prompt tweaking gets it right. You switch to ComfyUI IPAdapter, drop in the reference, set weight to 1.0, and get a face so blurred it is unrecognizable while the composition veers off course.
The hard part of IPAdapter is not installation. It is pairing, tuning, and controlling it. The guide below includes the model-to-CLIP Vision pairing table that prevents the most common errors, practical weight_type settings, a division of labor among three control methods, and separate paths for SD1.5, SDXL, and FLUX.
1. What IPAdapter is: one image as an instant LoRA
ComfyUI describes IPAdapter as image-to-image conditioning. It encodes the visual features of a reference image and injects them into generation. The cubiq repository summarizes the idea well: think of it as a 1-image LoRA.
That immediate transfer without training is the main difference between IPAdapter and LoRA. LoRA requires multiple training images, a training run, and a model file that is often tens or hundreds of megabytes. IPAdapter uses one reference directly, encodes it during generation, and requires no newly trained model file.
At a lower level, LoRA fine-tunes weight matrices and modifies the model during generation. IPAdapter encodes the reference into conditioning vectors and injects them into cross-attention alongside the text prompt. They take different paths, but both can steer the output.
1.1 How the three control methods divide the work
The three common control methods in ComfyUI have different strengths:
| Method | What it controls | What it needs | Advantage |
|---|---|---|---|
| IPAdapter | Style, reference, and subject traits | One reference image | Immediate transfer without training |
| ControlNet | Structure, pose, line art, and depth | A structural map such as OpenPose, Canny, or Depth | Precise composition and pose control |
| LoRA | Style, character, and visual language | A trained model file | Stable output across repeated use |
Each method suits a different job:
- Use IPAdapter for quick style tests, one-off references, or cases where you do not want to train a model. If you have one Starry Night reference and want a similarly styled landscape, you can feed it directly into the workflow.
- Use ControlNet for precise pose, composition, edge, or depth control. To keep a person in a specific pose, use an OpenPose map.
- Use LoRA for repeatedly applying the same style or character. Once you have trained a character LoRA, you can reproduce that character more consistently across generations.
You can combine all three. For a portrait in the style of Starry Night with a specific pose, let IPAdapter transfer the style and ControlNet OpenPose control the pose. See the ComfyUI ControlNet guide for the combined setup.
2. The most common error: the model-to-CLIP Vision pairing table
If the IPAdapter nodes are installed but produce an error or no visible effect, the usual cause is a missing CLIP Vision model, a wrong folder, or an incorrect pairing between CLIP Vision and the IPAdapter model.
2.1 CLIP Vision model list
IPAdapter needs two models: the IPAdapter model itself and a CLIP Vision model that encodes the reference image. They must match, or the workflow may fail or produce the wrong result.
| CLIP Vision model | Filename | Compatible IPAdapter models |
|---|---|---|
| vit-h | CLIP-ViT-H-14-laion2B-s32B-b79K.safetensors | Most SD1.5 models and SDXL models with a *_vit-h suffix |
| bigG | CLIP-ViT-bigG-14-laion2B-39B-b160k.safetensors | Models with a vit-G designation, including ip-adapter_sd15_vit-G and ip-adapter_sdxl |
The vit-h file is about 1.7 GB, while bigG is about 3.5 GB. Download the exact model from the correct Hugging Face repository rather than a different CLIP checkpoint with a similar name.
2.2 Folder and naming requirements
- CLIP Vision folder:
ComfyUI/models/clip_vision/ - IPAdapter folder:
ComfyUI/models/ipadapter/(create it manually) - Naming rule: Unified Loader expects the official filenames; Legacy Loader accepts custom names but requires manual model selection
If the folder does not exist, the node reports that it cannot find the model. models/ipadapter/ is not always present in a fresh installation, so create it:
mkdir -p ComfyUI/models/ipadapter2.3 Common pairing mistakes
- Pairing
ip-adapter_sdxlwith vit-h:ip-adapter_sdxlwithout thevit-hsuffix uses bigG, not vit-h. A wrong encoder may cause an error or a badly distorted result. - Installing
ip-adapter-plus_sd15without CLIP Vision: The IPAdapter model is present, but the encoder is missing. The node may load, yet the reference contributes nothing during generation. - Renaming the file and breaking Unified Loader detection: If you rename
ip-adapter-plus_sd15.safetensorstomy_ipadapter.safetensors, Unified Loader cannot identify it automatically. Restore the official name or use Legacy Loader.
2.4 Pairing checklist
When an error occurs, check the following in order:
- Open
ComfyUI/models/clip_vision/and confirm that the required CLIP Vision file is present under the correct name - Open
ComfyUI/models/ipadapter/and confirm that the folder and IPAdapter model both exist - Compare the two files with the pairing table
- Confirm that the filename follows the Unified Loader convention
Pairing errors account for most first-run failures. Checking the table before downloading avoids the majority of them.
3. IPAdapter model tiers: a quick selection table
Different jobs call for different model tiers. The base model has moderate strength, plus is stronger, and plus-face and full-face focus on facial references.
3.1 SD1.5 model tiers
| Model | Strength | Best use |
|---|---|---|
ip-adapter_sd15 | Medium | Basic style transfer when you want a restrained effect |
ip-adapter-plus_sd15 | Strong | Recommended for most cases where the style should be obvious |
ip-adapter-plus-face_sd15 | Portrait-specific | Preserving facial traits in portraits |
ip-adapter-full-face_sd15 | Stronger, but not always better | Extreme face control when plus-face is insufficient |
The plus model transfers reference traits more strongly than the base model, but it can also pull the composition away from your prompt. Use the base model for lighter style influence.
The plus-face and full-face variants specialize in portraits. Start with plus-face. Full-face is stronger, but that extra strength can distort a face instead of improving it.
3.2 SDXL model tiers
The listed SDXL models all use the vit-h CLIP Vision encoder. Do not confuse them with ip-adapter_sdxl, which uses bigG.

| Model | CLIP Vision pairing |
|---|---|
ip-adapter_sdxl_vit-h | vit-h |
ip-adapter-plus_sdxl_vit-h | vit-h |
ip-adapter-plus-face_sdxl_vit-h | vit-h |
These SDXL filenames include a vit-h suffix and therefore pair with vit-h. The separate ip-adapter_sdxl model has no such suffix and uses bigG.
3.3 Community extension models
ip_plus_composition_sd15/sdxl is a community model that transfers composition while ignoring style and content. Pair it with the composition weight_type when you want to preserve the layout but choose the style and subject independently.
3.4 Model selection recommendations
- Mainly transferring style: use a plus model for a clearly visible effect
- Generating portraits: use plus-face to preserve facial traits
- Applying a light style influence: use the base model so the reference does not dominate
- Transferring only composition: use
ip_plus_compositionwith thecompositionweight_type - Reusing the same reference many times: consider training a LoRA instead of encoding the same reference for every generation
4. weight_type in practice: style, composition, or subject
By default, IPAdapter can transfer style, composition, and subject traits at the same time. That is why a style reference can unexpectedly drag the composition with it, or a face reference can produce a blurred face. The weight_type setting narrows the type of influence.
4.1 weight_type options
| weight_type | Effect | Best use |
|---|---|---|
| style transfer | Primarily transfers style | Keep your own composition while borrowing the visual style |
| composition | Primarily transfers composition | Keep the reference layout while choosing a new style and subject |
| precise style transfer | More isolated style transfer | Reduce composition leakage; prefer this over standard style transfer when possible |
| Default (no special weight_type) | Transfers everything | Style, composition, and subject traits together |
Set weight_type in the IPAdapter Advanced node. IPAdapter Unified Loader alone leaves the workflow in the default all-influence mode. For precise control, add the Advanced node or use the dedicated IPAdapter Style & Composition nodes.
4.2 Differences between weight_type modes
- style transfer: focuses on style, although some composition can still bleed through.
- precise style transfer: separates style more cleanly and usually reduces unwanted composition influence. Try this first.
- composition: borrows the layout while ignoring style and content. Use it when the spatial arrangement matters more than the visual treatment.
4.3 Recommendations by scenario
- Style only: choose
precise style transferorstyle transferinIPAdapter Advanced. Start with weight 0.7–0.9 so the reference does not overwhelm the prompt. - Composition only: choose
composition, preferably withip_plus_composition_sd15/sdxl. A weight of 0.9–1.0 often works because composition guidance is less likely to blur a face. - Preserve a face: use plus-face with weight below 0.8. Keep the default weight_type or try
style transfer; do not usecompositionfor identity. - Multiple references: set the weight of an unused branch to 0. For separate style and layout references, set the layout branch to
composition, the style branch toprecise style transfer, and tune each weight independently.
4.4 Combining weight_type and weight
| Goal | weight_type | Starting weight |
|---|---|---|
| Transfer style but define your own composition | precise style transfer | 0.7–0.9 |
| Transfer composition but define your own style | composition | 0.9–1.0 |
| Transfer style and preserve a face | Default with a plus-face model | 0.6–0.8 |
| Combine several reference images | Set weight_type per branch | Tune per branch; set unused ones to 0 |
weight_type controls the scope of the reference, while weight controls its strength. If the reference keeps dragging the composition away, switch from the default mode to precise style transfer. If a face blurs, lower weight and use plus-face.
5. A practical feel for weight
What weight should you use? The default 1.0 is often too high: faces blur, the reference dominates, and the text prompt loses influence.
5.1 Starting value
Start at 0.8 rather than 1.0. At weight 1.0, reference features can become overemphasized and suppress the text prompt.
More sampling steps can help, for example moving from 20 to 30, but lowering weight addresses the underlying imbalance more directly. Extra steps also cost time; lowering weight does not.
5.2 Weight ranges
| weight | Result | Common problem |
|---|---|---|
| 1.0 | Strongest transfer | Blurred faces, prompt suppression, composition drift |
| 0.8–0.9 | Strong transfer | A useful balance for most workflows |
| 0.5–0.7 | Medium transfer | Weaker style, but easier to combine with several references |
| 0.3–0.5 | Light transfer | A subtle adjustment close to prompt-only generation |
If weight is too low, the reference may barely affect the image. If it is too high, the reference can overpower the prompt. A weight of 0.8 is a practical baseline.
5.3 Relationship to sampling steps
High weight → add steps if the face is still blurry. Low weight → fewer steps may save time.
Practical ranges:
- weight=1.0 → at least 30 steps, sometimes 40
- weight=0.8–0.9 → 25–30 steps
- weight=0.5–0.7 → 20–25 steps
- weight=0.3–0.5 → about 20 steps
More steps are not always better. Beyond 40, the improvement often becomes small while generation takes much longer. Adjust weight before pushing the step count higher.
5.4 Combining weight with other parameters
- weight + weight_type: weight controls strength; weight_type controls scope. Decide whether the reference should affect composition first, then tune how strongly it should apply.
- weight + CFG Scale: CFG Scale controls text-prompt influence. With a high IPAdapter weight, you can raise CFG Scale, for example from 7 to 9, to restore some prompt influence. With a lower weight, leave CFG Scale near 7.
- weight + multiple references: lower the weight of each reference to avoid conflicts. Two references at 0.5–0.6 each are safer than both at 0.8–1.0.
5.5 A repeatable tuning pass
A safe first test is weight 0.8 with 30 steps. Generate one image and adjust from the result instead of starting at 1.0.
Test sequence:
- Set weight=0.8 and steps=30, then generate one image
- If the reference is too weak, raise weight to 0.9
- If the reference is too strong or a face blurs, lower weight to 0.7
- If the composition drifts, change weight_type to
precise style transfer
Weight is the primary tuning control in IPAdapter. Start at 0.8 and adjust in small increments.
6. Installation and node setup
6.1 Installation steps
-
Clone the repository: run the following from
ComfyUI/custom_nodes/:git clone https://github.com/cubiq/ComfyUI_IPAdapter_plus -
Create the model folder: create
ComfyUI/models/ipadapter/manually if it does not exist:mkdir -p ComfyUI/models/ipadapter -
Download the models:
- Put CLIP Vision models in
ComfyUI/models/clip_vision/ - Put IPAdapter models in
ComfyUI/models/ipadapter/ - Check the pairing table in Section 2 before downloading
- Put CLIP Vision models in
-
Restart ComfyUI: after restarting, IPAdapter nodes should appear in the node list
The installation adds these nodes:
IPAdapter Unified LoaderIPAdapter AdvancedIPAdapter EncoderIPAdapter Style & CompositionIPAdapter Precise Style Transfer
6.2 Core nodes
IPAdapter Unified Loader loads the model and automatically detects the correct pairing when official filenames are used. It is the best starting point for most workflows.
Parameters:
ipadapter_file: selects the IPAdapter model; official filenames allow automatic detectionclip_vision: selects or matches the CLIP Vision encoderlora: automatically loads the paired LoRA for supported FaceID models
IPAdapter Advanced exposes weight_type, start_at, and end_at. It is the main node for precise influence control.
Parameters:
weight: reference strength; start at 0.8weight_type: influence scope, such as style transfer, composition, or precise style transferstart_at: when the reference starts affecting sampling, from 0 to 1end_at: when the reference stops affecting sampling, from 0 to 1
For example, start_at=0.2 and end_at=0.8 means IPAdapter only applies from 20% to 80% of the sampling process. The first and last 20% run without its influence.
IPAdapter Encoder encodes the reference image into the conditioning consumed by IPAdapter. Most basic workflows do not need to adjust it directly.
6.3 Legacy Loader versus Unified Loader
- Unified Loader: requires official filenames and loads matching models automatically. Use it in most workflows.
- Legacy Loader: accepts custom filenames but requires manual model selection. Use it for renamed files or version testing.
Keep the official names and use Unified Loader when possible. Switch to Legacy Loader when you need custom naming or a specific model version.
6.4 Building the basic workflow
A basic IPAdapter workflow uses this node chain:
Load Checkpoint → IPAdapter Unified Loader → IPAdapter Advanced → KSampler → VAE Decode → Save Image
                          ↑
                    Load Image (reference)
Steps:
- Load the base model with Load Checkpoint
- Load the IPAdapter model with IPAdapter Unified Loader
- Load the reference with Load Image
- Apply the reference with IPAdapter Advanced
- Sample with KSampler
- Decode with VAE Decode
- Save the result with Save Image
For missing-node installation and workflow recovery, see the ComfyUI workflow reuse guide.

7. The FLUX IPAdapter branch: an experimental path
FLUX IPAdapter uses different nodes from SD and does not load through cubiq’s node pack. Two common implementations exist, and both should be treated as beta software.
7.1 XLabs-AI
- Nodes:
Flux Load IPAdapterandApply Flux IPAdapter - Folder:
ComfyUI/models/xlabs/ipadapters/, notmodels/ipadapter/ - Status: beta; a good result may require repeated generations and ip strength tuning
- License: weights follow the FLUX.1 [dev] non-commercial license, so commercial use needs separate review
XLabs-AI is one of the primary FLUX IPAdapter implementations. To install it:
- Clone the XLabs node pack into
custom_nodes/ - Download the FLUX IPAdapter model to
models/xlabs/ipadapters/ - Load a FLUX base model, not an SD model
- Use
Flux Load IPAdapterandApply Flux IPAdapter
Parameter:
ip_strength: the FLUX equivalent of weight. Start around 0.8–0.9 rather than 1.0.- Expect to test several outputs and adjust the setting.
7.2 Shakker-Labs
- Node:
Apply IPAdapter Flux Model - Parameters: weight, start_percent, and end_percent
- Folder: clone the package into
ComfyUI/custom_nodes/comfyui-ipadapter-flux/
Shakker-Labs provides another FLUX-specific node pack:
- Clone it with
git clone https://github.com/Shakker-Labs/ComfyUI-IPAdapter-Flux - Load the FLUX IPAdapter model
- Apply it with
Apply IPAdapter Flux Model
Parameters:
weight: reference strength; start around 0.8–0.9start_percent: the point where IPAdapter starts applyingend_percent: the point where it stops applying
7.3 FLUX versus SD nodes
| Item | SD with cubiq | FLUX with XLabs or Shakker |
|---|---|---|
| Node pack | ComfyUI_IPAdapter_plus | XLabs or Shakker-Labs nodes |
| Model folder | models/ipadapter/ | models/xlabs/ipadapters/ |
| Maturity | Stable, widely used implementation | Beta and experimental |
| License | Open source node code | FLUX.1 [dev] non-commercial model weights |
7.4 Recommendations for FLUX IPAdapter
The FLUX IPAdapter ecosystem is newer and less predictable. A useful test order is:
- Start with the XLabs implementation because it is the more common path
- Set ip_strength or weight to 0.8–0.9 instead of 1.0
- Generate several samples and tune the parameters
- Review the FLUX.1 [dev] non-commercial restriction before commercial use
FLUX and SD use different node packs, model folders, and parameter semantics. Loading a FLUX IPAdapter model with cubiq’s SD nodes will fail or have no effect.
8. FaceID in brief: one option for face references
FaceID is an IPAdapter branch designed for face references. It requires insightface, and most FaceID models also need a matching LoRA in models/loras/. Unified Loader can load that LoRA automatically when the naming convention is preserved.
A separate face-consistency guide should cover FaceID, InstantID, and ReActor in depth. Here, the important boundary is that FaceID adds dependencies and a model-specific LoRA.
9. Dividing and combining IPAdapter, ControlNet, and LoRA
The three methods control different things and can be combined. When you stack them, lower individual weights to reduce conflicts.
9.1 Comparison of the three methods
| Method | What it controls | What it needs | Advantage |
|---|---|---|---|
| IPAdapter | Style, reference, and subject traits | One reference image | Immediate transfer without training |
| ControlNet | Structure, pose, line art, and depth | A structural map such as OpenPose, Canny, or Depth | Precise composition and pose control |
| LoRA | Style, character, and visual language | A trained model file | Stable output across repeated use |
They are complementary rather than interchangeable. IPAdapter is quick for style tests, ControlNet is precise for structure, and LoRA is stable for repeated styles or characters.
9.2 Combination examples
Example 1: reference style plus controlled pose
Goal: generate a portrait in the style of Starry Night with a specific pose
- IPAdapter: transfer the style with weight=0.7–0.8 and weight_type=
precise style transfer - ControlNet OpenPose: control the pose with weight=0.8–1.0
- Text prompt: describe the person and background details
Suggested settings:
- Keep IPAdapter at 0.7–0.8 so the style does not overpower pose control
- Keep ControlNet around 0.8–1.0 because pose guidance usually does not conflict with style
- Raise CFG Scale to 8–9 if the text prompt loses influence
Example 2: reference style plus a learned character
Goal: generate a known character in a particular visual style
- IPAdapter: transfer the art style with weight=0.6–0.7 and weight_type=
precise style transfer - LoRA: load the character model at weight=0.7–0.8
- Text prompt: describe the scene and action
Suggested settings:
- Keep IPAdapter at 0.6–0.7 and LoRA at 0.7–0.8; avoid maxing out both
- Raise LoRA weight if the character traits are too weak
- Raise IPAdapter weight if the art style is too weak
Example 3: multiple references plus ControlNet
Goal: combine style A, composition B, and pose C
- First IPAdapter branch: style A at weight=0.5–0.6 with weight_type=
precise style transfer - Second IPAdapter branch: composition B at weight=0.6–0.7 with weight_type=
composition - ControlNet OpenPose: pose C at weight=0.8–1.0
Suggested settings:
- Lower each reference weight when using multiple images
- Set an unused reference branch to weight 0
- Tune by priority: pose, then composition, then style
9.3 Points to watch when stacking controls
When several controls are active:
- Lower each weight: set IPAdapter around 0.5–0.7 rather than 0.8–1.0 when other strong controls are present.
- Tune in priority order: pose from ControlNet usually comes first, then IPAdapter composition, then IPAdapter style.
- Avoid controlling the same trait twice: two separate systems both pushing style can conflict.
- Restore prompt influence if needed: raise CFG Scale to 8–9 when stacked conditions weaken the text prompt.
See the ComfyUI ControlNet guide and ComfyUI LoRA guide. Exact weight ranges still need testing with your model and reference images.
10. Troubleshooting checklist
10.1 Common problems and fixes
| Problem | Cause | Fix |
|---|---|---|
| Nodes are installed, but generation errors or does not change | CLIP Vision is missing, in the wrong folder, or incorrectly paired | Check clip_vision/ and compare the files with the pairing table |
| Pairing error | IPAdapter and CLIP Vision do not match | Download the correct CLIP Vision model |
| Face blurs at weight=1.0 | Weight is too high | Lower it to 0.8–0.9 and try about 30 steps |
| Composition drifts | Default weight_type transfers everything | Set weight_type to precise style transfer in the Advanced node |
| FLUX IPAdapter does not work | FLUX uses different nodes from SD | Use XLabs or Shakker-Labs nodes instead of cubiq’s pack |
| Unified Loader cannot identify the file | Filename does not follow the required convention | Restore the official name or select it manually in Legacy Loader |
| Reference traits are barely visible | Weight is too low | Raise weight to 0.8–0.9 or switch to a plus model |
| Reference traits are too strong | Weight is too high | Lower weight to 0.5–0.7 |
| Several references conflict | Individual weights are too high | Lower each to 0.5–0.6 and set unused branches to 0 |
10.2 Advanced troubleshooting
The reference image is too complex
Problem: one image contains a strong style, composition, and subject, and the resulting signals interfere with each other.

Fix:
- Split the job across references: use one image for style with
precise style transferand another for layout withcomposition - Lower each weight to 0.5–0.6
- Set unwanted branches to weight 0
IPAdapter and several LoRAs conflict
Problem: style or character traits become unstable when IPAdapter and LoRA are stacked.
Fix:
- Set IPAdapter to 0.5–0.7 and LoRA to 0.5–0.7
- Do not use IPAdapter and LoRA to control the same trait
- Tune by priority: LoRA character first, IPAdapter style second
FLUX remains inconsistent
Problem: the FLUX IPAdapter output changes unpredictably or sometimes has no effect.
Fix:
- Generate several samples and tune ip strength or weight
- Try the XLabs implementation first
- Check that the model is in
models/xlabs/ipadapters/
The IPAdapter model does not match the base model
Problem: an SD1.5 IPAdapter model is being applied to an SDXL base model.
Fix:
- Match SD1.5 IPAdapter models to SD1.5 checkpoints and SDXL IPAdapter models to SDXL checkpoints
- Review the Stable Diffusion model selection guide
Node versions differ
Problem: node names and parameter labels vary slightly between package versions.
Fix:
- Use Unified Loader plus IPAdapter Advanced as the main path
- Check the installed node-pack version and update when necessary
- Follow the documentation for your installed version when parameter names differ
10.3 Troubleshooting sequence
Work through problems in this order:
- Check folders: confirm that CLIP Vision and IPAdapter models are in the correct locations
- Check the pairing table: verify that the two models match
- Check filenames: restore the official naming convention for Unified Loader
- Lower weight: start at 0.8 rather than 1.0
- Adjust weight_type: use
precise style transferwhen the composition drifts - Add steps: try about 30 steps when a strong reference still produces a blurred result
Most first-run problems come from a wrong pairing or excessive weight. Checking the folders, matching the encoder, and starting at 0.8 resolves the common cases.
Conclusion
IPAdapter treats one reference image as conditioning, letting you transfer style, composition, or subject traits without training a LoRA. The critical setup detail is the CLIP Vision pairing. The critical tuning detail is that too much weight blurs faces, while the default weight_type can pull the composition away from the prompt.
A reliable starting sequence is:
- Use the pairing table to download the correct CLIP Vision model
- Start weight at 0.8 instead of 1.0
- Choose
precise style transferwhen you only want style - Lower each weight when combining IPAdapter with ControlNet
From there, you can explore face consistency with FaceID, InstantID, or ReActor, or train a LoRA for repeated use. If you need the basics first, see the ComfyUI beginner guide.
Build and tune a basic ComfyUI IPAdapter workflow
Verify the model pairing and folders first, then start at a reference strength of 0.8 and change one parameter at a time.
- 1
Step 1: Install the node pack
Clone cubiq/ComfyUI_IPAdapter_plus into ComfyUI/custom_nodes, or install it through ComfyUI Manager, then restart ComfyUI. - 2
Step 2: Prepare the model folders
Make sure ComfyUI/models/clip_vision exists and create ComfyUI/models/ipadapter. Do not put both model types in the same folder. - 3
Step 3: Verify the model pairing
Use the IPAdapter filename to determine whether it needs vit-h or bigG, and confirm whether the base model is SD1.5, SDXL, or FLUX. - 4
Step 4: Connect the basic nodes
Connect Load Checkpoint, IPAdapter Unified Loader, IPAdapter Advanced, KSampler, VAE Decode, and Save Image in order, then connect Load Image to the reference-image input. - 5
Step 5: Start with safe parameters
Generate a baseline with weight 0.8 and about 30 steps. Choose precise style transfer for style only, or composition for layout only. - 6
Step 6: Change one variable at a time
Adjust weight, weight_type, start_at, or end_at separately. Lower each weight when combining multiple references or ControlNet to avoid conflicting conditions.
FAQ
What is the difference between IPAdapter and ControlNet?
Which CLIP Vision model does ip-adapter_sdxl require?
What IPAdapter weight should I use?
How do I transfer style without copying the reference composition?
Can FLUX use IPAdapter?
Why can't Unified Loader find my IPAdapter model?
19 min read · Published on: Aug 21, 2026 · Modified on: Aug 21, 2026

ComfyUI & Stable Diffusion: Setup, Models, and Workflows
If you landed here from search, the fastest way to build context is to jump to the previous or next post in this same series.
Previous
Using LoRA in ComfyUI: Loading, Weights, Stacking, and Character Consistency
Load LoRA files in ComfyUI, tune strength_model and strength_clip, stack multiple LoRAs, match the base model, reduce character drift, and troubleshoot weak results.
Part 6 of 16
Next
ComfyUI FLUX.1 Kontext: Multi-Turn Editing and Character Consistency
Set up FLUX.1 Kontext Dev in ComfyUI, write preservation prompts, manage multi-turn edits, roll back drift, and choose the right consistency tool.
Part 8 of 16


Comments
Sign in with GitHub to leave a comment