
Using LoRA in ComfyUI: Loading, Weights, Stacking, and Character Consistency
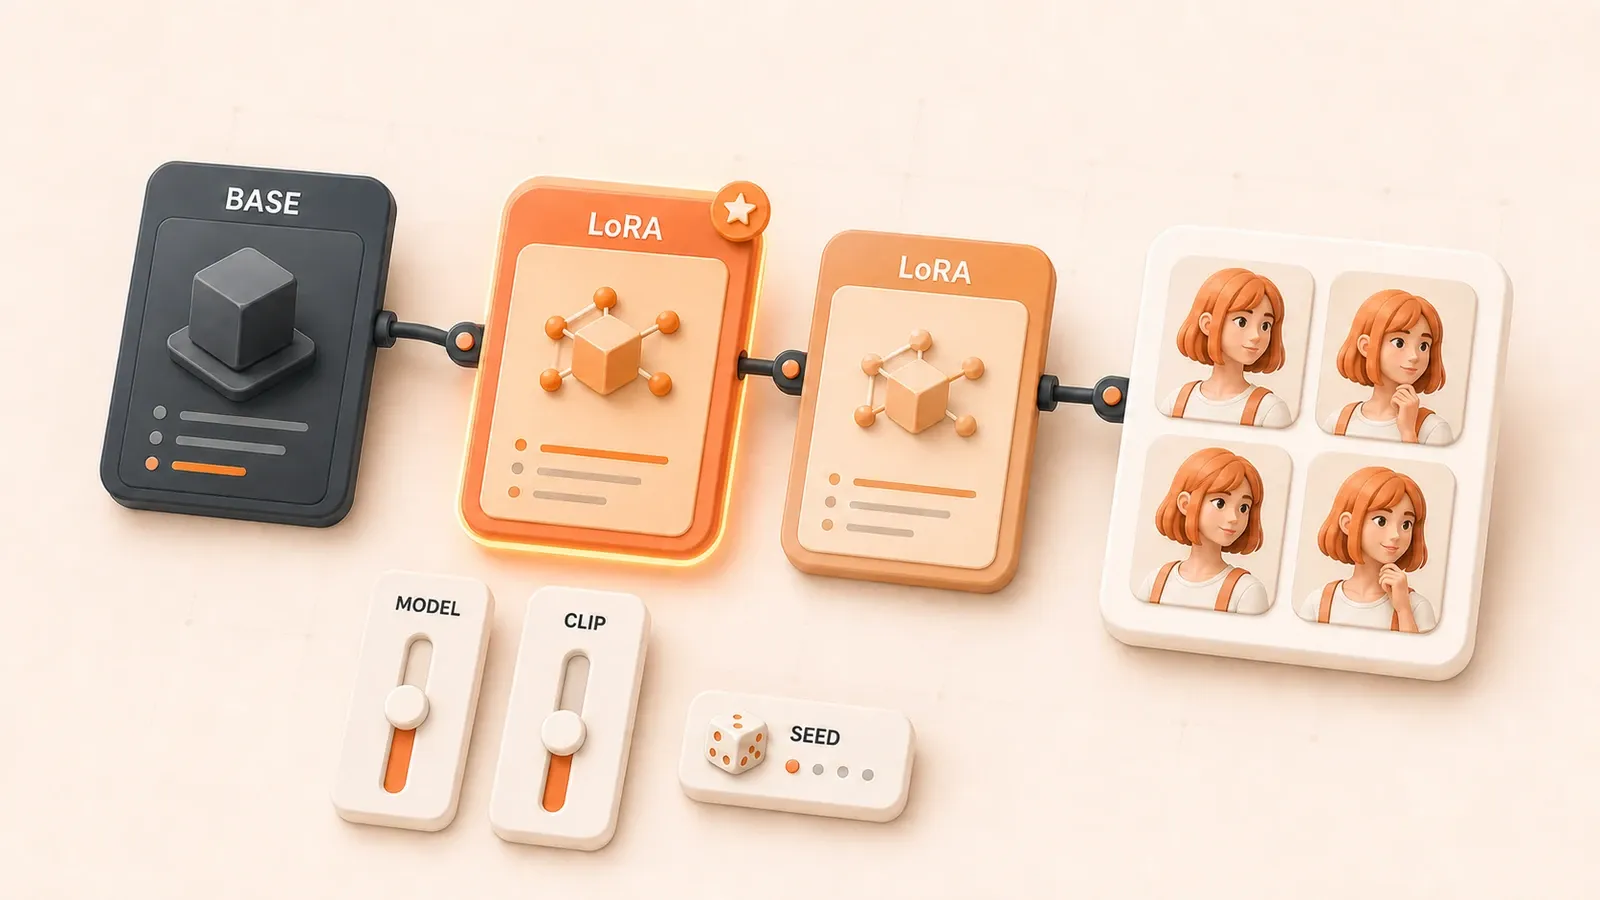
"The official ComfyUI LoraLoader documentation confirms the LoRA folder, the two input/output paths, the strength ranges, and node chaining."
Generate four images with the same character LoRA and every face looks different. Move the weight from 0.5 to 1.2 and the output barely changes. Chain two LoRAs and their styles start fighting. ComfyUI exposes these controls more explicitly than SD WebUI, which gives you more room to tune but also more ways to wire or configure the workflow incorrectly. The sections below cover every Load LoRA parameter, the practical difference between strength_model and strength_clip, multi-LoRA wiring and weight allocation, and a repeatable way to reduce character drift through model matching, trigger words, and troubleshooting.
LoRA basics and folder setup
LoRA, or Low-Rank Adaptation, is a lightweight weight-adaptation method. It does not replace the base checkpoint. Instead, it applies an additional set of weights at runtime. A LoRA is often tens of megabytes, while a base model may take several gigabytes. Training adjusts this smaller layer rather than retraining an entire checkpoint, reducing both training and storage costs.
Where to put LoRA files
ComfyUI’s standard path is ComfyUI/models/loras/, and it also detects subfolders. Prefer the .safetensors file supplied by the model author, place it in this folder, and refresh the model list. Restart ComfyUI if the dropdown still does not update. The new file should appear in the Load LoRA node’s lora_name dropdown. Do not treat the extension as proof of compatibility; also check the base model and intended use on the model card.
How LoRA variants are handled
Variants such as Lycoris, LoHa, LoKr, and LoCon are used through the same LoRA loading flow. Once the file is in the correct folder, the node workflow does not change. The variants differ mainly in how they are trained and factorized, which can affect file size or behavior in particular cases. From the user’s perspective, the loading steps are the same.
Load LoRA node parameters
The Load LoRA node applies LoRA weights to the output of a base model. It has two inputs on the left, two outputs on the right, and three settings that determine what is loaded and how strongly it is applied.
Input and output ports
| Port | Direction | Type | Purpose |
|---|---|---|---|
| model | Input | MODEL | Connects to the MODEL output of the base Checkpoint Loader |
| clip | Input | CLIP | Connects to the CLIP output of the base Checkpoint Loader |
| model | Output | MODEL | MODEL with LoRA weights applied; connects to the downstream sampler |
| clip | Output | CLIP | CLIP with LoRA adjustments applied; connects to the prompt path |
Both outputs need to reach the appropriate downstream nodes. If the model output is connected but the clip output is not, trigger-word response may weaken or disappear.
Node settings
| Setting | Type | Range | Purpose |
|---|---|---|---|
| lora_name | Dropdown | File list | Loads from models/loras/; newly added files appear after a refresh |
| strength_model | Number | -100 to 100 | Controls the effect on model weights; everyday tests usually start around 0 to 1 |
| strength_clip | Number | -100 to 100 | Controls the effect on CLIP text encoding; everyday tests usually start around 0 to 1 |
Both strength inputs accept negative values, but a negative value is not a universal “weaker” setting. Different LoRAs can respond differently, so test negatives only after compatibility is confirmed and the seed is fixed. The two strengths do not need to match; inspect the model and CLIP sides separately for each LoRA.
strength_model vs. strength_clip in practice
Load LoRA exposes two strengths instead of one. Do you need to change both, or can one stay fixed?
What each strength changes
strength_model controls the LoRA’s effect on image generation. It changes the model weights that directly shape details, style, texture, and lighting.
strength_clip controls the LoRA’s effect on text encoding. It changes how the CLIP text encoder interprets the prompt and responds to trigger words.
The model strength determines how visible the visual traits become; the CLIP strength influences how strongly the LoRA follows the trigger and prompt. Their relationship is not as simple as “higher equals better.”

Typical starting points by LoRA type
| LoRA type | strength_model | strength_clip | Notes |
|---|---|---|---|
| Character | 0.8-1.0 | 0.6-0.8 | A stronger model side can preserve character traits; lower CLIP can avoid an overbearing trigger |
| Style | 0.7-0.9 | 0.7-0.9 | Similar values balance style and prompt interpretation |
| Concept | 0.6-0.8 | 0.8-1.0 | A stronger CLIP side can reinforce the trigger while a lower model side limits visual overload |
These are experience-based starting points. The usable range depends on the LoRA’s training data and trigger strength.
Sweep one weight with the same prompt and seed
- Fix the prompt, seed, CFG, and sampling steps.
- Change only strength_model and test 0.6, 0.8, 1.0, and 1.2.
- Compare the four images for style, detail, and character traits.
- Choose the strongest value that still produces a clean image as the model-side starting point.
- Fine-tune strength_clip while watching trigger response and prompt consistency.
Changes to CLIP strength are less direct visually, so tune it after finding a useful model strength. If the style is right but the face breaks, try lowering strength_clip by 0.1 or 0.2.
Trigger words: how to find and use them
The LoRA is selected and the strength is nonzero, yet the image barely changes. Often the LoRA is fine; the trigger word is missing or disconnected from the intended concept.
What a trigger word is
A trigger word is a keyword defined during training. It activates the traits the LoRA learned. Many character and concept LoRAs need one, while some style LoRAs work without a required trigger or offer an optional one to reinforce the style.
Without the trigger, the effect may be weak or absent. You might see a faint stylistic bias while core traits such as the face, clothing, or hair fail to appear.
How to find the trigger word
- Open the model card, such as its CivitAI page.
- Look for “Trigger Words” or “Activation Text.”
- Copy the trigger token into the prompt.
Some authors put the trigger in the description rather than a separate field. Read the usage notes as well. A LoRA that needs no trigger should say so explicitly.
Where the trigger belongs in the prompt
Keep the trigger next to the character or concept it describes and separate it from other keywords with commas. Follow the model card and current workflow for any extra weighting syntax; simply moving a word to the beginning does not guarantee a stronger effect.
Example prompt structure:
character_name, 1girl, long hair, blue eyes, white dress, ...Here, character_name stands for the trigger token listed on the model card. A standard ComfyUI workflow already selects the model through Load LoRA, so you do not need to copy WebUI’s <lora:filename:weight> syntax unless a specific custom-node workflow supports it.
Follow the trigger with stable character traits, then scene and composition details. Avoid inserting unrelated style terms between the trigger and the traits it is meant to activate.
Weight ranges for style and character LoRAs
What weight should a LoRA use? Starting at 1.0 can produce either a broken image or almost no visible effect because different LoRA types have different useful ranges.
Reference ranges
| LoRA type | Suggested range | Starting point | Symptoms when too high |
|---|---|---|---|
| Style | 0.5-0.9 | 0.75 | Color clipping, added noise, or a style strong enough to distort the subject |
| Character | 0.7-1.2 | 0.8 for well-known characters 1.0-1.1 for small training sets | Broken anatomy, exaggerated facial features, or overemphasized traits |
These are empirical starting points, not official limits. A character trained on a larger dataset may work around 0.8, while a small or personal dataset may need 1.0-1.1 before its traits become clear.
A quick weight-sweep method
- Fix the prompt, seed, CFG, and sampling steps.
- Set strength_model to 0.6 and strength_clip to 0.8.
- Generate the first image and check whether the LoRA appears.
- Change strength_model to 0.8 and generate the second image.
- Change strength_model to 1.0 and generate the third image.
- Change strength_model to 1.2 and generate the fourth image.
- Compare the four outputs and choose the range that is visible without breaking the image.
- Fine-tune inside that range in steps of about 0.1.
If 0.6 shows no effect, check for a missing trigger or mismatched base model. If 1.2 produces severe distortion or color failure, the useful range may be closer to 0.7-0.9. After sweeping the model side, tune CLIP strength for prompt response.
The comparison works only if the prompt and seed remain fixed; otherwise the images change for reasons unrelated to the weight.
Stacking multiple LoRAs: order and primary weights
Using a character LoRA with a style LoRA, or combining several character LoRAs, requires a multi-LoRA stack. ComfyUI handles this by chaining nodes.
How to chain the nodes
Connect the model and clip outputs of the first Load LoRA to the corresponding inputs of the second. Connect the second node to a third in the same way. Only the final Load LoRA outputs go to the sampler and text-encoding path.
Official workflows support chaining multiple Load LoRA nodes. In real combinations, the base model, LoRA training method, strength, and custom nodes may all affect the result. Do not assume order is always irrelevant. Fix the seed, compare both orders, and keep the better chain. Weight allocation is still usually the first variable that determines which LoRA leads.
Weight allocation strategies
| Stack | Weight setup | Expected result |
|---|---|---|
| Two LoRAs | 0.5-0.6 each | Balanced combination with less conflict |
| Three or more LoRAs | Primary 0.8, secondary 0.3-0.5 | Primary LoRA leads; secondary LoRAs support it |
| Character + style | Character 0.8-1.0, style 0.5-0.7 | Character traits take priority without losing the style |
If both LoRAs are set around 0.8-1.0, the character can fade and the styles can collide. With three or more, define a clear primary LoRA around 0.8 and lower the others to roughly 0.3-0.5 so that their traits do not overwrite one another.
Stacking risks
Style conflict occurs when two incompatible style LoRAs pull the image in different directions. Character traits fade when too many LoRAs remain strong. Pushing several LoRAs close to 1.0 can produce broken anatomy, clipped colors, or unstable output.
Test each LoRA by itself before combining them, then assign primary and secondary weights. Do not start by giving every LoRA the same strength.
A character-consistency recipe
Generate four images with one character LoRA and every face still changes. LoRA supplies a set of traits; it does not guarantee identity consistency. Reproducibility depends on the complete generation setup.
The core combination
Start with a LoRA, a fixed seed, and a fixed prompt structure. Keep the sampler, steps, CFG, size, and workflow unchanged, along with the trigger, character traits, scene order, and weights. Under the same environment, that gives you a reproducible baseline. Once the scene, composition, or control nodes change, the character can still drift.
Example prompt structure:
character_name, 1girl, long hair, blue eyes, white dress, school background, ...Change only the scene section between generations. Keep the trigger and character traits stable.
Add structural or reference-image control
Pose, depth, or edge ControlNet workflows can hold composition and body structure. If facial identity is the main problem, evaluate a reference-image, IP-Adapter/FaceID, or face-refinement workflow that supports the same base model. These tools solve a different problem from LoRA, and combining them can reduce drift further.
Keep the LoRA, seed, and prompt baseline fixed before adding one compatible control workflow. There is no universal control strength; start in the middle and compare gradually so the result does not become rigid.
Limits to expect
This combination cannot promise 100% identity. Expressions, lighting, and details still change. LoRA plus fixed generation settings lowers drift, but it does not clone the character exactly.
Drift usually appears when the prompt, sampler, steps, CFG, size, base model, LoRA strength, or control nodes change. Some hardware and operators can also introduce nondeterminism. Structural controls can lock pose or outline, while hair, clothing, expression, and background details still vary.
Character consistency is an iterative tuning problem. Adjust the weights and prompt structure for the specific LoRA and scene instead of expecting a one-time universal configuration.
Matching SD1.5, SDXL, and FLUX LoRAs to base models
A common reason for a LoRA to show no effect is a base-model mismatch. An SD1.5 LoRA needs an SD1.5 checkpoint, an SDXL LoRA needs an SDXL checkpoint, and a FLUX LoRA needs the corresponding FLUX model and workflow. A mismatch can silently do nothing or produce an error.
Compatibility rules
| LoRA type | Matching base | Mismatch symptom |
|---|---|---|
| SD1.5 LoRA | SD1.5 checkpoint | No visible effect, a weak effect, or silent failure |
| SDXL LoRA | SDXL checkpoint | Shape mismatch errors, broken output, or no effect |
| FLUX LoRA | Matching FLUX base model and text encoders | Loading failure, key or dimension mismatch, or abnormal output |
Using an SDXL LoRA with an SD1.5 base may produce an error or simply have no visible effect. A FLUX LoRA must match its FLUX base model, text encoders, and workflow. Current official examples use built-in nodes such as LoraLoaderModelOnly according to the workflow, so do not treat one third-party node name as the only valid entry point.
How to confirm the base model
- Open the model card.
- Find “Base Model” or “Compatible Model.”
- Confirm whether it is SD1.5, SDXL, or a specific FLUX version.
- Load the matching checkpoint or diffusion model in ComfyUI.
Some LoRAs advertise support for multiple bases, but their actual output can differ. Prefer the base recommended by the author.

Notes for FLUX LoRAs
FLUX uses a different model structure and workflow from SD1.5 and SDXL. Its LoRA must match the exact FLUX version and loading path. Current ComfyUI FLUX examples can use LoraLoaderModelOnly and load the diffusion model, text encoders, and VAE separately.
The FLUX ecosystem is still evolving. If loading fails, check the current official ComfyUI tutorial for that model, the LoRA model card, and the base-model version before blaming a node. An old tutorial’s node name is not a reliable compatibility test.
Troubleshooting a missing or weak LoRA effect
If loading the LoRA produces no change or only a weak effect, work through the checks in this order.
| Symptom | Likely cause | Check |
|---|---|---|
| Image is unchanged | LoRA is not in the active path | Verify that both model and clip are connected through Load LoRA |
| Image is unchanged | Strength is 0 | Inspect strength_model and strength_clip |
| Effect is weak | Weight is too low, below about 0.3 | Raise it toward 0.6-1.0 and run a weight sweep |
| Effect is weak | Trigger is missing | Open the model card, find Trigger Words, and add them to the prompt |
| Effect is absent | Base model mismatch | Confirm SD1.5, SDXL, or FLUX and switch to the matching base |
| Effect is absent | Wrong folder | Confirm that the file is inside models/loras/ |
| Effect is absent | Wrong or unsupported model file | Use the author’s supported LoRA file and confirm the model card instead of relying on the extension alone |
| LoRA is missing from the list | Model list was not refreshed | Refresh the list or restart ComfyUI |
| Loading, key, or dimension error | FLUX LoRA and workflow do not match | Check the FLUX version, official example nodes, text encoders, and model card |
| Styles conflict or character traits fade | Poor multi-LoRA weight allocation | Lower the secondary LoRA and define a clear primary one |
First check the model and clip wiring, then the strength values, the trigger, the base-model match, and finally the file location. Most weak-effect cases are resolved by the trigger, weights, or model compatibility.
Next steps and related reading
Once loading, weight tuning, and stacking work, you can move into more specialized workflows.
Related articles
- ComfyUI beginner guide: review installation, model folders, nodes, and the first generation
- ComfyUI workflow reuse guide: import workflows, restore node dependencies, and troubleshoot model paths
- Stable Diffusion model selection guide: compare SD1.5, SDXL, and FLUX routes and usage constraints
- Stable Diffusion prompt template guide: organize prompt structure, weight syntax, and iteration
- ControlNet for pose, line art, and depth control (link to be added after publication)
Advanced directions
Multi-LoRA weight scheduling can use third-party nodes such as rgthree Power LoRA Loader to make larger stacks easier to manage and to support workflow-specific masking or regional behavior.
LoRA masks apply an effect to a selected region instead of styling the entire image or overwriting character traits everywhere.
Training a custom LoRA with Kohya_ss or another tool requires its own workflow for datasets, training parameters, validation, and export.
LoRA is a common Stable Diffusion adaptation method, but weight tuning and stacking still require controlled tests. Every LoRA has its own useful range. Test each one alone, combine only after you have a baseline, and use the troubleshooting table when the result disappears or breaks.
Load and tune a LoRA in ComfyUI
Start with file placement, node wiring, and trigger words, then establish the two strengths, a multi-LoRA stack, and character-consistency controls.
⏱️ Estimated time: 30 min
- 1
Step 1: Match the LoRA to its base model
Check the model card for SD1.5, SDXL, or the exact FLUX version, and record any required trigger words. - 2
Step 2: Place the file in the LoRA folder
Put the author's LoRA file in ComfyUI/models/loras/, refresh the model list, and confirm that it appears under lora_name. - 3
Step 3: Connect MODEL and CLIP
Feed the base model's MODEL and CLIP into Load LoRA, then route both outputs into the sampling and text-encoding paths. - 4
Step 4: Sweep weights under fixed conditions
Hold the prompt, seed, sampler, steps, CFG, and size fixed; compare 0.6, 0.8, 1.0, and 1.2 before narrowing the range. - 5
Step 5: Combine multiple LoRAs
Chain Load LoRA nodes, verify each LoRA alone, then assign primary and secondary weights and compare different orders. - 6
Step 6: Record the result and troubleshoot
Save the base model, LoRA, trigger words, weights, and generation settings. If the effect is missing, check wiring, weights, trigger words, base-model compatibility, and file location in that order.
FAQ
Why does the image barely change after I load a LoRA in ComfyUI?
Where should I put LoRA files in ComfyUI?
What is the difference between strength_model and strength_clip?
How do I stack multiple LoRAs in ComfyUI?
How can I reduce character drift across images?
Can I mix SD1.5, SDXL, and FLUX LoRAs?
What LoRA weight should I use?
14 min read · Published on: Jul 20, 2026 · Modified on: Jul 20, 2026

ComfyUI & Stable Diffusion: Setup, Models, and Workflows
If you landed here from search, the fastest way to build context is to jump to the previous or next post in this same series.
Previous
ComfyUI ControlNet: Control Poses and Composition with OpenPose, Canny, and Depth
Set up ControlNet in ComfyUI, match preprocessors to models, tune strength and sampling ranges, combine controls, and troubleshoot weak or missing effects.
Part 5 of 16
Next
ComfyUI IPAdapter: Reference Image Style, Composition, and Model Pairing
Pair IPAdapter with the right CLIP Vision model, tune weight and weight_type, control style and composition, and troubleshoot SD1.5, SDXL, and FLUX workflows.
Part 7 of 16


Comments
Sign in with GitHub to leave a comment